Click the Month: May 2014

Florence Lucca 8

A Tuscan holiday is just what I needed, and frankly I can’t think of a time when I wouldn’t welcome one.  This holiday came with exceptional timing and I soaked in every minute.  It was the perfect balance of touristy activity in Florence and immersion into a hobby I hold close to my heart, in the beautiful Val D’Orcia region.  I realised I have so many photos from this trip that it makes best sense to share them in batches.  These photos were taken during the first leg of my trip, a few days spent in Florence and surrounding areas.

Florence Lucca 2

I can’t wait to share more with you, particularly those from the Plated Stories workshop on food writing, styling and photography that I attended with 5 other fabulously inspiring women.  The workshop  was taught by Jamie Schler and Ilva Beretta of Plated Stories, both very patient and highly knowledgeable teachers, and I urge you to go over and read their post for their impressions of the lovely experience.

For now, I leave you with these images while I once again battle the beast that is jetlag.

Florence Lucca 1


Florence Lucca 6Florence Lucca 5

Florence Lucca 7

Florence Lucca 3

Florence Lucca 4

Roasted Brussel Sprouts with Garam Masala and Coconut

Brussel Sprouts Masala 5

An airport meal is a ritual of mine every time I embark on an international trip.  I look forward to that time, after all charms and pleas are unleashed on the person behind the check-in desk to let those extra three kilos through without charge.  After that, toiletries in plastic snap-lock bags are placed in trays, boots and belts are removed, then awkwardly pulled on again, carry-ons are hauled onto security belts and the whole juggling act is carried out whilst waving the passport and boarding card at officials every step of the way.  Finally, when documents are put away carefully and bags are reassembled, there is a simple pleasure in sitting down, catching one’s breath and either hashing out a plan for the trip to come or reflecting on the adventure that was.

I am aware that when it comes to culinary let-downs, airport food is a close second to that on the flying machines themselves.  Food in that in-between land is always overpriced, limited in variety and invariably disappointing.  Bread that is slightly stale after spending the day in an overly air-conditioned environment.  Muffins that are similarly cold and dry.  Slices of ham that are dehydrated around the edges.  Scrambled eggs that can be lifted en masse from the plate.  Sandwiches whose cost might feed a small African nation for a day.

Brussel Sprouts Masala 1

I know all this, yet I always try and make time, between that madness of the security gates and the departure gates, to sit, reflect and have a meal at the airport.  On the way to Florence, I sat at Sydney airport and nutted out that feeling I always have when I am starting on a trip.  That niggle, like a tiny stone in a shoe, that I have forgotten something.  So I sat, stared at the ascending planes, gathered my thoughts, and dissected the niggle.  I sipped my medicinal coffee and chewed on my grilled (plastic) cheese sandwich, remembered what I had forgotten and realised with relief that it was something I could live without.  Just like that, I tipped the stone out of my shoe.

Brussel Sprouts Masala 2

It’s been a few days of pizza and pasta now, and this at about the point when I begin to crave something of home.  To me, Italian food comes only second to Indian food.  I love its simplicity- a toothsome pizza base, a well simmered sauce and a handful of basil, and it is at its best.  But after a few days, I do crave a vegetable or two, preferably home-cooked in Indian spices.  Green beans, stir-fried the South-Indian way or in this simple curry would do just fine.  Or this ivy gourd and coconut stir fry.  Or these brussel sprouts, rubbed with garam masala and coconut oil, then roasted until they are slightly sweet.  Tender but still offering some resistance against eager teeth.  Interspersed with chewier coconut.  These sprouts would do very well against my current carb overload, but would also make an amazing side dish, or a main meal with a couple of poached eggs on top.

Brussel Sprouts Masala 4

Roasted Garam Masala Brussel Sprouts

Feeds 2 as a main dish or 4 as a side dish

Based on Ina Garten’s recipe in The Barefoot Contessa Cookbook.

Get:

600g brussel sprouts
1/2 cup shaved coconut (use shredded if you can’t find this)
4 tbsp coconut oil, melted
3 tsp garam masala
1/4-1/2 tsp chilli powder
1 tsp cumin seeds
3/4 tsp salt
1/2 lime

Make:

Preheat the oven to 200 degrees.

Cut the stems off the brussel sprouts and cut them in half lengthwise.

In a large roasting pan, toss all the ingredients using your (clean) hands, rubbing the spices into the cut surfaces of the sprouts.

Roast for 35-45 minutes, tossing in the pan every 10 mins, until the sprouts are crisp-edged, tender inside, but still holding together and a little chewy.

Squeeze lime juice generously over it before serving.

Brussel Sprouts Masala 3

Chocolate, Cranberry and Pistachio Granola

Choc Cranberry Pistachio Granola 3

It began with the subtlest of signs.  A hole in a paper bag from which plain flour poured when I was shifting things around to look for something.  A perfect circle the size of a ten cent piece that I convinced myself was a tear.  I cleaned up the mess, found what I needed and thought nothing more of it.

Then on another day, another hole……..this time in the wholemeal flour bag.  And another pile of flour underneath to clean up.  On the other side of the pantry, there were tiny holes nibbled into the bag of pepitas.

Nibbled!

By tiny teeth!

Choc Cranberry Pistachio Granola 1

It was then that we noticed the scattering of tiny black pellets.  After all, when you’ve been busy scooting around on tiny feet and munching your way through a pantry full of food, nature will inevitably call and a trail will be left behind.

Feeling somewhat invaded and unclean, we set out the humane traps.  They were not lured by the bread that we offered on the first two nights, not the sweet piece of dried coconut that we tried next.  Predictably, it was the cheese that did it.  Not the holey Swiss cheese that attracts cartoon mice, but a small piece of Grana Padano…….the expensive kind.

Choc Cranberry Pistachio Granola 6

Once both the tiny furry terrorists were caught and released in the park down the road, Mum and I set about on our cleaning mission.  It was a much needed push to spring clean the pantry.  Old ingredients and those that were blessed by rodents were thrown out, shelves were wiped down, and glass jars were filled, labelled, and arranged in height order.

Ingredients that I had purchased and forgotten about were rediscovered.  An afternoon of experimentation led to a rich, chocolatey granola, low enough in sugar to make it ok to eat chocolate in the morning.  I used some unsweetened cocoa mass that was uncovered in the mouse hunt, and added rice syrup for a slight sweetness.  You could do the same, or just use 70 or 80 % dark chocolate.

Choc Cranberry Pistachio Granola 2

Chocolate, Cranberry and Pistachio Granola

Get:

1 1/2 cups shredded coconut
1/2 cup sunflower seeds
80g dark chocolate (I used unsweetened cocoa mass + 2 tsp rice syrup)
2 tbsp cashew or macadamia nut butter
1 tbsp protein powder or milk powder (optional)
1 tbsp chia seeds
1 tsp cinnamon
1/8 tsp salt
2 tsp coconut oil
1/2 cup shelled pistachios, roughly chopped
1/4 cup dried cranberries, roughly chopped

Make:

Preheat the oven to 160 C.  Spread the coconut and sunflower seeds out on an oven tray and toast in the oven for 7-8 minutes, or until the coconut has turned a light brown.  Spread the pistachios on a seperate tray and roast until they have gained a little colour- they may take a bit longer than the coconut and sunflower seeds.  If making the nut butter from scratch, this is the time to roast those on a separate tray.

Melt the chocolate in a double boiler or in the microwave in 20-30 second bursts (use a large bowl either way).  If using cocoa mass, stir in the rice syrup well.  While the chocolate is warm, add the coconut oil and nut butter, cinnamon and salt, and stir well.

Add the other ingredients and toss until they are all well coated in chocolate.  Place the bowl in the fridge for 20-30 minutes.

Remove from the fridge and crumble with your fingers.  Store at room temperature for up to 3-4 weeks or in the fridge for longer. Eat with milk, nut milk, yoghurt or on it’s own!

Choc Cranberry Pistachio Granola 4

Spiced Apple and Ginger Relish

A good relish recipe is something we should all have in our condiment repertoire.  The store-bought ones tend to be loaded with sugar and preservatives, and there is something so satisfying, so hard-core about making condiments at home.

Apple relish 4

This one takes a little grating and a blending of spices.  Then it’s just stewing, covered, while the fruit’s juices fuse with the slightly feisty ginger and the spices weave themselves in amongst it all.  It is best if you ignore it for a day or so, then enjoy it when the spices are allowed to develop their flavours and settle into the sweet, tart mixture.  Spread it on toast over some good butter, or on crackers with a sharp cheddar or creamy soft white cheese.  Dollop it onto a piece of meat or fish, or generously into a burger.  Nibble on slices of toasted haloumi with this relish smeared over it for a protein-filled snack.

I used the new Greenstar apples, which, interestingly are so packed with Vitamin C that they do not brown for hours after they are cut.  Other green apples such as Granny Smiths would also work, but I would lessen the amount of apple cider vinegar you use as they tend to be more tart.

Apple relish 1

Spiced Apple & Ginger Relish

Get:

1 tsp coconut oil
1/4 tsp cumin seeds
3 green apples, grated
5cm ginger finely grated
1/4 tsp turmeric
1/4-1/2 tsp chilli powder
1/4 tsp powdered cinnamon
2 tbsp apple cider vinegar
1/2 tsp rice syrup or honey
1/2 tsp salt
Water

For the Spice Mix:
1/4 tsp cumin seeds
1/4 tsp coriander seeds
4-6 fenugreek seeds
The seeds from 2 cardamom pods

Make:

In a non-stick pan, roast the spice mix on low heat until they are fragrant.  Grind to a powder.

In a large non-stick saucepan, heat the oil, then reduce to a low heat.  Add the whole cumin seeds and once they have popped, add the spice mix, turmeric, chilli powder and cinnamon.  Fry, stirring, for a couple of minutes.  Add the ginger and fry for a minute or so.

Add the grated apple and increase to a medium heat.  Stir to coat the apple in the spices and cook for 2-3 minutes.  Add syrup, vinegar and salt and stir through well.  Pour in 1/3-1/2 cup water, stir and cover.  Cook for 5-7 minutes until the mixture is reduced.  Repeat this twice more (adding water and cooking covered), until the apple is very tender.

Store in an airtight, preferably sterilised jar in the fridge for 2-4 weeks.

Apple relish 2

Click the Month: April 2014

How did we get to be a third of the way through the year?  Who else feels like we celebrated New Years Eve like, yesterday?

Malleshwaram 8

It is indeed, the end of April and for us in the land of Oz, the onset of the cooler months. The blue skies still make an appearance but along with them there is a nip in the air.  One that we never quite take seriously at the beginning of the season, until we notice ourselves reaching for a cardigan, then a coat on our way out.  Or switching on the electric blanket.  Or dragging the heater out from under the bed where it was happily snoozing through summer and spring.

Malleshwaram 1

These images were taken in March, during my India-UK adventure.  But they were too pretty not to share, these snaps of the local market, and food being sold from roadside carts in Bangalore.  So I hope that April has done you some good, friends.  And we, wrapped in our blankets with our fluffy socks on, welcome in May.

Malleshwaram 2

Malleshwaram 3

Malleshwaram 4

Malleshwaram 6

Malleshwaram 7

Malleshwaram 5


Stepping-Stone Nutty Chocolate Eggs (low-fructose)

Beyond the overstuffed floral sofas, past the assortment of porcelain milkmaids and ceramic puppy dogs, there was a scuffed old desk pushed up against the wall.  The tiny old lady gingerly pulled out the chair and perched herself on it, gesturing for my uncle and I to take a seat nearby.  She was my uncle’s dearest patient, and he had brought me along on a house visit to meet her.

stepping stone eggs 1

Carefully, she pulled open a draw and held out a plastic tube, paper thin skin stretching over arthritic knuckles as her hands curled around it.  Peering into the container, my eight-year old eyes widened in delight.  Eggs of all sizes were nestled in together.  They twinkled in their colourful foil wrappers, unlike anything I had seen before.

‘Pick one’ urged my uncle.  I snapped out of my bewilderment to choose a bright blue one, about the size of a chicken egg, and unwrapped it slowly.  A cobblestone chocolate surface was revealed as the soft foil fell away under my eager fingers.  The hollow centre was a real surprise, and there was something about that thin chocolate shell, perhaps the way it just seemed to give way on my tongue, that did it for me.  I’ve been weak at the knees for Easter eggs ever since.

stepping stone eggs 2

Those first few months after we migrated to Australia are mostly a blur, but there are certain memories, like this one that linger vividly within the childhood section of my mental filing cabinet.

The lovely old lady is long gone.  But that little girl’s first taste of a chocolate Easter egg, sitting in the living room of her uncle’s favourite patient, is never to be forgotten.

stepping stone eggs 3

These eggs were a happy accident in my quest to create a low-sugar creme egg.  While they are not quite what I envisioned, they are a stepping-stone towards a creme egg, and turned out too good not to share with you. The centres of these are creamy, albeit a bit too firm to call them a creme egg.  They have a natural sweetness provided by the nuts and boosted by the tiny amount of sweetner, which is nicely balanced by the bitter dark chocolate shell.  As for the original goal…..well, there’s always next Easter.

For other low-sugar chocolaty treats, try these or these.  Or even these.

Happy Easter to you all!

stepping stone eggs 4

Stepping-Stone Nutty Chocolate Eggs

Get:

Makes 12-15 small eggs

1/4 cup cashew or macadamia nut butter
100 grams (2 sachets) coconut paste
1-2 tsp rice syrup or honey
100g good quality dark chocolate

Make:

Dip the unopened packets of coconut paste in boiling water for a couple of minutes to soften.

Place the nut butter, coconut paste and syrup or honey in the food processor and blitz to a smooth paste.  Transfer to a bowl and freeze for 20 mins or so until quite firm.  Alternatively, you could pour the mixture into silicone chocolate moulds and place that in the freezer.

If hand-shaping the eggs, remove the mixture from the freezer and using the spoon, scoop out small amounts (about a tsp) of it.  Usig clean hands, knead and roll into balls, then flatten slightly to make eggs.  Place on grease-proof paper on a tray and freeze until very firm.

In the meantime, melt the chocolate in a double boiler or in 20-30 second bursts in the microwave.  Roll the frozen eggs (or whatever shape you choose) in the melted chocolate.  Use a couple of spoons to cover the eggs in the chocolate and place back on the grease-proof paper lined tray.  Refrigerate until the chocolate is set.

Eat!

Notes:

If you would like to make your own nut butter, find the method here.  You will need about 1/2 cup of nuts to make 1/4 cup of butter.

I found coconut paste in the Asian food section of large supermarkets.  I found it in a box of 5 sachets of 50 grams each.  I believe it is also available in some Asian grocery stores (thanks for the tip JJ!).

stepping stone eggs 5


Or La La Banana Bread (Paleo) from Clean Living Cookbook

We have talked before about my cookbook fascination.  You very sweetly didn’t judge me when I revealed that I own many more cookbooks than I actually use.  I recently had a glimpse of what lay in my future when I visited the home of a friend of a friend whose cookbook collection put mine to shame.  “Let me show you something” She said as she slid open her wardrobe doors to reveal a wall of cookbooks.  An entire wall.  Vintage tomes, the pages yellowed and slightly fragile sat alongside crisp, contemporary recipe collections adorned with breathtaking photography.  It was not quite heaven but pretty darn close.

Banana Bread Clean Living 1

One of the latest additions to my collection (and one step closer to the coveted cookbook wall), is the Clean Living Cookbook (Hachette, Australia), by My Kitchen Rules alumni Luke Hines and Scott Gooding.  I cooked from it no less than six times in the last two weeks, and I think it’s a safe assumption that this is one member of my cookery book army that will soon be thoroughly covered with ingredient stains, a sure sign of affection.  It is packed with uncomplicated recipes for wholesome, moreish dishes that your body as well as your taste buds will thank you for.

Banana Bread Clean Living 3

Deciding which recipe to share with you wasn’t easy, but in the end, this one was an obvious choice.  You see, I used to make banana bread with such frequency that I have been accused of buying bananas and deliberately ignoring them until they are ready for the banana retirement village that is banana bread.

When I decided to cut down on sugar, I reluctantly gave up my habit due to the sugar content of most banana bread recipes.  Scott and Luke’s recipe on the other hand, is Paleo friendly, which makes it free of refined sugars as well as gluten.  This is not the cakey, oversweet slice you get in cafes.  No, this Or La La Banana Bread is a much more healthful loaf, dense with the chew that coconut offers and the rich, tight crumb that almond meal brings.  I tweaked it very slightly, adding a little more oil for a more moist outcome.  If you don’t have coconut oil, extra virgin olive oil would also work.

Banana Bread Clean Living 5

It is best straight out of the oven, still hot slices tossed gingerly between fingertips, or toasted and slathered with your favourite spread.  Soon after I made it for the first time, I happened to discover some ripe mango flesh in the freezer, a welcome remnant of the summer just gone.  So then there was a mango version, which was equally lovely and disappeared just as fast.

Banana Bread Clean Living 4

Or La La Banana Bread

Very minutely modified from Clean Living Cookbook

Makes 1 loaf

Get:

2 cups almond meal
3 eggs
2 tbsp nut butter (I used peanut)
3 tbsp coconut oil
1 tsp cinnamon
1/2 cup shredded coconut
2 large ripe to overripe bananas (or 1 cup ripe mango flesh for mango bread), mashed
1 tbsp chia seeds
1/2 cup nuts, roughly chopped (walnuts, cashews or pistachios work well)
A small handful of shredded coconut, pepitas or sunflower seeds to sprinkle on top (optional)

Make:

Preheat the oven to 180 degrees Celsius.  Grease and line a loaf tin (the boys recommend 10 x 20 cm) with baking paper.

In a large mixing bowl, mix together the almond meal, eggs, nut butter and oil into a thick batter.  Add the coconut, banana (or mango), cinnamon, chia seeds and nuts, and combine well.

Pour the batter into the tin and level out the top using a knife or spatula.  Sprinkle coconut or seeds (if desired) over the top.  Bake on the middle shelf of the oven for 25-30 mins, or until a knife passed into the centre comes out fairly clean.  Allow to cool completely before turning out (if you can wait that long!).

Banana Bread Clean Living 2

Eight Little Women

It was a time when rounded verandahs were all the fashion, and the two girls who were old enough to know this convinced their father that a rounded verandah was the thing to have.  The little ones looked on in awe as the teak doors were painstakingly carved by hand.  Eventually, curiosity would get the better of them and they would play with the sharp wood fragments, only to be shooed away by the old carpenter.  The same teak doors still separate the rooms of the fifty-something year old house, their carved patterns intact, their hue slightly darkened with age.

rangoli

My mother is the fifth of the eight, all girls. The older ones cared for and scolded their younger sisters, in equal measure.  Over the years, the solid brick walls absorbed the gleeful chatter, melodious singing and silly squabbles of eight little women.  Clothes were bought or home sewn, handed down, fought over and innovatively re-sewn.  Nothing was wasted or carelessly tossed away. Pleasures were simple and always shared.  A pretty piece of fabric, a small bag of sweets, a new song.

Thondekaye Palya 2

Education was deemed important beyond almost anything else. Nooks were claimed for study and the safe-keeping of books.  The table, a staircase landing, the stone used to wash clothes upon and the tiny attic above the third bedroom all became valuable study areas where books were devoured and exams were fretted over.  As the older girls graduated, their spaces were relinquished to be occupied by younger sisters.  Etched into the door of a small cupboard with a knife sharpened with procrastination, is the name of one of the sisters, the surrounding wood worn smooth by the years.

My grandparents saw no reason for eight daughters to be any less academically accomplished than if they had been eight sons.  Their thinking was progressive for their time and as a result, the house churned out an assortment of doctors, scientists, accountants and teachers.  Brass plaques that were nailed into the front door bearing names and once shiny new qualifications still adorn the dark wood.  Among the plaques sits the two oldest of them, one bearing my grandfathers name and the other bearing the name of the house.

Jyothi

A brilliant light.

Thondekaye Palya 1

Stairs along the side of the house led up to the open terrace, a common feature of houses of that time.  This wide open space was for daytime yoga sessions, afternoon naps on summer days and a makeshift salon where wet hair was dried before it was braided.  My grandmother would venture up there to dry chillies and tamarind on large blankets weighed down by rocks.  Diwali saw that terrace bathed in a glorious display of light when all the girls would race up there to set off firecrackers.  Later, the wrappers would be proudly carried down and piled in front of the house, lest the neighbourhood kids think that eight little girls couldn’t set off their share of explosions.

Marriages were arranged or beaus were found, kept secret, breathlessly whispered about and finally disclosed.  Weddings were organised, the youngest still giggly schoolgirls excitedly watching their akkas (older sisters) move away with the men they chose.

Later, there were grandchildren.  Small, sprightly offspring who would climb the bars surrounding that rounded verandah.  Quieter little ones who would curl into those same nooks with story books.  Aunty Jyothi, the very daughter for whom the house was named, lives in that house now with her family and so two more daughters have been raised between the solid walls, fed from the same kitchen and have crammed for exams in the same rooms.

Thondekaye Palya 3

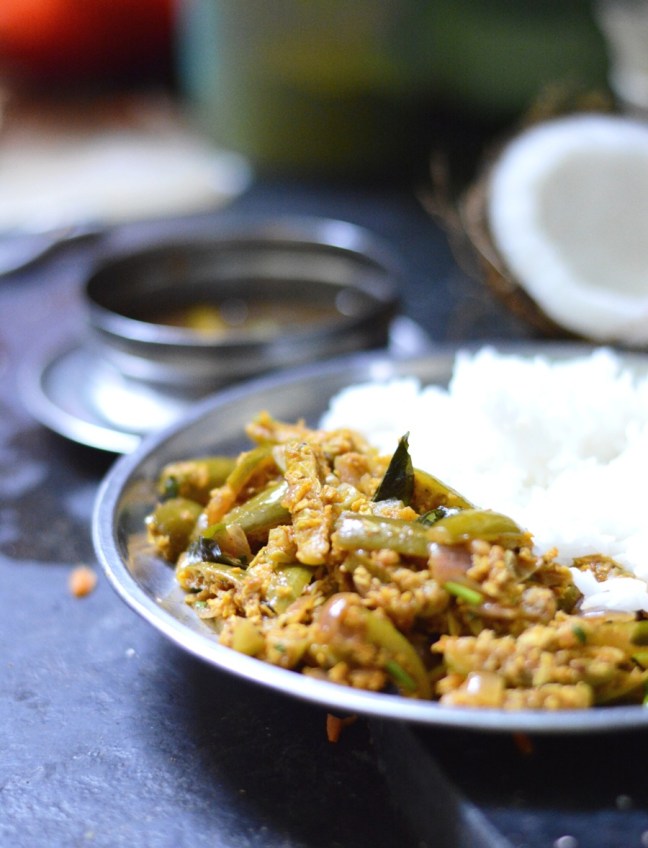
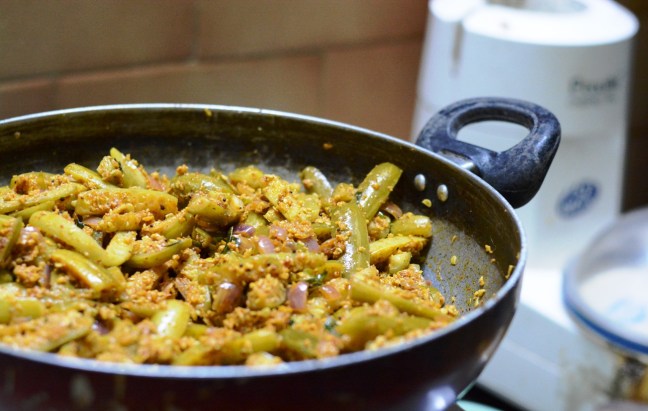
During my recent visit, my cousin Chaitra and I spent a morning cooking in the kitchen of the house our mothers grew up in.  It was apt, and terribly exciting that she taught me to how to cook one of my favourite vegetables.  Thondekaye (Ivy Gourd), resembling tiny cucumbers, is available only in frozen form in Australia, although those in the UK can find it fresh in Indian stores.  My love of it is widely known amongst my mum’s side of the family, meaning that many of my aunts will indulge me by cooking me a thondekaye dish whenever I visit India.  So when Chaitra, who has flourished into quite the cook, offered to teach me how to make this Manglorean Thondekaye Sukha (dry stir-fry), I was in.

It is important to cut the whole thondekaye lengthwise, into quarters or sixths.  What happens is that each piece curls lovingly around the spiced coconut matrix, the flavours settling nicely between the internal ribbing.  The sharpness of chilli, hint of jaggery sweetness and sour notes of the tamarind are offset by the freshness of the coconut, and the tiny thondekaye wedges are the perfect vehicle for this intricate mixture.

Thondekaye Palya 4

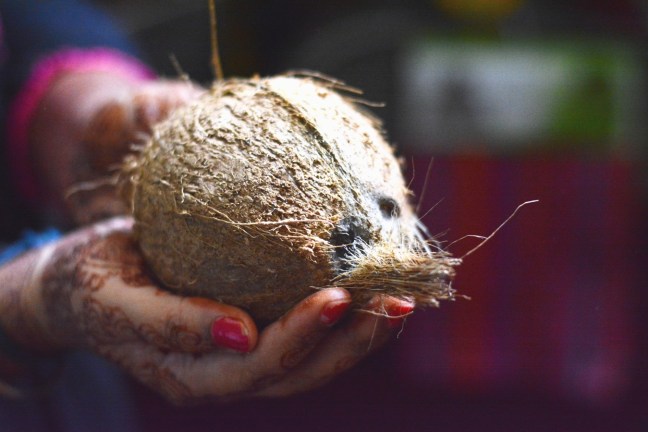
That morning, my cousin and I cooked, giggled, chatted and cooked some more.  I chopped as Chaitra grated fresh coconut.  She roasted spices to fragrant perfection while I soaked tamarind.  Each step was patiently explained to me while I madly scribbled it all down.

So it was that we added new memories to the fifty-something year old kitchen.  And the gleeful chatter of two more women mingled and were absorbed into the walls of the house with the rounded verandah.

Thondekaye Palya 5

Thondekaye Sukha (Ivy Gourd and Coconut Stir-fry)

Get:
600 grams of fresh or frozen thondekaye (ivy gourd)
Ball of dried tamarind the size of a small lime
Boiling water
1 medium onion, diced
1 cup grated coconut, fresh or frozen (defrosted)
2 tsp grated or powdered jaggery
Salt
Small handful fresh coriander, chopped (optional)

For the Spice Mix
1/4 tsp coconut oil
2 tbsp coriander seeds
1/2 tbsp cumin seeds
1/4 tsp fenugreek seeds
4-5 black peppercorns
4 dried red chillies, broken into pieces
Generous pinch asofoetida
1/2 tsp urad dhal
10-12 dried curry leaves

For Tempering:
2 tbsp coconut oil
1/2 tsp mustard seeds
1/2 tsp urad dhal
1/4 tsp turmeric powder
6-8 fresh or dried curry leaves
2 small garlic cloves, slightly crushed

Make:
Break up the tamarind and soak in 1/2 cup of boiling water in a medium sized bowl. Mash with a fork and leave to soak until the water is cool enough to touch.  Then, with clean hands, squish the tamarind in the water until the water thickens.  Strain the water into another bowl.  The tamarind flesh can be discarded or stored in the fridge and used again within a few days.

Slice the thondekaye lengthwise into quarters or sixths, depending on how thick they are.  Frozen thondekaye usually comes pre sliced.  Immerse in salted boiling water and bring to the boil again.  Simmer on low-medium heat until the insides are tender but the skin still has a bite.  This will take 5-7 mins for frozen thondekaye, and longer for fresh.

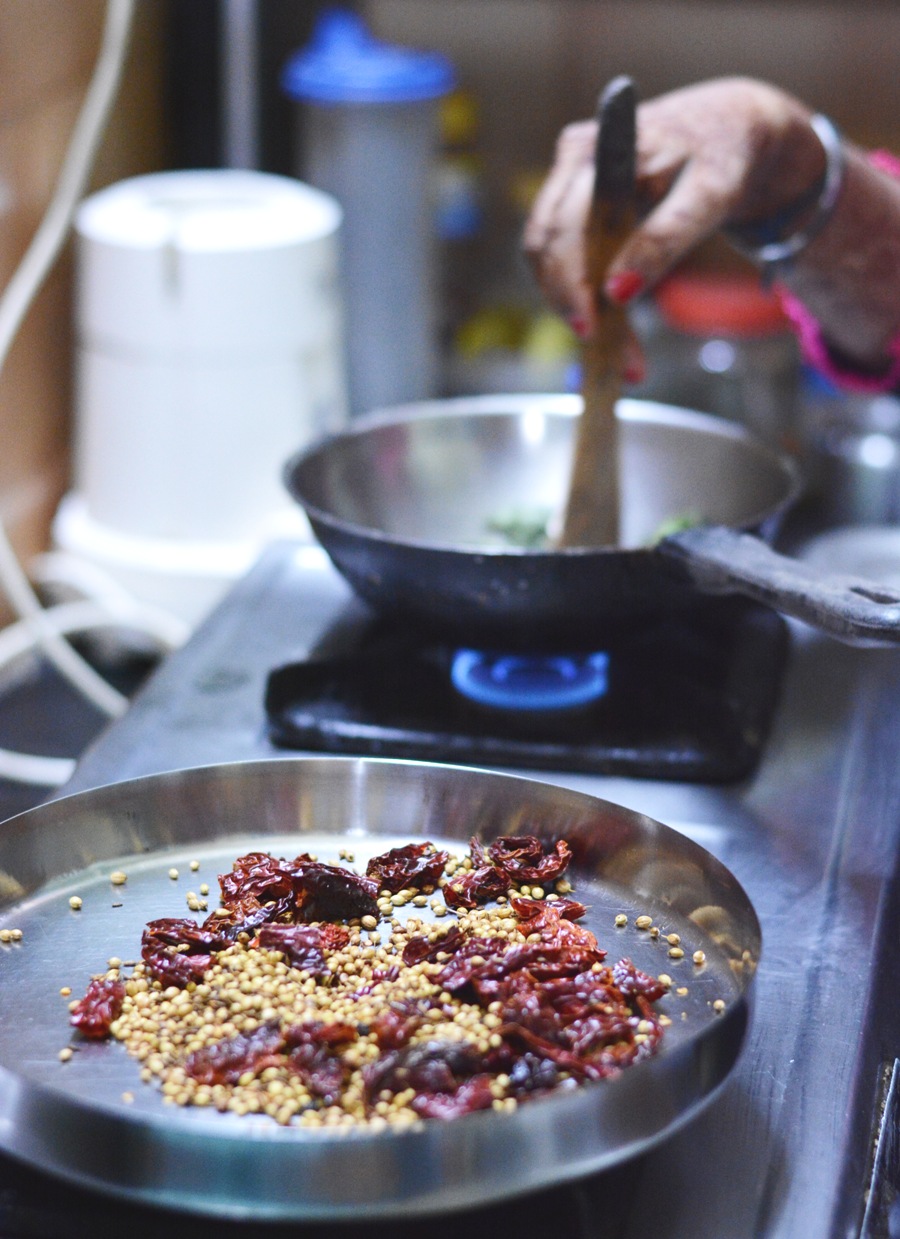
In a large non-stick pan, warm 1/4 tsp coconut oil.  Add all the spice mix ingredients except the curry leaves.  Roast on low heat until fragrant and until the red chillies become brittle between the fingers.  Transfer the mixture to your mortar and pestle or spice grinder.  In the same pan, roast the dried curry leaves for a minute or so and add to the other spices.  Grind to a fine or slightly coarse powder.

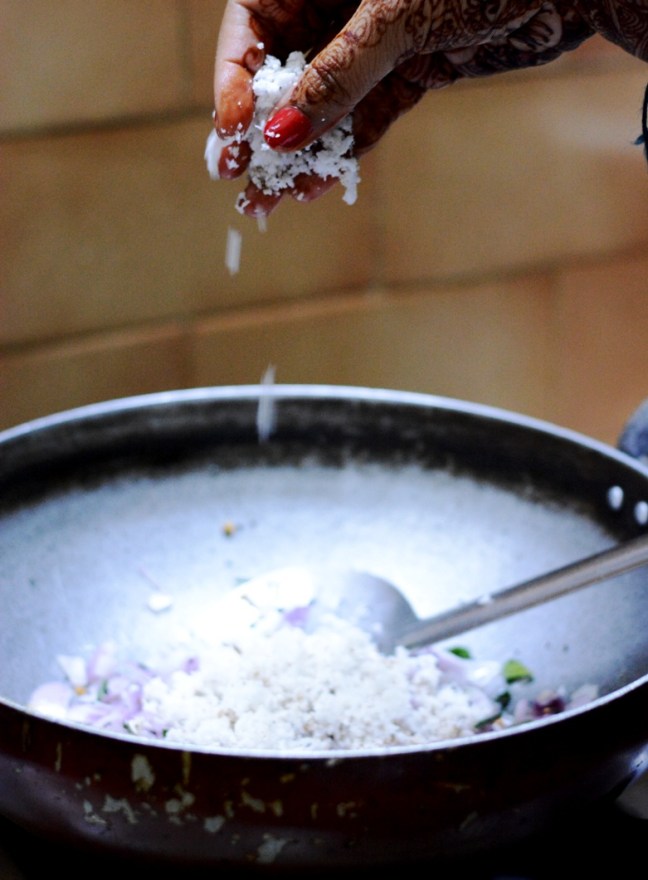
In the same large pan, heat 2 tbsp coconut oil.  Lower the heat to medium and add the mustard seeds.  Take care not to burn them! When they have popped, add urad dhal, turmeric, curry leaves and garlic.  Stir-fry for a minute or so on low-medium heat until the dhal has gained a little colour.  Add the spice mixture and stir-fry for about 2 mins.  Then, add the diced onion and saute until translucent.  Add the coconut and toss to mix.  Pour in the tamarind water and sprinkle in the jaggery and 2 tsp salt.  Mix well and cook for a further minute.  Drain the thondekaye and add to the pan. Stir-fry for another 5 minutes.  Taste and add more salt if neccessary.  If the thondekaye is still a little undercooked, cover and cook, stirring intermittently, for a further 5-10 mins.  The thondekaye should be tender and yielding but not mushy.

Sprinkle with coriander, if desired, and serve with chapatis or mixed into rice with a little more coconut oil.

Notes:

Jaggery is unrefined Indian sugar and can be found at Indian grocery stores along with frozen thondekaye, coconut, the spices, urad dhal and dried tamarind.  Jaggery has a unique flavour but if you can’t get it, soft brown sugar should work.

You can of course use powdered spices instead of whole, but believe me when I say that when you start powdering your own spices, you will never want to go back to pre-powdered ones.


Thondekaye Palya 6

Click the Month: March 2014

It has been a colossal month over here at OSP headquarters.  Last week, this wee blogski here had the good fortune of being Freshly_Pressed in WordPress’ daily showcase of posts.  I will admit that both myself and the blog have been on a bit of a shameless high from this all week.

white horse


Being on vacation for the first half of March ensured that it got off to a good start.  After eating, laughing and dancing at a dear cousin’s wedding, I visited my friends Subo and Chris in England.  The pair have an eight month old daughter who is quite possibly the cutest thing north of the Equator.  I spent a few days in the big smoke of London, to feed my nostalgia more than anything else.  But mostly, we stuck to the countryside, going on road trips between quaint little towns and meandering walks in the lush, spring-kissed woods.

OSP Ahrani3


So today, on what is my precious friend Subo’s first Mothers Day, I shall leave you with some photos I took of her gorgeous family.  I hope your March was fruitful, and I wish all the mums in Europe a Happy Mothers Day.
See ya’ll in April!

OSP Family3

OSP Ahrani6

OSP Ahrani7

OSP Family8

OSP Family5

OSP Ahrani & Subo 2

OSP Family7


Orecchiette with Zucchini

Orchiette1

A holiday on the other side of the world is all well and good, but then there’s the jetlag to contend with.  Currently, sleeping through the night is somewhat of a challenge and staying awake at work is only achieved with multiple cups of coffee and not allowing myself to sit down for too long, anywhere.  These are the times that I am thankful that I do not have a desk job.

Orchiette4

Gradually, my brain is convincing my baffled body that night is day and day is night.  Is it just my imagination that this transition gets more challenging the older I get?

The plus side to being wide awake against my will at some unearthly time is that it gives me a few unaccounted for hours with which to do things.  My hunger pangs led me to trawl through the pantry before the sun was even up and in the midst of cramming everything that was remotely edible into my mouth, I came across some lovely pasta from the good people of Barilla.  One pasta bible, a quick scramble for herbs around the still-dark garden, and half an hour later, there was a tasty, nutritious lunch to look forward to on my first bleary-eyed day back at work.

Orchiette3

You use the zucchini raw but the thin slices get partially cooked by the acidic lemon juice.  Cool, right?  I am quite partial to Orecchiette but you can, of course, use any short pasta that takes your fancy. For more pasta-related shenanigans, try out one of the classes at Casa Barilla in Sydney.Orchiette2

Orecchiette with Zucchini

Serves 3-4

Slightly modified from Pasta by Carla Bardi (page 134)

Get:
2 medium zucchini (courgette)
1 or 2 small red chillies, finely chopped
Small handful fresh mint leaves, roughly chopped
1/2 tsp salt
Freshly cracked pepper, to taste
1 tbsp fresh lemon juice
4 tbsp extra virgin olive oil

250g good quality dried Orecchiette Pasta (I used Barilla)

Grated parmesan or pecorino cheese to serve

Make:

Using a vegetable peeler, shave the zucchini lengthwise into strips.  In a large bowl, toss the zucchini strips with the chillies, mint, salt, pepper, lemon juice and olive oil.  Leave for 20-30 min.

Cook the pasta in salted water according to packet instructions until al dente.  Drain and toss the pasta with the zucchini.  Taste and add more salt or pepper as neccessary.

Serve with a generous amount of parmesan or pecorino grated over the top.

This is NOT a sponsored post, however the pasta was kindly supplied by Barilla.

Orchiette5