Roasted Brussel Sprouts with Garam Masala and Coconut

Brussel Sprouts Masala 5

An airport meal is a ritual of mine every time I embark on an international trip.  I look forward to that time, after all charms and pleas are unleashed on the person behind the check-in desk to let those extra three kilos through without charge.  After that, toiletries in plastic snap-lock bags are placed in trays, boots and belts are removed, then awkwardly pulled on again, carry-ons are hauled onto security belts and the whole juggling act is carried out whilst waving the passport and boarding card at officials every step of the way.  Finally, when documents are put away carefully and bags are reassembled, there is a simple pleasure in sitting down, catching one’s breath and either hashing out a plan for the trip to come or reflecting on the adventure that was.

I am aware that when it comes to culinary let-downs, airport food is a close second to that on the flying machines themselves.  Food in that in-between land is always overpriced, limited in variety and invariably disappointing.  Bread that is slightly stale after spending the day in an overly air-conditioned environment.  Muffins that are similarly cold and dry.  Slices of ham that are dehydrated around the edges.  Scrambled eggs that can be lifted en masse from the plate.  Sandwiches whose cost might feed a small African nation for a day.

Brussel Sprouts Masala 1

I know all this, yet I always try and make time, between that madness of the security gates and the departure gates, to sit, reflect and have a meal at the airport.  On the way to Florence, I sat at Sydney airport and nutted out that feeling I always have when I am starting on a trip.  That niggle, like a tiny stone in a shoe, that I have forgotten something.  So I sat, stared at the ascending planes, gathered my thoughts, and dissected the niggle.  I sipped my medicinal coffee and chewed on my grilled (plastic) cheese sandwich, remembered what I had forgotten and realised with relief that it was something I could live without.  Just like that, I tipped the stone out of my shoe.

Brussel Sprouts Masala 2

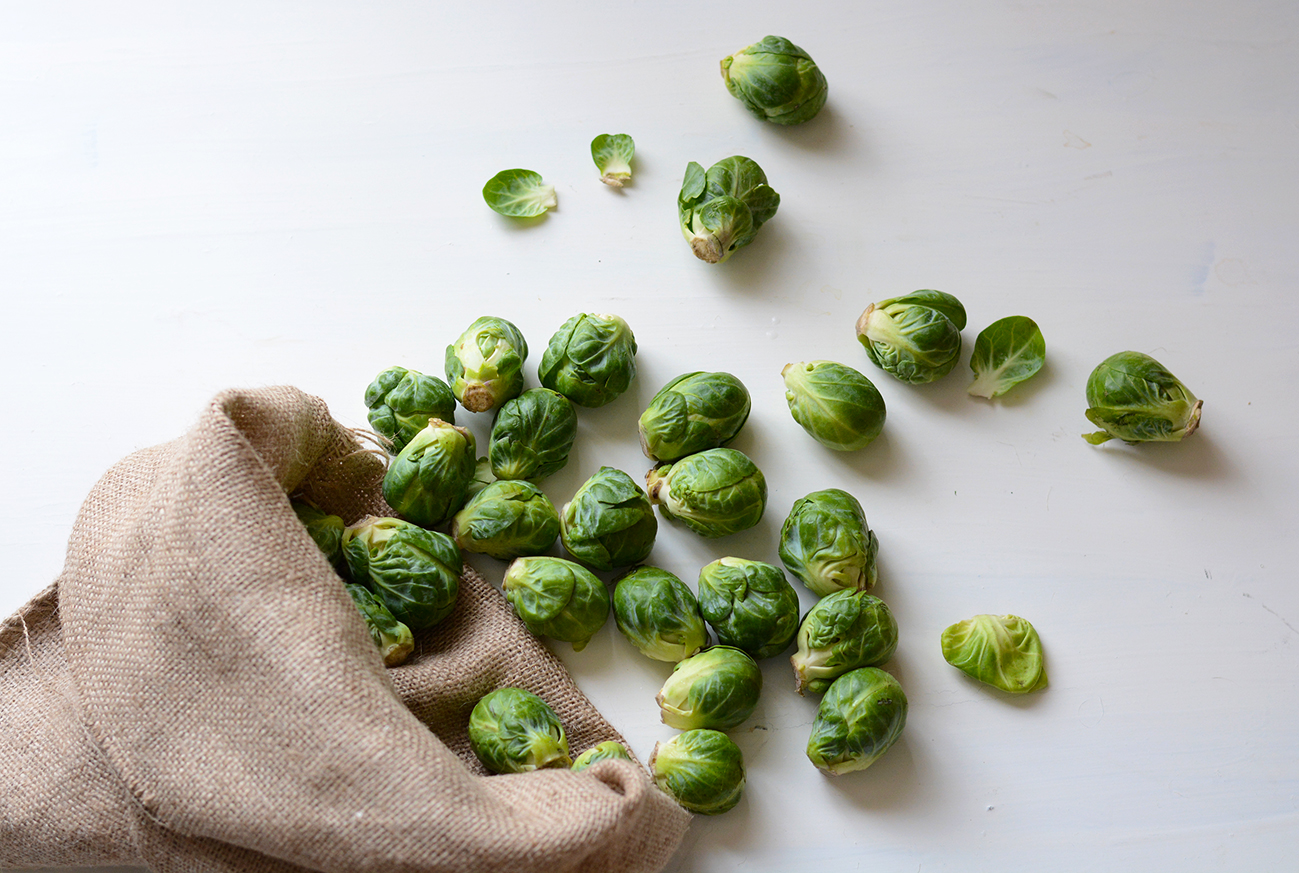
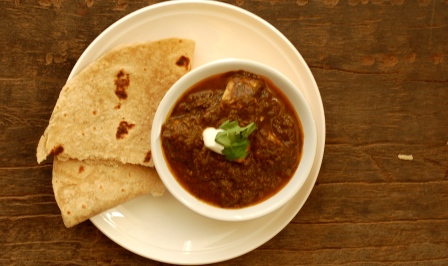
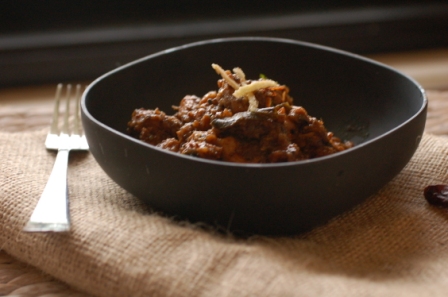
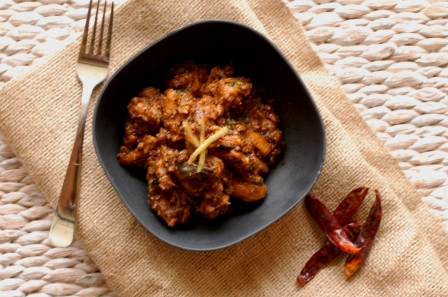
It’s been a few days of pizza and pasta now, and this at about the point when I begin to crave something of home.  To me, Italian food comes only second to Indian food.  I love its simplicity- a toothsome pizza base, a well simmered sauce and a handful of basil, and it is at its best.  But after a few days, I do crave a vegetable or two, preferably home-cooked in Indian spices.  Green beans, stir-fried the South-Indian way or in this simple curry would do just fine.  Or this ivy gourd and coconut stir fry.  Or these brussel sprouts, rubbed with garam masala and coconut oil, then roasted until they are slightly sweet.  Tender but still offering some resistance against eager teeth.  Interspersed with chewier coconut.  These sprouts would do very well against my current carb overload, but would also make an amazing side dish, or a main meal with a couple of poached eggs on top.

Brussel Sprouts Masala 4

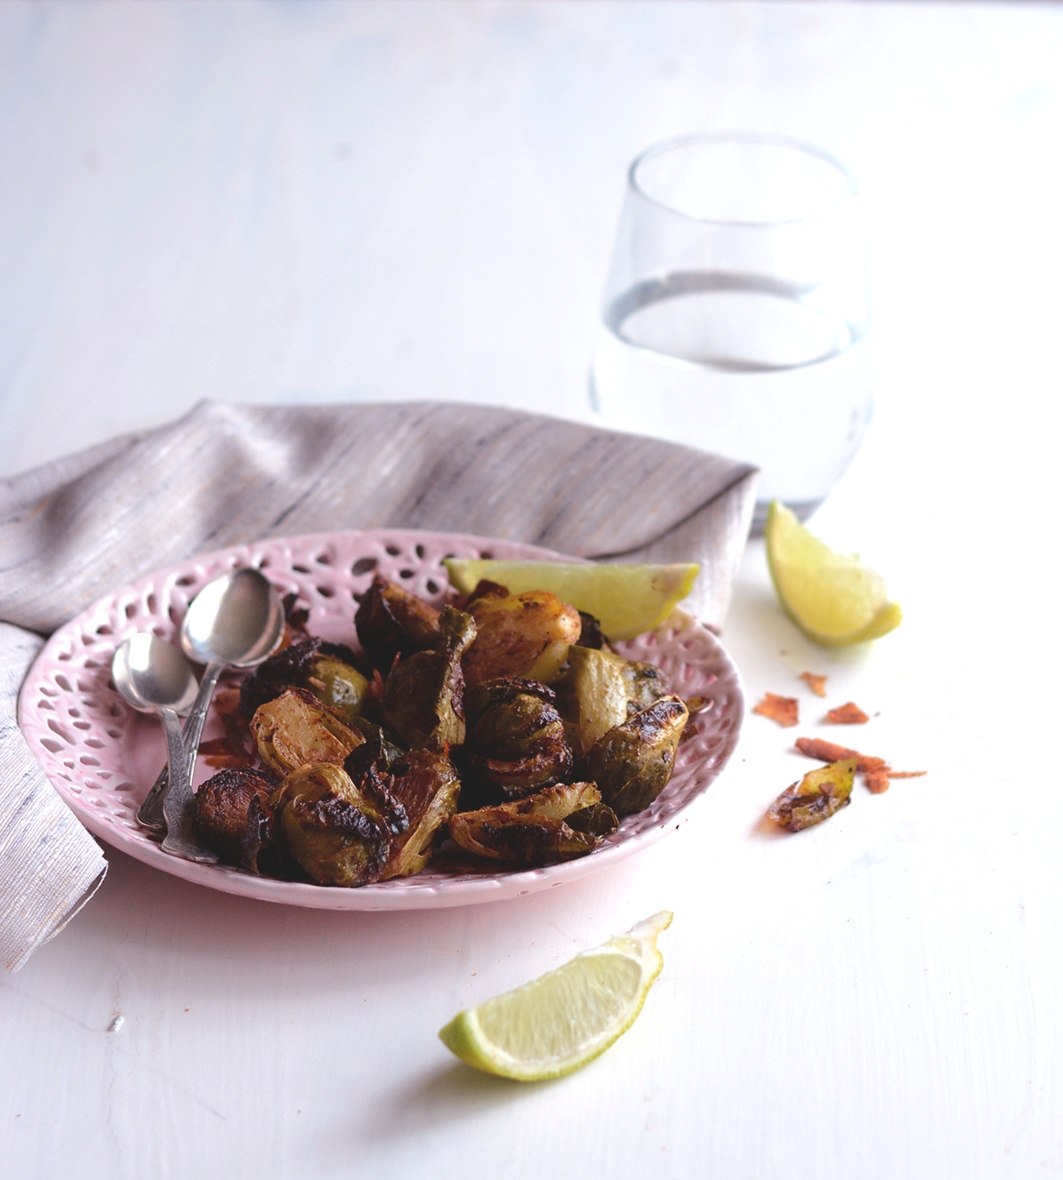
Roasted Garam Masala Brussel Sprouts

Feeds 2 as a main dish or 4 as a side dish

Based on Ina Garten’s recipe in The Barefoot Contessa Cookbook.

Get:

600g brussel sprouts
1/2 cup shaved coconut (use shredded if you can’t find this)
4 tbsp coconut oil, melted
3 tsp garam masala
1/4-1/2 tsp chilli powder
1 tsp cumin seeds
3/4 tsp salt
1/2 lime

Make:

Preheat the oven to 200 degrees.

Cut the stems off the brussel sprouts and cut them in half lengthwise.

In a large roasting pan, toss all the ingredients using your (clean) hands, rubbing the spices into the cut surfaces of the sprouts.

Roast for 35-45 minutes, tossing in the pan every 10 mins, until the sprouts are crisp-edged, tender inside, but still holding together and a little chewy.

Squeeze lime juice generously over it before serving.

Brussel Sprouts Masala 3

Advertisement

Orecchiette with Zucchini

Orchiette1

A holiday on the other side of the world is all well and good, but then there’s the jetlag to contend with.  Currently, sleeping through the night is somewhat of a challenge and staying awake at work is only achieved with multiple cups of coffee and not allowing myself to sit down for too long, anywhere.  These are the times that I am thankful that I do not have a desk job.

Orchiette4

Gradually, my brain is convincing my baffled body that night is day and day is night.  Is it just my imagination that this transition gets more challenging the older I get?

The plus side to being wide awake against my will at some unearthly time is that it gives me a few unaccounted for hours with which to do things.  My hunger pangs led me to trawl through the pantry before the sun was even up and in the midst of cramming everything that was remotely edible into my mouth, I came across some lovely pasta from the good people of Barilla.  One pasta bible, a quick scramble for herbs around the still-dark garden, and half an hour later, there was a tasty, nutritious lunch to look forward to on my first bleary-eyed day back at work.

Orchiette3

You use the zucchini raw but the thin slices get partially cooked by the acidic lemon juice.  Cool, right?  I am quite partial to Orecchiette but you can, of course, use any short pasta that takes your fancy. For more pasta-related shenanigans, try out one of the classes at Casa Barilla in Sydney.Orchiette2

Orecchiette with Zucchini

Serves 3-4

Slightly modified from Pasta by Carla Bardi (page 134)

Get:
2 medium zucchini (courgette)
1 or 2 small red chillies, finely chopped
Small handful fresh mint leaves, roughly chopped
1/2 tsp salt
Freshly cracked pepper, to taste
1 tbsp fresh lemon juice
4 tbsp extra virgin olive oil

250g good quality dried Orecchiette Pasta (I used Barilla)

Grated parmesan or pecorino cheese to serve

Make:

Using a vegetable peeler, shave the zucchini lengthwise into strips.  In a large bowl, toss the zucchini strips with the chillies, mint, salt, pepper, lemon juice and olive oil.  Leave for 20-30 min.

Cook the pasta in salted water according to packet instructions until al dente.  Drain and toss the pasta with the zucchini.  Taste and add more salt or pepper as neccessary.

Serve with a generous amount of parmesan or pecorino grated over the top.

This is NOT a sponsored post, however the pasta was kindly supplied by Barilla.

Orchiette5

Mum’s Green Mango and Coconut Rice (Vegan, Gluten-Free)

My summer holidays were often spent in a way that my parents thought best combined the two elements of being an Indian family in Australia.  It was a time before the teenage years descended on me with all their accompanying awkwardness.  Before that phase where the parentals were mortifyingly embarrassing, no matter what they did.  Anything they did that was too typically Indian would make me want to crawl under the nearest table and any attempts on their part to be more Aussie would be met with a roll of the eyes.  During those teenage years, they really couldn’t win.

Green Mango 1

But this was a time before all that adolescent angst set in, when this marrying of cultures was just part of life. We would drive to caravan parks in seaside towns, often with two or three other families from our community.  We stayed in a string of mobile homes that never went anywhere and splashed around in the pool while our mothers cooked and our fathers ate Bombay bhuja mix with their beers.

Peanuts 2

The smell of barbequing meat would waft past us from the Australian families with whom we were sharing the park.  Our mothers would wrinkle up their vegetarian noses in disgust and set about cooking a good Indian meal using the impressive toolkit of ingredients they had packed into the cars.  Lentils were cooked, rice micro-waved and spices blended, the scents mingling with that of cooking meat, chlorine and sunscreen.

There was often some sort of South Indian bread- fluffy steamed idlis with chutney, or dosas made from batter that had fermented perfectly in the warm car.  Otherwise there would be the semolina based upma or some sort of flavoured rice dish such as a puliogare, lemon rice or this green mango and coconut rice.

Green Mango Rice 1

Luckily all the teenage angst eventually gave way.  Anything else would be a real pity as there is nothing remotely embarrassing about this flavourful, slightly tart rice dish that is a favourite in this Indian family.

Mangoes are in season now and although the ripe fruit are undeniably delicious, there is much you can do with the raw green version readily available in markets and ethnic grocers.  For this dish, try to choose greener, less ripe mangoes as the more tart they are, the better.  The crunch of the peanuts and roasted dhal adds something special.  If you are allergic to peanuts but tolerant of others, try using cashews.

Green Mango Rice 2

Mum’s Green Mango and Coconut Rice

Feeds 6-8

Get:

1  & 1/2 to 2 green mangoes, peeled and flesh finely grated (the greener the better!)
2 cups uncooked basmati rice
2  & 1/4 cups water

For the spice paste:
2 tsp fenugreek seeds
4 dry red chillies
Generous pinch asafoetida
1 cup fresh shredded coconut (I use frozen)
Any bits of mango that you could not grate
1-2 tbsp water

For the tempering:
1/4 cup cooking oil
2 tsp mustard seeds
1 tbsp channa dhal
1 tbsp urad dhal
1/2 tsp turmeric
Generous pinch asafoetida
10-15 curry leaves
3/4 cup small peanuts (available in Indian stores)

Salt, to taste

Make:

Cook the rice.  This can be done by placing 2 cups of rice in a rice cooker with 2 1/4 cups of water and cooking according to the rice cooker instructions.  Alternatively, you could place the rice and water in a large microwave dish and cook uncovered for 11 minutes, then covered for 2 minutes.

In a large non-stick saucepan, roast the fenugreek seeds until fragrant.  Grind the seeds in the spice grinder or food processor, then add the other spice paste ingredients and grind to a smooth paste.  Add a little more water if necessary.

In the non-stick saucepan, heat the oil and temper the mustard seeds on low heat.  Once they have popped, add the dhals, turmeric and asafoetida.  Fry until the dhals are a golden brown and then add the curry leaves, covering the pan immediately.

Once the curry leaves have crisped, add the peanuts.  Ensure the heat is on low and fry the peanuts, stirring gently until they are a golden brown colour.  This should take 5-7 minutes.

Add the spice paste and warm through for a minute or so.

In a large mixing bowl, fluff up the warm rice with a fork.  Add the grated green mango, spice paste/peanut mix and about 3 tsp salt to start.  Toss through gently to coat the rice in the other ingredients.  Taste and add more salt if needed.

Serve on its’ own or as a side dish to curries.

Note:
Green mangoes, the spices, dhals, small peanuts and frozen shredded coconut are all available at Indian grocery stores.

Green Mango 2

A Bowl of Red

Beetroot Fried Rice 2

Beetroot does this thing where it colours everything around it crimson with its juices.

My fingers, the wooden spoon, the new(ish) tea towels……et al.

I can’t decide whether it’s very cool or very obnoxious.

Beetroot and peas

And rice…..well rice doesn’t stand a chance against beet juice, what with being white and all.

It’s a blank canvas for redness.

This is a super simple, quick weekday meal.  My solution to having nothing in the vegetable crisper drawer except a single lone beet, and a container of cooked rice that needed a good home.

Peas

I think we’ll keep this one on the dinner rotation.  The beets provide fibre and a touch of sweetness which is nicely contrasted by the chilli.  The rice makes it a filling weekday meal which is super quick to make.  Did I say that already?  Well it is……it took me longer to take photos of this dish than it did to make it.

Super quick.

Beetroot Fried Rice 3

Beetroot Fried rice

Feeds 2-3

Get:

500g beetroot, peeled and julienned
1/2 cup fresh or frozen peas
2 tsp vegetable oil
1 tsp black mustard seeds
1/4 tsp turmeric
1/2- 1 tsp chilli powder
1/8 tsp asafoetida
1/2 tsp urad dhal (uncooked)
1/2 tsp channa dhal (uncooked)
8-10 curry leaves
1-2 large hot fresh red chillies, finely chopped
Salt
3 cups cooked rice (I use basmati)
1 tsp lemon juice

Make:

If you do not have rice which is already cooked, cook the rice using your favourite method.  Spread the cooked rice out on a large tray to cool.

Peel the beetroot and julienne- I use a mandolin for this.

If using fresh peas, cook in boiling water for 5-10 minutes.  If using frozen peas, just soak in boiled water for a few mins.

Heat the oil in a non-stick wok or fry pan.  Turn the heat down and add the mustard seeds and cover while they pop.  Add the dhals and fry until they are slightly browned.  Add the spices and fry for 2-3 mins.  Then, add the chilli and curry leaves and fry until the leaves are browned.  Read more about tempering spices here.

Throw in the beetroot, 1 tsp salt and about 1/2 cup water. Stir through and cover the pan. Cook on low to moderate heat for 4-5 mins until the beetroot is tender but still firm.  Drain the peas and add to the pan, as well as the rice.  You may have to break up the rice with your fingers.  Continue to toss everything together until it is all coated in the spices and oil, and heated through.  Be gentle with the rice so it doesn’t go squishy.  Taste and add more salt if needed.  Squeeze about a tsp of lemon juice over the top.  Toss through again and serve sprinkled with chopped fresh coriander and yogurt on the side.

Notes:
The dhals are probably optional but they do add a nice crunch.

Beetroot Fried Rice 1


Dad’s Pav Bhaji- an Indian Street Food Favourite

If you are the type to like your food dainty, neatly arranged and delicately spiced, this recipe is probably not for you.  If elegance and order on the plate be your priority then under no circumstances should you even contemplate making and devouring this dish.  And if cutlery is your friend or you strive to maintain grace while eating your meals, well then I’m really baffled as to how you even ended up here.

Pav Bhaji 2

If you’re still here, I’m glad you are because if you are willing to overlook the complete and utter lack of prettyness of a dish and place something that looks like homogenous slop in your mouth, then this might just be for you.  And if you are game to tear off buttery, toasted bread with your fingers, scoop up some of the aforementioned slop, top it with zingy raw onions, a squeeze of lemon juice and fresh coriander and cram it into your mouth, you may just be glad that you did stick with me here.

Pav Bhaji 4bVKD_0720

So if you manage to get that far, what you will probably experience is something akin to a Bollywood street party in your mouth.  You know the kind where boy and girl are walking down the street seemingly normally and all of a sudden everyone breaks into song and magically, strangers know all the steps to the dance? Yup, just like that but on your tongue.

And if you’re still tuned in, I promise you won’t regret it.

Pav Bhaji 1

Pav Bhaji is an Indian street food that originated in Mumbai and is now consumed by hungry folk on street corners all over India, as well as in restaurants the world over.  It is a kind of spiced stew, crammed full of vegetables bound together by mashed potato.  It is the mashing, the cooking, the stirring, followed by more cooking allows the vegetables to absorb the spices so beautifully.  When this smoothly spiced bhaji meets buttery toasted bread, it really feels like, at least in that moment, all is right with the world.

In our family home, although my dad can cook, it is my mum who does most of the day-to-day cooking, like this dish.  But pav bhaji? This is undoubtedly my dad’s domain.

A meticulous vegetable chopper, dad first chops all the vegetables in a perfectly even dice, then proceeds to combine it all together in a simmering pan while the spices develop their flavours, slowly but surely.

So we wait patiently, the aroma making it almost impossible for us to focus on our pre-dinner tasks, until finally dad dishes up the delicious bhaji along with pan-toasted bread as well as the accompanying chopped onion, coriander and wedges of lemon.

We normally use store bought bread rolls to pile the bhaji onto, but if you would like to try making your own, Sneh from Cook Republic has a recipe.

Pav Bhaji 5

Dad’s Pav Bhaji

Feeds 4-6

Get:

3 medium potatoes, quartered (Desiree or Pontiac work well)
2 medium carrots, finely diced
3 medium onions (you will need 4 in total), finely chopped
1 red capsicum, diced
1 green capsicum, diced
3 small tomatoes, diced
3/4 cup frozen peas, soaked in boiling water
More boiling water
50g butter + extra for bread (optional but recommended!)

For the Tempering:

2 tsp cumin seeds
1 1/2 tsp pav bhaji masala
1/2 tsp Garam masala
1/4 tsp chilli pdr
1 tsp amchur (dry mango powder)
2 chillies
1 1/2 -2 tsp salt

To serve:
8 Bread rolls- white bread tastes the best with the bhaji but grain or wholemeal also work
Butter
1 Lemon, cut into wedges
1/3 cup fresh coriander, roughly chopped
1 small onion, finely chopped

Make:

Place the potatoes in a pot with 1/2 salt and enough boiling water to completely cover them. Boil until just cooked through.  Drain and set aside to cool.

Chop all the vegetables as described and soak the frozen peas in boiling water.

In a large non-stick wok or fry-pan, heat the oil on moderate heat.  Add the cumin seeds and when most of them have popped, add the chillies.  Fry, adjusting heat to prevent the seeds from burning, for 1-2 mins.  Add the spices except for salt and amchur and cook, stirring for 3-4 mins.  Add both types of capsicum and fry for 5-6 mins.  Add the onions and fry until the onions are translucent.  At this point, add 1/2 cup water, cover and cook for 3-4 mins.

The capsicum should be just cooked through by now.  Add tomatoes, carrots and peas and another cup of water. Add 1 1/2 tsp salt and stir through.  Cover and allow to cook on low heat until carrots are cooked through and tomatoes are starting to go mushy.  While this is cooking, peel the cooked potatoes.

Much of the water may have evaporated by now.  Add the potatoes and another cup of water.  Use a potato masher to roughly mash the mixture in the pan.  Keep it fairly chunky- don’t aim for a mashed potato consistency, but enough of the potato should be mashed to homogenise the mixture.

Cook for 2-3 mins.  At this point, you should taste and add more chilli powder, salt or amchur (for sourness) according to taste.  Cover and cook for 15-20 min, on low-medium heat, stirring every few mins.  The mixture should be quite loose during this process, like a very thick soup.  Add water as you cook to maintain this consistency.

Finally, add 50 grams butter, cubed and stir through until melted and the mixture thickens a little.  Cook uncovered, stirring for a further 5 mins.  Take off the heat and allow to sit for a few mins before serving.

Slice the buns into half through the middle as you would for a burger.  Butter the bread generously and fry, cut side down in a non-stick fry-pan until toasted.  Use this method rather than using the toaster or grill- trust me on this one!

Serve bhaji with a sprinkle of raw chopped onion, coriander and a good squeeze of lemon juice, and bread on the side.

There are 2 ways of eating this- either pile the bhaji onto the bread and eat like a pizza or tear off pieces of bread and spoon/scoop the bhaji onto it.  Either way, ditch the knife and fork and use those fingers!

Notes:

Pav bhaji masala, garam masala and amchur powder are available at Indian grocery stores.  Garam masala is also available in mainstream supermarkets.

You could make this dish vegan by using vegan spread instead of butter, or by skipping the butter altogether.

Pav Bhaji 3

Hug-In-A-Bowl Yellow Dhal

Isn’t it funny how being ill causes many of us to enter a time capsule and revert to when we were kids?  I know when I’m hit with the flu or a tummy bug, the nine- year old in me comes out in all her whingy glory and I find myself craving mummy-style pampering, lots of hugs and comfort food.

VKD_0606

When I was ten years old, I got the chicken pox and had to have two weeks off school (devastating, I know).  My mother stayed home from work as well to look after me and it’s only now when I have a career of my own that I appreciate the difficulty of taking so much time off with zero notice.

So for two weeks we hung out at home watching videos on the VCR (showing my age now) and playing game after game of Monopoly, me slathered in calamine lotion and mum doing all she could to distract me from scratching the pox.  I gained a true obsession appreciation for the game, becoming some sort of speckly real estate mogul of a cardboard and plastic world.

VKD_0619

And mum kept the comfort food coming.  A sore throat was a feature of my chicken pox so she would make a lovely, seasoned and buttery mashed potato which she would form into little round cakes lovingly pressed with a fork to make them a little bit fancy.  I lived on these simple little potato cakes until my throat recovered and I could stand to eat other foods.

Slowly, the pox dried up and I was given the all-clear to return to school.  I know we were both a little sad to put aside the Monopoly board, leave behind the mother-daughter pseudo holiday and return to our respective vocations.

VKD_0618

Over the past few days when I was hit with the flu, comfort food was again what I craved.  And at the top of the list of warm flu-busting foods for me is Dhal, that simply flavoured lentil soup that is on every Indian menu.  Not the buttery, garlicky stuff you get in restaurants but a simple yellow dhal, the kind that is made in Indian homes all over the world on a daily basis.

This dish is one of the first Indian recipes I learned, when I was young and restless and would only stand still in my mum’s kitchen long enough to learn something this simple.  It is still made fairly frequently in our home, and often we will stray from the basic recipe to throw in some frozen peas, a couple of handfuls of baby spinach, chopped onion or diced potato.  I could eat bowlfuls of this stuff as a soup or mix it with rice the traditional way with a side of curry and yoghurt.

Ask ten Indian women how they make their yellow dhal and you are likely to end up with ten different recipes.  This is the way my mum and I make it- a little gingery, a little lemony, a little herby and a lot comforting.

VKD_0630

Basic Yellow Dhal

Serves 2-3

Get:

1/2 cup Toor Dhal
Boiled water
Salt
2 cm piece ginger, grated
1-2 hot red chillies cut into thirds
Small handful coriander, chopped roughly
Small Handful Dill, chopped roughly
1 1/2 – 2 tsp lemon juice

For the Tempering:

1 tsp vegetable, canola or sunflower oil
1 tsp cumin seeds
Generous pinch asafoetida (optional but recommended)
6-8 curry leaves

Make:

Cook Dhal however you are used to doing so.  I use a pressure cooker.  I place the dhal in the cooker with 1 1/2 cups boiling water and a good pinch of salt.  With my cooker, the dhal is cooked after 3 whistles but you will have to adapt this according to the cooker you use.

Another option is to soak the dhal overnight, then either boil it with 1 1/2- 2 cups water in a saucepan with a tight-fitting lid, or use a rice cooker.  You should be able to use a microwave as well but I have never used this method.

Once the dhal is cooked, add a further 1/2 cup water, 1/2 tsp salt, the ginger and the chillies.  Transfer the whole mixture to a saucepan or pot.  Simmer on low heat for 10-15 mins, stirring intermittently.  Ensure you break up any lumps in the cooked dhal when you stir.

Add the herbs and simmer for a further 2 mins.  Turn off the heat and add the lemon juice, stir through.  Taste and add a little more salt or lemon according to taste.

In a separate small pan, heat 1 tsp oil.  Add the cumin seeds and turn off the heat.  Once the cumin seeds have all popped, add the asafoetida and curry leaves.  When the curry leaves have semi-browned in the oil, add the tempered mixture to the dhal and stir through.

Serve with rice, chapatis or on it’s own.

Notes:

Asafoetida is the dried and powdered gum exuded by certain underground rhizomes and an important ingredient in Indian vegetarian cooking.  It has a pungent smell and helps to balance flavours as well as aids digestion.

You can get Toor Dhal and asafoetida at Indian Grocery stores.  Toor Dhal is also available in some supermarkets.

The pressure cooker method is the easiest way to cook dhal. If using a pressure cooker, allow it to cool completely before trying to remove the lid. If using the other methods, soak overnight first and ensure the dhal is cooked through before using- this will take a good 30-40 mins on the stove.

VKD_0614

Palak Paneer on a Precious Day Off

What I love most about my job, apart from the obvious- saving animals lives, alleviating pain in cute furry creatures and all that other WFF (warm fuzzy feeling) inducing stuff- are my weekdays off. In my line of work, at least on the clinical side of things, there is no Monday to Friday, 9 to 5 schedule.

DSC_0278

Instead, we are required to work some weekends, meaning we get weekdays off in lieu. And while it is truly painful to drag yourself out of bed at 6.30 am on a Sunday morning, leaving behind warm sheets to tend to sick animals (who annoyingly don’t always plan their medical needs to occur during the week), having a weekday to myself really does soften the blow.

My day off feels like an indulgence, even though I’ve well and truly worked my backside off for it. It is something that is all mine……a whole day before me which I can fill with whatever my heart desires. Of course, much of it is spent on mundane tasks such as a workout session, housework and paying bills, but strangely just the idea of having the choice makes a day off seem like a guilty pleasure. And even those chores are less painful during the week- lines at post offices and banks are shorter, Sydney’s normally congested roads are a little easier to navigate and appointments with dentists and such are more available.

DSC_0258

And on the occasion that the day off coalesces with the weekend- well, what more can you ask for than a long weekend?

DSC_0265

This dish is definitely one for a day off. There are a few processes which take a little time when you first give it a go. But it’s so very worth it at the end.

Palak Paneer is an Indian classic. I have been disappointed with some of the versions I’ve had at restaurants; many are bland with a layer of oil floating over the top of barely recognisable spinach puree and lumps of paneer (cottage cheese) that you need to fish for.

My Palak Paneer is a little more robust, well-spiced and the result of several attempts to get the masalas just right.DSC_0417

You can make the paneer yourself using this technique from this lovely blog, or use store-bought paneer. If using store-bought paneer, I prefer the frozen cubes to the blocks you find in the fridge. Also, despite being more fiddly, I highly recommend you use fresh spinach rather than frozen.

PALAK PANEER

Palak Paneer (Spinach and Cottage Cheese Curry)
Get:

Spice Mix
1/4 tsp cumin seeds
1/4 tsp coriander seeds
1/8 tsp fenugreek
8-10 black peppercorns
Insides of 2 cardamom pods

Tempering
1/2 tsp cumin
1/4 tsp red chilli powder
1/4 tsp turmeric powder
1/2 tsp garam masala
3-4 cloves
2 bay leaves
3 hot green chillies split down the middle
1 small clove garlic, grated or minced (you will need 2 in total)
1/2 tbsp ginger, grated (you will need 1 1/2 tbsp in total)
1/2 large onion chopped finely (you will need the other half too, also chopped)

Gravy
1 quantity spice mix
1 small clove garlic
1/2 tbsp ginger, grated
1/2 large onion chopped finely
1/4 cup passata or 1 soft tomato chopped roughly
2 bunches English spinach
3/4 tsp sugar
1/4 tsp amchur (dry mango powder)
2 tsp salt
3 tsp oil

280-300g paneer in cubes (packaged or fresh)
Handful coriander, chopped roughly

Make:

If using frozen paneer, defrost.

Chop bottom part of the spinach stalks off and discard. The more tender part of the stalks can be left on. Chop each bunch of spinach into thirds. Place in a colander and wash thoroughly to get rid of the grittiness (and trust me, I’ve never met a bunch of spinach that wasn’t gritty!). Wash in batches if easier. Place aside.

To make the spice mix, dry roast all the spices in a small pan over low heat until fragrant. Use an electric grinder or mortar and pestle to grind to a powder.

Heat 1 tsp oil in a large saucepan or wok. When oil is hot, add spice mix, 1/2 tbsp ginger, 1 clove garlic and half a chopped onion. Fry on low-medium heat until onion is tender. Add spinach and simmer, covered until spinach is mostly cooked. Add tomato or passata, stir through and cook for a further 2 minutes. Add 1 tsp salt and stir through. Transfer to the bowl of your food processer and leave to cool. Once cooled, blitz to a puree.

In the saucepan or wok, heat 2 tsp oil. When oil is hot, reduce heat to low and add 1 tsp whole cumin seeds. Allow seeds to pop, stirring gently. Add garam masala, turmeric and chilli powder and stir for a minute. Add bay leaves, cloves, chillies, ginger and garlic and stir for 1-2 minutes. Add the other half of the chopped onion and stir until coated in oil and tender.

Add spinach puree to the saucepan and bring to a boil. Add sugar, amchur and 1/2 tsp salt. Stir through and taste- add more salt in 1/4 tsp increments according to taste. Simmer on a medum heat for 5 minutes.

Add paneer and stir through, covering the cubes with the gravy. If using home-made paneer, be extra gentle! Cover and simmer on low heat for 3-5 minutes. If using frozen paneer, you may need to simmer a little longer.

Sprinkle coriander over the top and serve with rice, naan or chapatis.

Notes:
You can so totally simplify this by:
Using more garam masala instead of the spice mix- about a tsp should do it. However freshly ground spices are something else!
If you can’t find amchur, a good squeeze of lemon or a dollop of sour cream right at the end may provide the sourness required.
For a touch of luxury, feel free to stir through about a 1/4 cup of cream or sour cream.

PALAK PANEER 2

Black Pepper Chicken Fry

I am a shameless cookbook hoarder.  This in itself would not be a problem except that I seldom use cookbooks.  I tend to be more of an intuitive cook and will occasionally do a Google search or look to my favourite blogs for recipes.  But those lovely, expensive, glossy cookbooks?  Sadly neglected.

My cookbooks are even strategically positioned close to the kitchen for convenience.  From your basic $5 pasta bible bought at the discount table in a shopping centre to spectacular hardbacks written by celebrity chefs with photography that is almost as delicious as the recipes themselves.  From Madhur Jaffery to Masterchef, it’s all there on that shelf, in pristine condition and waiting to be used.

DSC_0221

Oh yes, there are the days when the mood takes me that I flip through a few of them looking for inspiration.  Eventually I may even find a recipe that I want to (sort of) follow, and if I’m feeling really diligent, the dish might even make its’ way onto the stove or the oven and then onto a plate. But mostly I just like to have these books.

Recently, I broke my self-imposed cookbook buying ban by purchasing one that I had been stalking coveting for quite some time.  Tasting India by Aussie Chef Christine Manfield is truly a work of art and full of totally cook-able recipes.  Manfield manages to take the reader with her on a journey around India, celebrating its mind-boggling diversity, its hospitable people and most importantly, its incredible cuisine.  The smears of masala that have already appeared on some of the pages attest to the fact that this is one cookbook that I will be using again and again, and for more than just its decorative value.

DSC_0596

The Black Pepper Chicken Fry is a dish that I have already made several times.  The long simmer allows the chicken to be oh so tender and nicely coated with the pepper-based masala.  You first get a little hit of pepper, followed by the lovely chicken that falls apart obligingly in your mouth.

DSC_0586

Black Pepper Chicken Fry

Feeds about 4, takes about 60-80 mins to make

Adapted from Tasting India, Christine Manfield, p.250.

Get:

Spice mix:

1 1/2 tsp cumin seeds
1 1/2 tsp coriander seeds
1/2 tbsp black peppercorns
3-4 dried red chilies
The insides of 2 cardamom pods
1/2 tsp cinnamon powder

Other ingredients:
1 tbsp vegetable oil
1 tsp cumin seeds
1 tsp mustard seeds
8-10 curry leaves
4 medium cloves garlic, peeled and finely grated
1 1/2 inch piece fresh ginger, finely grated
1 large white onion, finely diced
2 ripe tomatoes, finely diced
1 kg chicken thigh fillets cut into 1 inch pieces
Salt
Water

 Make:

Place the spice mix ingredients in a small pan over a low heat. Roast until they are browning slightly and fragrant.  Powder using a mortar and pestle or spice grinder.

Heat the oil in a large non-stick saucepan over medium heat.  Add cumin and mustard seeds and stir until popping.  Add the spice mix and stir for a minute or so.  Throw in the curry leaves and cover to protect yourself from the hot oil flying everywhere.  Add the ginger and garlic and stir for about 2 mins.  Add the onion and cook until softened, then add the tomato and cook for a further 5-7 mins.  Season with the salt and stir.

Add the chicken pieces and stir until they are coated with the other ingredients. Cook for about 5 mins until the chicken starts to colour.  Add 1 1/2 cups water, cover and simmer on low-medium heat for 30-40 minutes or until most of the liquid has been absorbed. Stir every 5 mins or so.  About halfway through the process, taste and add more salt if necessary.

Serve with your favourite Indian bread or steamed rice.

Notes:

Yes, it does seem like a lot of water…..but it works….trust me on this one.

DSC_0592

Home-laid eggs and their fate (Egg Curry)

The other day one of my bosses came to work with cartons and cartons of eggs.  It turned out that the 12 hens that he keeps in his inner-city backyard had been on a laying frenzy and he had been faced with an eggy surplus.  I of course, was helpful enough to take a dozen of them off his hands and find good use for them.

DSC_0624

Now being an Indian kid brought up by city slicker parents, freshly laid eggs were never really part of my upbringing.  While I was growing up, most of my parents’ friends were like us- Indian immigrant urban professionals who didn’t even have a cat, let alone chickens running around in their backyards.  So imagine my delight as these gorgeously imperfect thin-shelled things landed in my hands.  Eggs of different shapes, deeply yellow yolks and smudged with dirt for authenticity.  Eggs without dates stamped on them!

What to do with this unexpected produce? I certainly didn’t have the heart to bake them into anonymity in a cake nor did I want to beat them into submission to make an omelette.  No, these eggs called for a starring role in their own dish, a trailer with gold star on the door and their own stunt men (stunt eggs?).  Surely, these eggs needed to be in an egg curry. An egg curry that is inspired by one my friend Sailaja made us when I visited her in Chicago last year.  Creamy, hard boiled eggs floating happily in a lightly spiced sauce with the bite of onions and the tang of tamarind.

DSC_0194

Of course, if you don’t have a boss who provides you with charmingly wonky home-laid eggs, I suppose the ones from the supermarket (preferably free range) will work just fine.

DSC_0233

DSC_0234

Egg Curry

Feeds 4

Get:
1 quantity spice mix
8 small eggs or 4 large eggs
1 tomato
Small red onion
Small chunk (about 3cm cubed) of dried tamarind
1 hot green chilli
1 tsp minced fresh ginger
1 chubby garlic clove, minced
1/4 cup passata
1/2 tsp cumin
1/4 tsp mustard seeds
1/4 tsp turmeric powder
1/4 tsp chilli powder
Salt to taste
1 cup baby spinach leaves, firmly packed
Small handful chopped coriander

For the Spice Mix:
1/4 tsp Cumin
1/4 tsp coriander seeds
1/8 tsp mustard seeds
1/8 tsp fenugreek seeds
1/4 tsp black pepper
The insides of 3 cardamom pods

Make:
Place eggs in a large saucepan and cover well with water.  Bring to the boil and simmer until eggs are hard-boiled.  Drain water, allow to cool and cut eggs lengthways into halves for small eggs and into quarters for large eggs.

Soak the tamarind in 1 1/2 cups boiling water. Once the water cools, squeeze the tamarind with your hands or with a fork. Strain and retain water.

For the spice mix, place all the spices in a non-stick pan and toast over low heat until slightly browned and fragrant.  Grind using a mortar and pestle or spice grinder to a coarse powder.

Place 1/2 onion and whole tomato chopped roughly, half of the ginger and garlic, green chilli chopped roughly and 1 tbsp of the tamarind water in a food processer.  Whizz until pureed.

Chop the other half of the onion finely.  In a non-stick saucepan, heat the oil over a medium heat.  Add 1/2 tsp cumin seeds and 1/4 tsp mustard seeds.  Once these are popping, reduce heat and add turmeric, chilli powder and spice mix.  Fry, stirring for about 2 minutes and add curry leaves (stand back as these will sizzle!).  Once curry leaves are browned, add ginger, garlic and the chopped onion.  Sauté the mixture until the onion is translucent, then add the pureed mixture, passata and the remaining tamarind water.  Add salt to taste, about 3/4 tsp.  Bring to the boil and simmer for 5-10 mins, adding water if necessary to maintain a gravy consistency.

Reduce heat and add spinach and stir mixture until spinach wilted.  Add eggs by gently placing into gravy.  Stir gently, spooning gravy over eggs.  Allow to simmer gently for 4-5 mins.

Serve on steamed or boiled rice with coriander sprinkled over the top.

Notes:

I realise not everyone wants to be grinding spices after being at work all day.  To simplify this, you can use about 1 to 1 1/2 tsp of garam masala instead of making a spice mix, but of course IMHO, freshly ground spices always taste better.

Dried tamarind is available at Indian grocery stores.  If you can’t find it, you can use about 1 tsp of tamarind paste, but this may give you a darker curry.

This makes a reasonably spicy curry, so feel free to leave out the fresh chilli if your spice threshold is on the lower side of if you are feeding little ones.

DSC_0637