Lime and Pepper Rasam (broth)

The air has gotten a whole lot colder here in Sydney. Our balcony, while offering us unimpeded views of the city, is also exposed to sometimes aggressive winds. We often come home to find that anything that is not heavy or secured down has been ruthlessly thrown out of its place. Vegetation must be limited to heavy, solid pots against the sheltered wall. The gardenia I resurrected from a dried-up stick trembles behind the cane chair, refusing to bloom under such conditions. The spiny succulent sits against the door, resolutely maintaining its preference for the outdoors while it cowers in the corner of the door frame. There’s a trough of herbs which I planted with almost no hope for their survival, given my dubious history with keeping anything edible alive. Surprisingly, they stare at me defiantly, a few leaves tattered but still very much alive and almost productive enough to harvest for tossing through dishes.

Rasam Lime Pepper (4 of 10)_edited

The winter quilt and heaters came out a few weeks ago. Winter clothes were unraveled from suitcases, some forgotten about, the reminder of their existence like a small retail-therapy buzz. Dragging ourselves out of bed an hour earlier to fit in a gym session seems like a mammoth undertaking, and we are more frequently hitting the snooze button to favour a little extra time in the warmth instead. Noses run unbidden and at the most inconvenient of times. Our throats are scratchy on occasion and each time, we wonder whether it’s a cold or worse still, the dreaded flu.

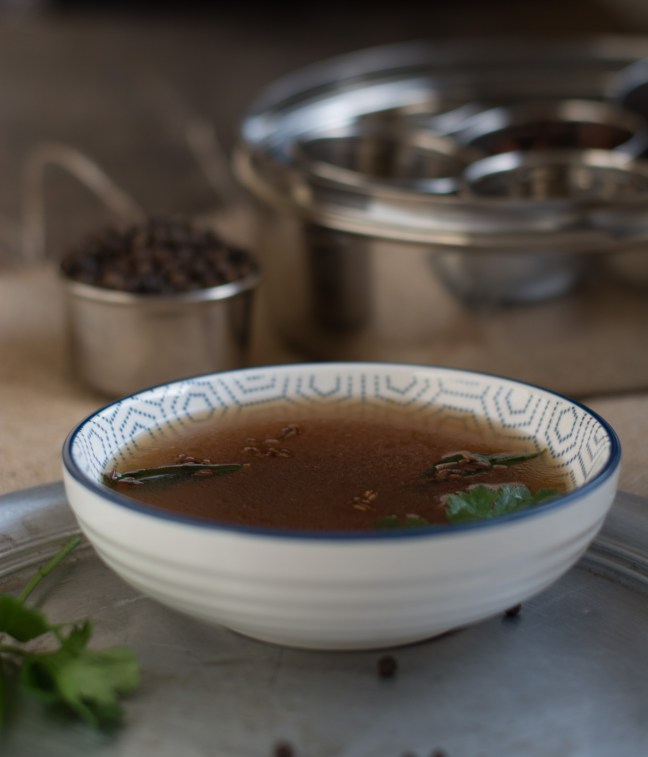
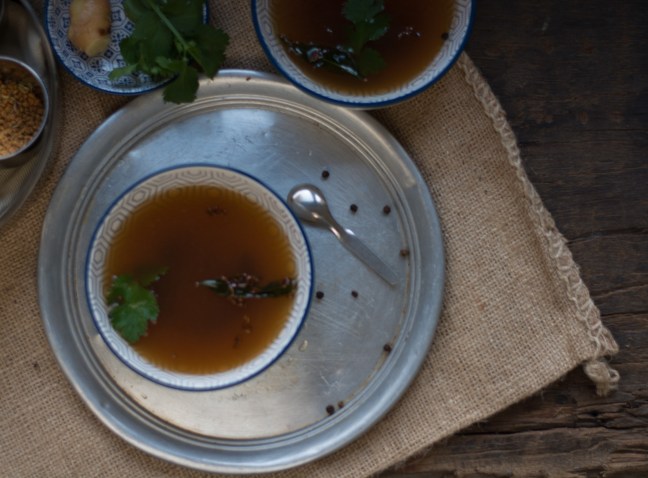
There are cravings for soup and these are dutifully satisfied. Rasam is a South Indian staple. It is what every southie kid remembers eating several times a week, mixed with rice and accompanied by a vegetable side dish. It is the antidote to sniffles, colds, and even the dreaded flu. Rasam is a delicate balance of spice, sourness and salty undertones. It takes a little practice but it’s worth getting just so. This version uses limes, as I was gifted a bag of these by a generous colleague with an overactive lime tree. Also, pepper to soothe the throat, the comforting sourness of tamarind and a few basic spices. Rasam is often made with lentils, but this one is more of a clear broth.

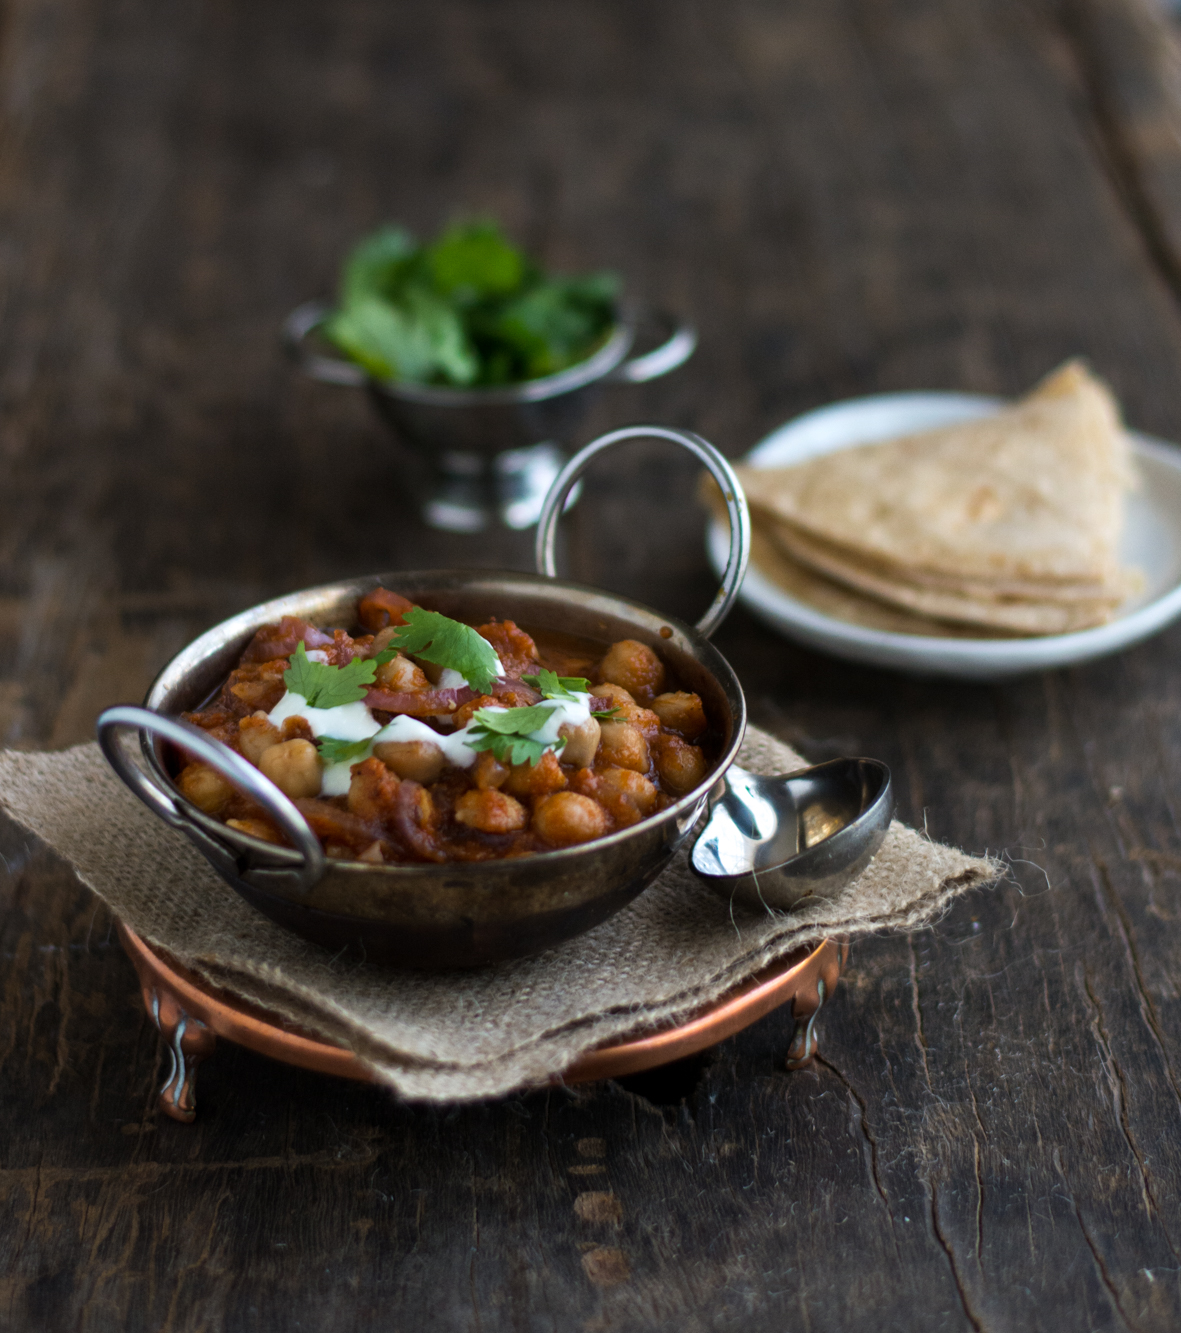
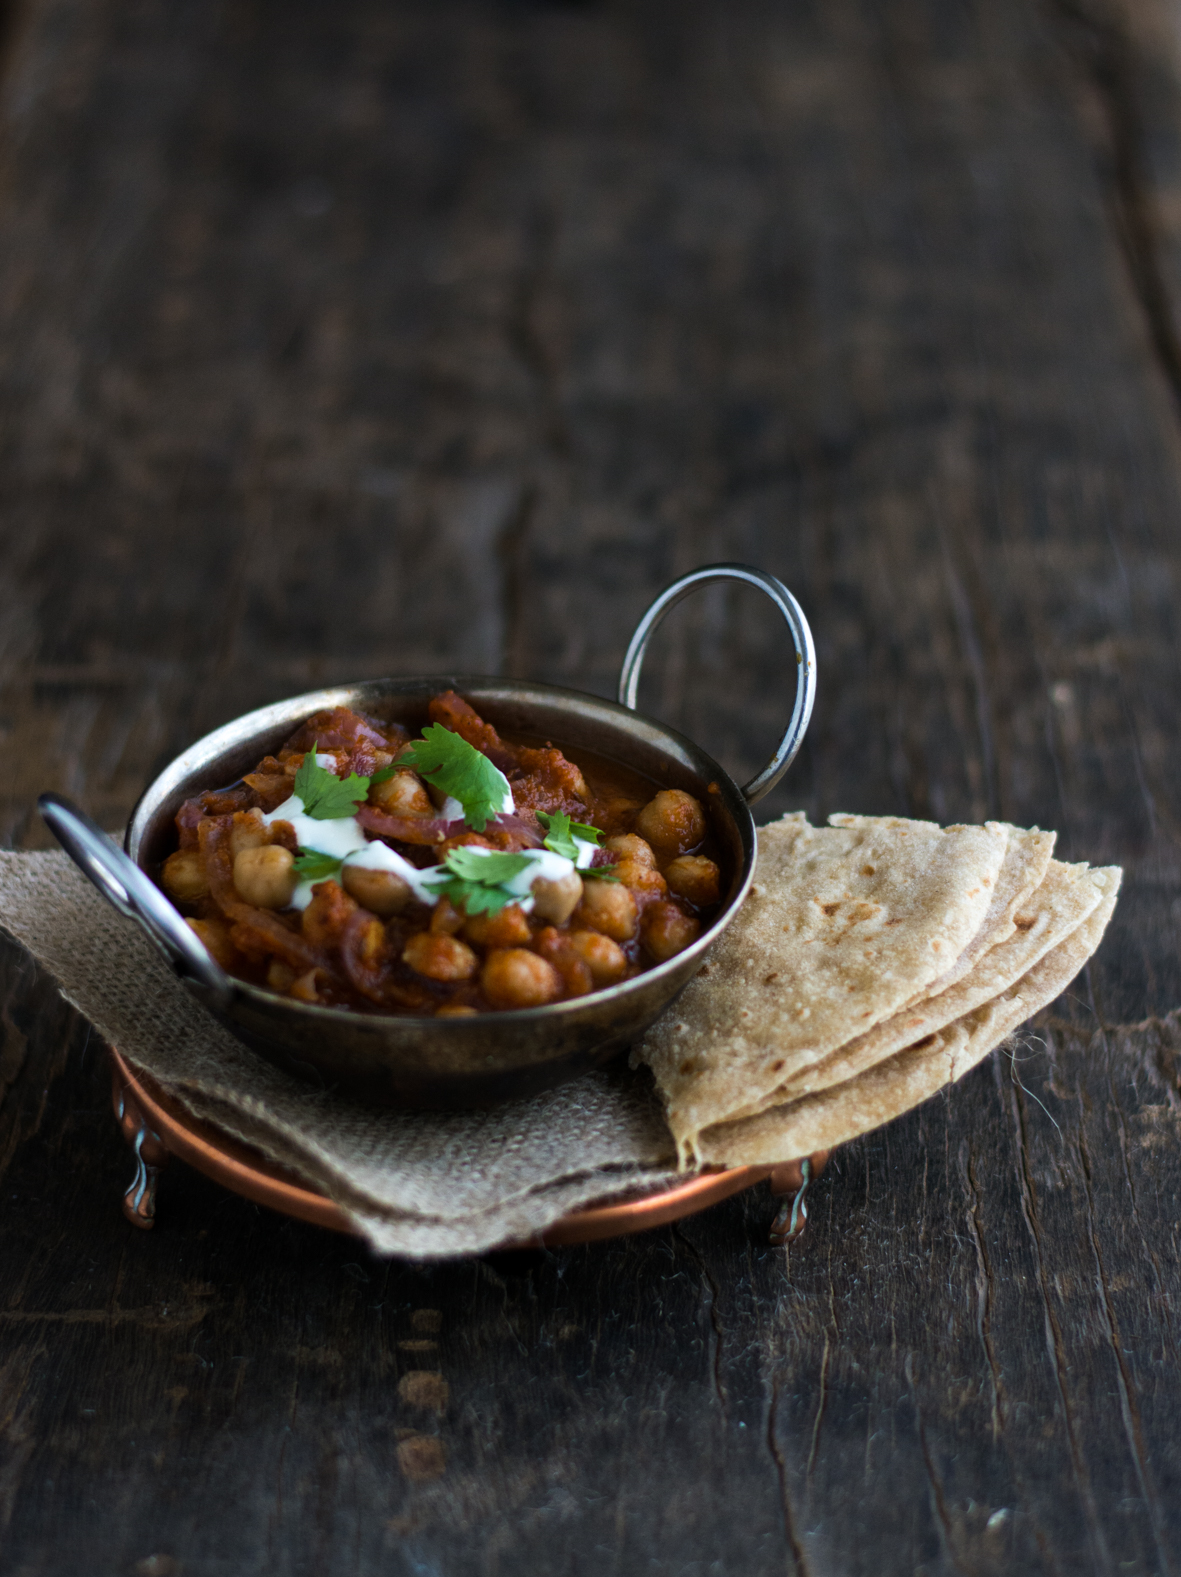
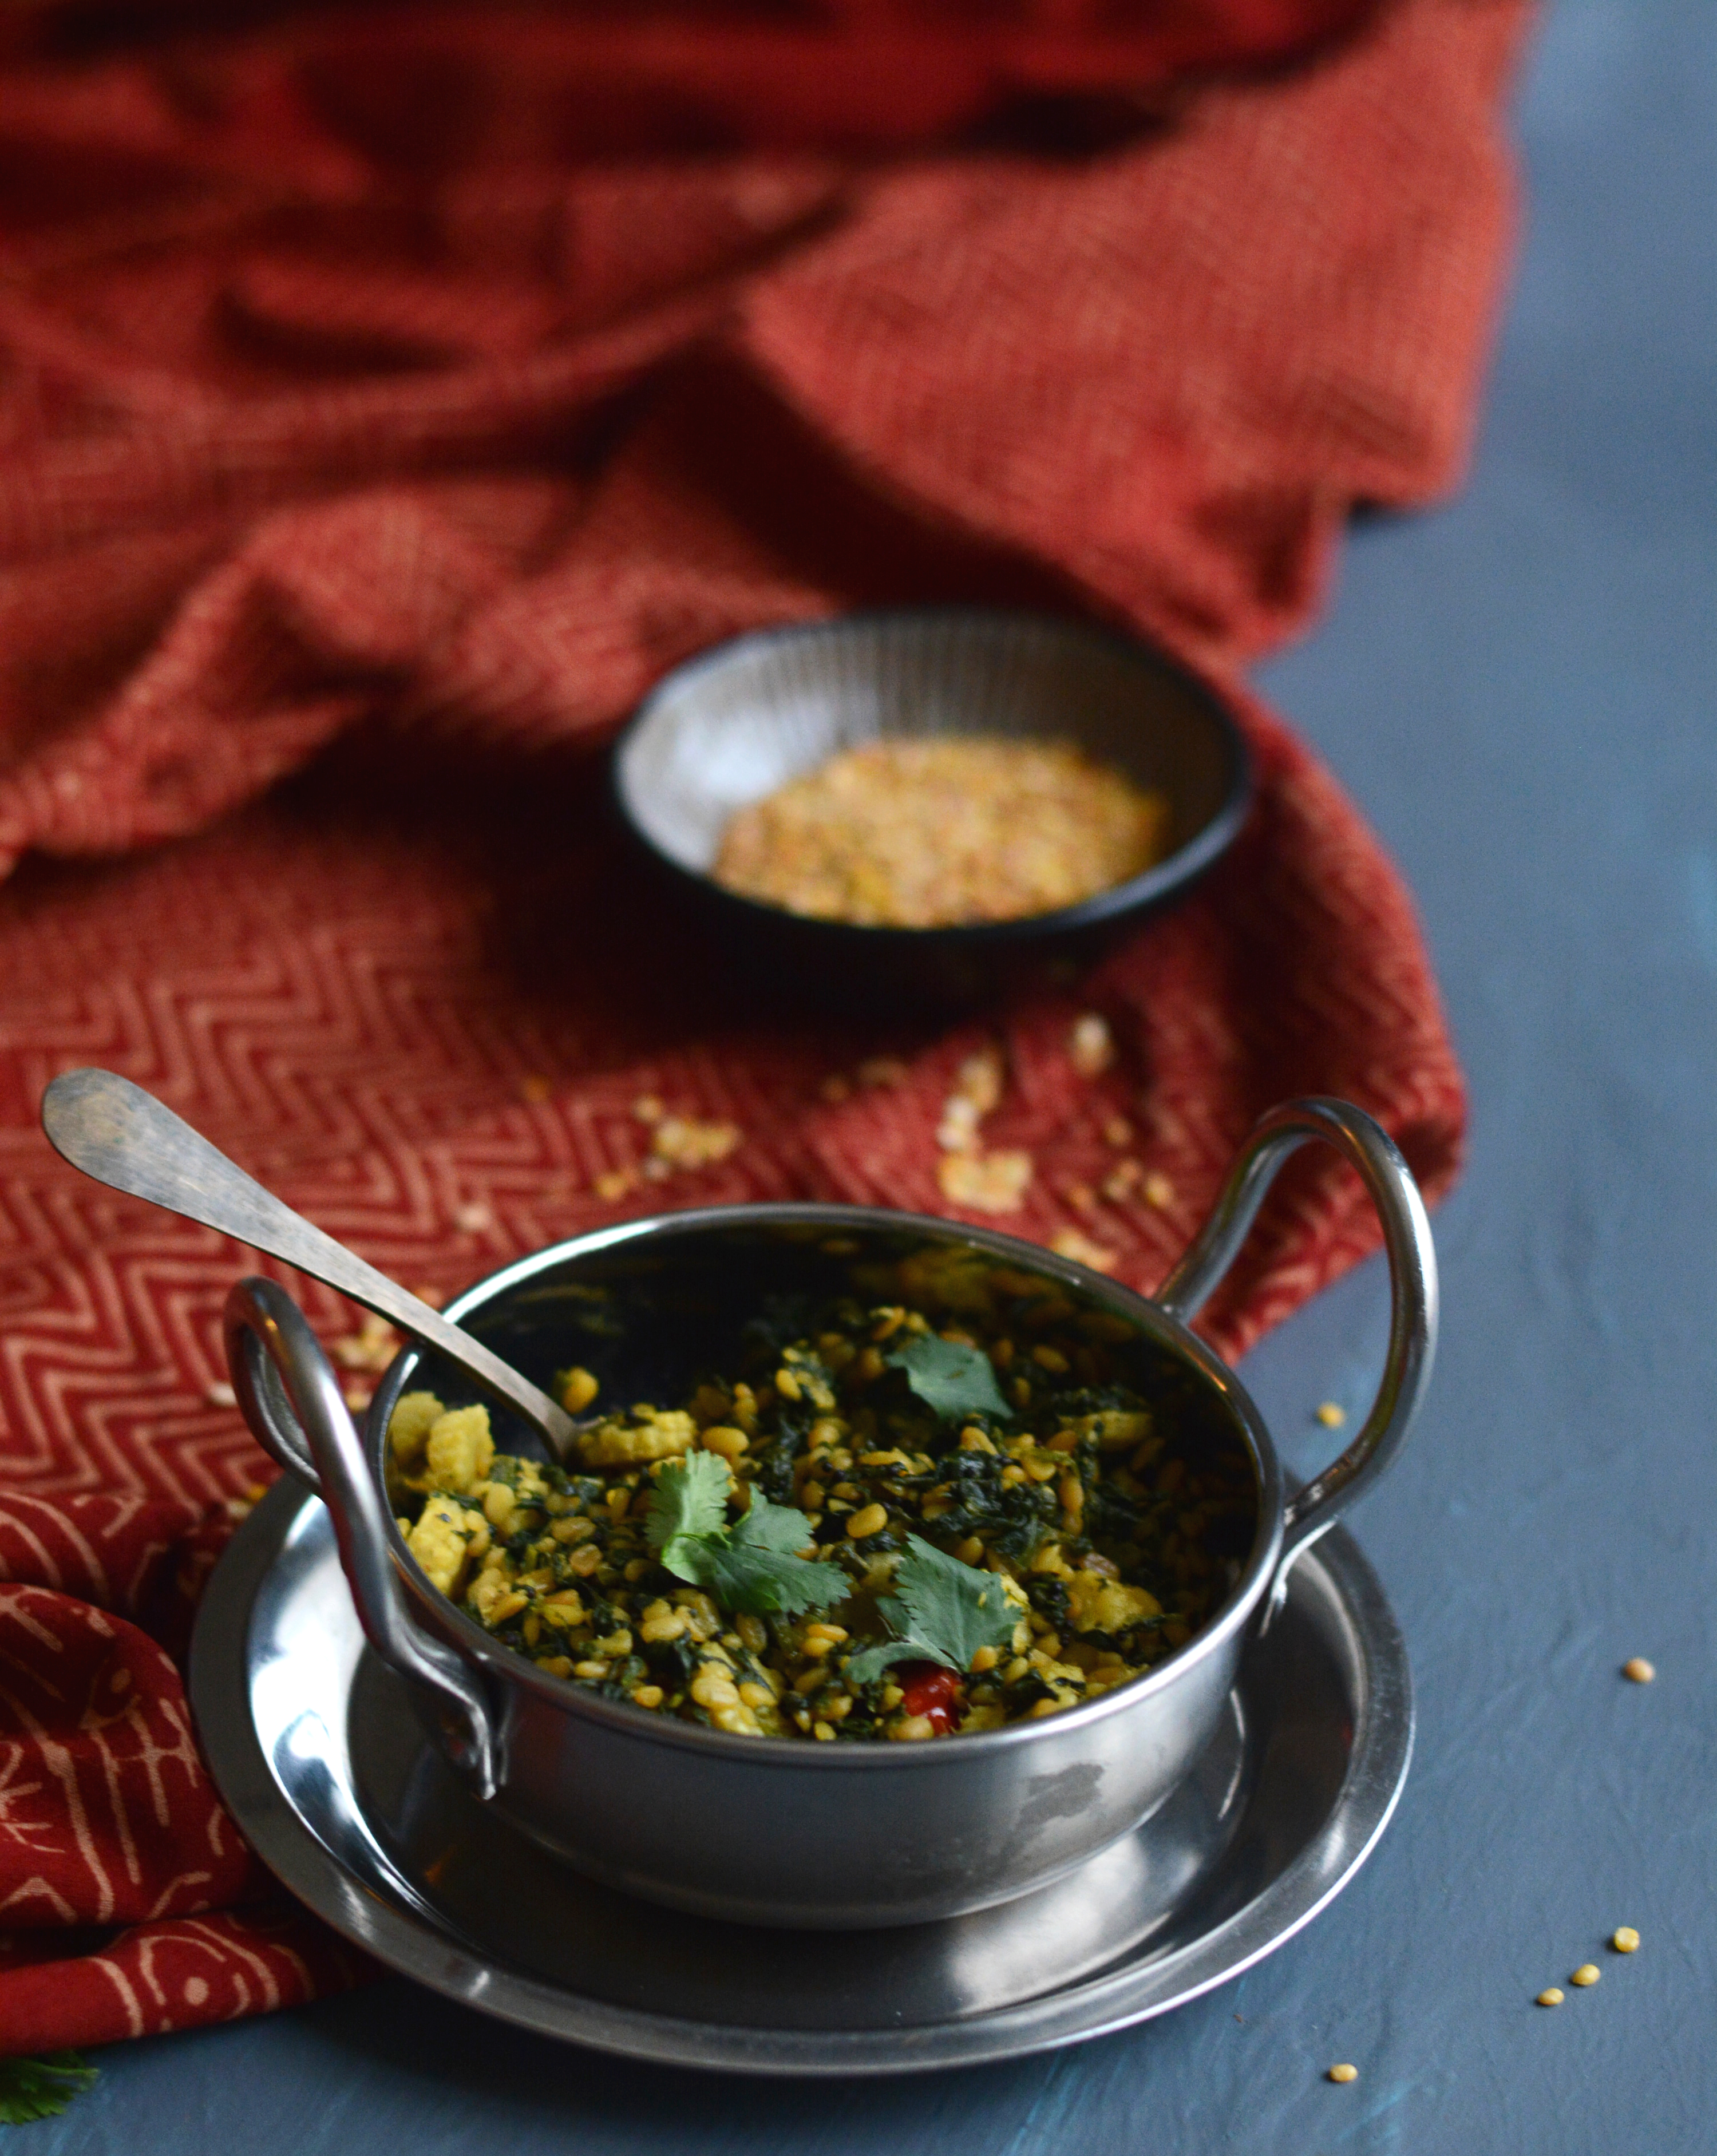
For more wintery comfort foods, try this dhal, Palak Paneer, or this Egg Curry.

Rasam Lime Pepper (7 of 10)_edited

Lime and Pepper Rasam

Get:

1 golfball sized chunk of dried tamarind
2 L boiling water
7-8 cm fresh ginger, finely grated
½ tbsp freshly ground pepper
1 tsp whole peppercorns
1 tsp cumin powder
1 tsp coriander powder
1 ½ tbsp tightly packed soft brown sugar or jaggery
Salt to taste
3-4 tbsp lime or lemon juice
Small handful fresh coriander, roughly chopped

For tempering:

2 tsp vegetable oil
2 tsp cumin seeds
Pinch asofoetida (optional)
6-8 fresh curry leaves

Make:

Shred the tamarind with your fingers and place in a bowl with 1 cup boiling water, set aside. Place 6 cups boiling water in a medium sized saucepan on the stove. Add ginger, spices and jaggery. Bring back to a boil and then reduce to a simmer for 10 to 15 minutes. When the water that is soaking the tamarind is cool enough to handle, squeeze the tamarind within your fingers to extract the flavor into the water. Yes, it feels kind of gross but no pain, no gain. Set aside for another few minutes. Add salt to the rasam mixture, starting with 1 tsp. Stir to dissolve, and taste- you may need to add another ¼ to ½ tsp.

Strain the tamarind water into the rasam mixture, taking care not to include any chunks of tamarind. Simmer for another 10 minutes. If the mixture is getting too concentrated, add a little boiling water. Taste along the way. There should be a nice balance of pepperiness, and sourness form the tamarind which is offset by salt and sugar. Remember this is a savoury dish so sugar should not be the predominant flavor.

Once you are happy with the flavor balance, boil for another 10 minutes, then take off heat. Add 3 tbsp lemon or lime juice, taste and add a little more if a subtle flavor is not coming through.

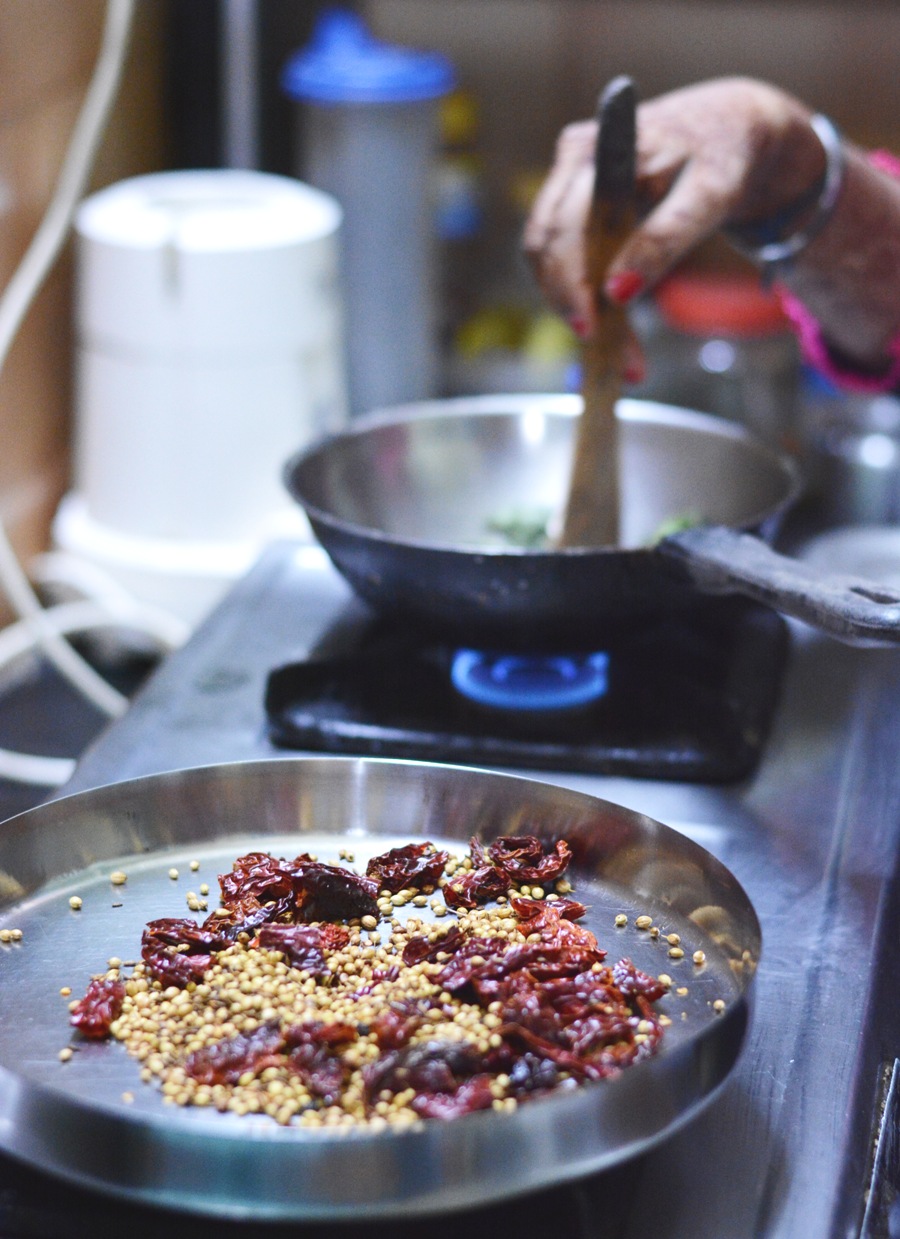
To temper: In a small saucepan, heat oil on the stove. Add cumin seeds and allow them to pop. Add asofoetida, then curry leaves and stand back because they will sizzle and pop in a violent fashion. You may need to turn the heat down before you bolt to the other side of the kitchen. Once the spluttering tantrum is over, add the tempered mixture into the rasam and stir through.

Finally, add coriander leaves and stir. Serve mixed with rice or on its own as a clear soup. If it is a little too spicy for you, allow the sediment to settle and scoop the clearer liquid from the top, which will be less peppery.

Rasam Lime Pepper (1 of 10)_edited

Advertisement

Tefal Cook4Me and Spiced Chickpeas with Coconut

I’m the first to admit that I have control issues in the kitchen. The stove is a ship and I, its captain.  This makes it near intolerable for anyone who dares to help me put together a meal.  It also makes it very difficult for any sophisticated appliances to be truly useful in my kitchen.  My need for control means that I must stir the pot myself, pottering between that and chopping of the next ingredient to be added, while simultaneously shooing out anyone who ventures in.

Cook4Me 3 colours

When Tefal asked me to trial their Cook4Me Electric Pressure Cooker, I have to admit I was sceptical. I am a stovetop pressure cooker user from way back, refusing to be swayed even by an exploding-dhal-from prematurely-opened-cooker incident a few years ago.  Would I still be ‘hard core’ with an electric pressure cooker, I wondered?

I don’t know exactly when I officially joined the Tefal Cook4Me camp. Was it the heart-achingly moist, buttery fish fillets I made using the ‘Sweet Chilli Salmon’ recipe?  Or the realisation that I didn’t have to pay attention and count the whistles from a stovetop cooker in order to ensure my lentils were cooked but not pureed?  Whatever the trigger, the result is that I now use my Tefal Cook4Me almost every day.

You guys, this thing not only cooks things to perfection, retaining moisture and flavour, but it also tells you how to do it!! It is programmed with loads of gorgeous recipes that take you through the cooking process, step by step, for 2, 4 or 6 people. Even an intuitive cook like me is quite happy to minimise the firing of neurons at the end of the day and still end up with a delicious, healthy meal.  Also, this thing is one sexy looking machine! I know, I know……I saved the most important bit till last.

Picture 4166
Picture 4166

A lot of things are supposed to change your life these days…..appliances, cars, cosmetics. The Tefal Cook4Me may not change your entire life, but it sure will transform the way you cook, especially if you like quick, healthy, simple meals that are easy to clean up afterwards and so, so good to eat.

Oosli, or Spiced Black Chickpeas with Coconut, is a traditional South Indian Dish, popular during festival times but made throughout the year. It is a protein rich dish, perfect for those who rely on non-meat sources of protein, but also delicious as a filling workday lunch.  The earthiness of the legume is offset by the freshness of coconut and a subtle-but-definitely-there hint of lemon.  If you can’t find black chick peas, you can also use regular chick peas.

Tefal Cook4Me was kindly provided by Tefal Australia, however all opinions are my own.  Cook4Me images are from Tefal.

Spiced Chickpea coconut  (4 of 5)

Spiced Chickpeas and Coconut (Oosli)

Serves 2-4 as a side dish

Get:

1 cup dried small black chick peas, soaked overnight
2 tsp coconut or vegetable oil
1 tsp black mustard seeds
1/2 tsp turmeric powder
Pinch asafoetida
½ to 1 hot green chilli, split down the middle
2 dried red chillies broken into large pieces
8-10 curry leaves
3 tbsp fresh or fresh frozen (thawed) grated coconut
Salt
Lemon Juice
Small handful coriander, roughly chopped

Special Equipment:
Tefal Cook4Me Electric Pressure Cooker

Make:

Drain and rinse the soaked chickpeas. Place in the Cook4Me pot with plenty of the water (chick peas should be completely submerged with about 1 cm of water above them).  Choose manual on the Cook4Me panel and reduce the time using the dial to 2 minutes. Press ok to start.  Once your Cook4Me beeps to indicate that it is finished cooking, allow the pressure to dissipate (about 5-10 minutes).  Open the lid of the Cook4Me and remove the pot to drain the water from the chick peas.  The chick peas should be cooked through but firm.

Replace the empty pot into the Cook4Me and use the manual option to choose the ‘Browning’ setting. With the lid now left open, heat the oil in the Cook4Me pot.  Add the mustard seeds. Once they have popped, add turmeric, asafoetida, red chillies and green chilli.  Cook, stirring gently for 1-2 mins.  Add 4-5 curry leaves (they will splutter so step back or momentarily lower the lid).  Once the curry leaves have crisped, remove the green chilli and discard.

Drain the cooked chick peas and add to the pot. Add 1/2 tsp salt to start with.  Stir and leave to cook, with the lid lowered (but not latched), for a couple of minutes.  Add the coconut and remaining curry leaves, toss through.  Taste and add more salt if needed.  Stir again.

Turn off the Cook4Me and add 1 tsp lemon juice. Toss through, taste and add a little more lemon juice to taste.  The dish should be a little lemony but this shouldn’t be a dominant flavour.

Sprinkle with coriander just before serving. Serve as a side dish or as a vegan protein-rich main dish with flatbreads.

Notes:

All the ingredients should be available in Indian grocery stores.

Spiced Chickpea coconut (3 of 5)

Better with time

Being away from this space for four months has been tough.  It’s not that I didn’t want to be here, that I just wandered off without a care.  I thought about it a lot, I did! But this here little world of mine was crowded out by a new challenge, a study related one which according to the experts in my life makes me a glutton for punishment.

channa masala (1 of 4)

You see, if I post here, I want to be all here, giving it all I have.  This space needs nurturing.  It needs balance, the right amount of everything.  It is a cocktail, to be balanced with the right dash of spirit, a touch of sweetness and a zip of acidity.  It is a curry, spices tempered before the star of the show enters.  Cold tomato puree meets sizzling oil and popping cumin seeds.  The temperature plunges, then climbs again, liquid spluttering as the fire under the pot catches up.  In goes the protein and enough moisture to engulf it, stewing it in heat and flavour.  This is when you step back a little, letting the good things happen.  Chick peas that are firm to begin with, left to simmer in a sea of flavour, to soften slowly until they are barely holding together.  And when they meet a spoon or a tooth? All bets are off.

Those slowly softening chickpeas don’t ask for much.  A bath that is voluptuous with flavour.  For the sharpness of the chilli to tingle the tip of the tongue, then let others shine before it leaves an impression that accumulates with every bite.  That the slightly sour acidity of the tomato sings its song to brighten the palate.  That the sweetness of the onion and tomato develops with time, but never becomes more than an undertone.  And the salt? It’s the last to join the cacophony, in careful increments, giving all the other elements the power to do what they do best.

The chick peas soften, greedily absorbing spicy, sour, sweet and fragrant.  And we wait.  We cover, we simmer, we stir.  We stir first lovingly, then impatiently.  Most importantly, we taste and we tweak and we wait.

channa masala (3 of 4)

Like so many things, the flavour gets better with time.  A nice long simmer, yes but if you manage to make a big enough batch to save some for the next day, a type of magic happens overnight in that pot.  The kind of magic that makes yesterday’s curry strike an even deeper chord than it did when you first made it.  You see, a night together allows all the ingredients to get to know each other, to understand each other’s strengths and limitations, to work out how to interact harmoniously.  To wind up so flavourful that you can’t help but “Oh!” when you come back to it a day later.

There are probably a hundred or more minute variations to this classic dish. This is how I like it.  Plump, yielding chick peas.  A full-bodied sauce.  Sliced onions, a little firm and prominent enough to partner the chick peas.  And time.

Love, patience and time.

channa masala (2 of 4)

Channa Masala (Chick Pea Curry)

Get:
1 1/2 cups dried chick peas, soaked overnight or 2 tins of chickpeas
2 tbsp vegetable, canola or sunflower oil
1 onion, halved then sliced in half-rings
1/2 onion finely diced (you will use the other half in the sauce)
2 tsp Channa Masala
2-3 Bay Leaves
4 Cloves
3 tsp cumin seeds
1/2 tsp amchur powder
1/4 tsp chilli powder (optional)
Salt
Small handful fresh coriander, roughly chopped
Plain yoghurt (optional)

For the Sauce:
1 medium sized garlic clove, peeled
4cm fresh ginger, peeled
1/2 onion roughly chopped
1 tin tomato, or 4-5 ripe fresh tomatoes, quartered
2 hot green chillies
1 tsp salt
1/2 tsp coriander seeds
1/2 tsp cumin seeds

Make:

If using soaked dry chick peas, they will need to be soaked overnight.  Once soaked, cook them in a pressure cooker or over a stove until they are cooked but still quite firm.  If done over the stove, they will take at least 30 minutes.  Drain once cooked and set aside.  If using tinned chick peas, drain and rinse in cold water.

Lightly toast 1/2 tsp coriander seeds with 1/2 tsp cumin seeds in a pan, until fragrant.  Grind these together to a rough powder with a mortar and pestle or electric grinder.

Add to all the other sauce ingredients and 1 cup water in the bowl of your food processer. Pulse a few times until a reasonably smooth consistency is reached.

For the tempering, gently heat the oil in a large saucepan.  Do not allow the oil to reach smoking stage, use a moderate heat.  Add the 3 tsp of cumin seeds and when they have sizzled for a few seconds, add the cloves and bay leaves.   Add the diced onion half.  Fry for a few minutes on low-medium heat, taking care not to burn the cumin seeds, until the onion is a little softened.  Add the channa masala and chilli powder (for a spicier curry). Fry on low heat for another minute or so.

Add the sauce to the pan.  Add about 1/2-1 cup water to the food processor, blitz a few times, then add this water, with the remains of the sauce, to the pan.  Bring to a gentle boil, cover and simmer on low heat for 3-4 minutes.

Taste and add a little more salt or chilli powder if required. Drain and rinse the chick peas.  Add these to the pan, stir and cover.  Bring to the boil again and simmer on low-medium heat for about 30 min, stirring intermittently. Cook until the chick peas are softened and just holding together (they should not be allowed to disintegrate).  Add the sliced onions, separating the layers with your fingers, a few minutes before the chick peas are at that stage. If the sauce becomes too reduced, add a little water along the way to maintain a gravy consistency.

Taste and ensure the flavour is balanced how you like it.  Add a little more salt, chilli powder or amchur if needed.  if adding more chilli powder, cook for a few more minutes, stirring intermittently.  If you find the curry is too spicy, stir through 1-2 tbsp of plain yoghurt just before turning off the stove.  For a vegan option, leave out the yoghurt or use a little coconut cream.

Garnish with fresh coriander and serve with your favourite Indian bread, with raita or plain yoghurt on the side.  Like all other curries, this one tastes better the next day.

Notes:

Dried chick peas, Channa masala and amchur (dried green mango) powder, along with the other spices are available in Indian grocery stores.  Channa masala is a spice mix made specifically for this dish.

To speed things up use 1/2 tsp each of cumin powder and coriander powder instead of grinding these from whole seeds.  However I steer clear of bottled minced ginger and garlic.

Freekah, Mint Pesto and Vegie Bowl (Vegan)

Freekah Mint Veg Bowl (2 of 5)

I guessed that by this time of the summer, the mint scattered along the side of the house would have flourished, perhaps even enough for a pesto.  The crop started many years ago as a couple of tiny plants, one of regular mint and one of chocolate mint.  The chocolate mint has never served a purpose per se, but I defy any of you to walk past a cute little pot of emerald green leaves that smells ever so slightly of an After Eight mint without wanting it in your garden.

At some point in the history of the garden, both plants escaped the pots, intermingled and took up their sprawling residence in the garden bed along the side of the house.  It’s a little unruly, this part of the yard.  Little chartered territory given a slightly more dangerous edge by the stump of the lemon tree that my dad had to chop down owing to its infestation of ominous looking black citrus bugs with their toxic venom.  Definitely not for barefoot wanderings.

Freekah Mint Veg Bowl (4 of 5)

Be-sandaled and armed with a basket and scissors, I made my way around the Tulsi (holy basil) and picked my way among the weeds, past the stumpy citrus.  Squeezing around the water heater, I was met with a lush mint crop large enough to supply a toothpaste factory.  A pesto was surely in order.  I tossed it with freekah (a type of cracked wheat) and with a few fresh vegetables, it made the freshest, most healthful lunch I’ve had in some time.  Sweetcorn is a must I think but as far as other vegetables go, You can pretty much pick your favourites.  I threw in carrot and snowpeas, but cherry tomatoes, blanched asparagus or broccoli, or pan-fried zucchini would work beautifully.

Want more healthy and filling vegetarian salad ideas? Try this lentil salad or quinoa salad.  Or screw the salads and make this fudge 🙂

Freekah Mint Veg Bowl (1 of 5)

Freekah, Mint Pesto and Vegetable Bowl

Get:

3/4 cup dry Freekah
1 ear of corn
Olive oil
Other vegetables according to preference
Small handful sunflower seeds.

For the Mint Pesto:
1 1/2 cups loosely packed fresh mint leaves
1 cup loosely packed baby spinach leaves
2 tbsp almond meal
1/2 hot chilli
Small garlic clove (optional)
1/4 cup olive oil
A good squeeze of lemon juice
Salt to taste

Make:

Place Freekah on the stove with twice the amount of water and 1 tsp salt.  Bring to the boil and simmer for 20-25 mins until cooked.  It should be tender but still a little firm and nutty. Drain, rinse  and set aside.

At the same time, boil the peeled corn in salted water in another pan for about 10 min.  Rub the corn with olive oil and char on an open flame or in the grill.  With a knife, carefully cut the corn off the cob.  Prep the other vegetables.

To make the pesto, blitz all the pesto ingredients (start with 1/2 tsp salt and add more to taste) in a food processor until a rough paste is formed.  Taste and add salt or lemon juice as needed.

Toss the pesto through the freekah.  Divide into 3 or 4 bowls.  Top with corn and whatever vegetables you choose. Finally, sprinkle with sunflower seeds.

Freekah Mint Veg Bowl (3 of 5)

Comfort…..

……is that old pair of jeans that has molded perfectly to every curve of your body.  The ones that used to be a bright azure denim but now, after a hundred washes and many more wears, is a murky blue-grey shade of its former self.  Comfort is slipping these on, feeling them conform to your skin obediently and diligently ignoring that thinning area over the backside that one day is bound to give up the ghost, taking your dignity with it.

Mac and Cheese Valli Little (1 of 4)

Comfort is bare feet.  The liberation you feel when you open the front door, kick off the shoes, stretch the toes and feel plush carpet between them.  It is going to the cinemas in your sweatpants and no make-up.  Comfort watches movies on the couch on New Years’ Eve while the world packs picnics, braves the crowds and catches trains home after midnight, blinking under fluorescent lights.

Comfort is a hug with one who you have hugged for so long that both your shapes have long ago imprinted into one another.

And yet comfort may be something else, like talking on a friend’s couch for hours about nothing and everything all at once.

Mac and Cheese Valli Little (4 of 4)

Comfort is edible.  It is dhal, hot and salty, gingery and lemony, popping with cumin.  It is a roast potato with plenty of butter, solid to slippery liquid as it hits the steaming flesh.  It is hot chocolate, cold beer or a well-earned glass of wine.

Comfort is cheese and pasta.  Mac ‘n’ cheese.  Waistline defying mouthfuls of perfectly yielding pasta in a melty yellow matrix.  Throwing nutrition and caution to the wind to embrace it, comfort on a plate.

This one is from a cookbook which is the latest offering in the delicious. series by Valli Little, titled Love to Eat (ABC Books, Harper Collins).  The book navigates the home cook through a global journey, with each section holding recipes that are Valli Little’s take on flavours of that part of the world.  Comfort from each of the world’s corners.  For lovers of this series, this latest addition doesn’t disappoint, with practical and mouth-watering recipes that any home cook can tackle.

Mac and Cheese Valli Little (5 of 1)

I have my eye on the Kashmiri Prawns from the Indian section and the Chilli Chocolate Puddings of Latin America.  But for now we have this Mac ‘n’ Cheese slice.  I used emmental instead of gruyere, rosemary instead of thyme based on what I could get my hands on at the time.  I unceremoniously dumped in a whole 500g boxful of pasta rather than the recommended 400g and found the recipe still worked well.  I also stopped short of pan frying the slices dusted with flour, mainly due to sheer laziness, but I’m sure this would add an extra layer of decadence.  The pasta I used was one from the Barilla gluten-free range, a shape that is cutely named ‘elbows’.  I wrapped the slices individually, refrigerating some to eat within three or four days, and freezing some.  They thawed very well and made a perfectly convenient lunch to look forward to.

What is your Comfort?

Disclosures: My copy of Love to Eat was sent to me by Harper Collins Australia, and pasta was provided by Barilla, but all opinions are my own.

Mac and Cheese Valli Little (3 of 4)

Mac ‘n’ Cheese Slice

From delicious. Love to Eat, Valli Little

Makes 7-9 serves

Get:

400-500 g macaroni or similar shaped pasta
Olive oil, to drizzle
2 cups milk
1 onion, halved
2 bay leaves
2 sprigs thyme or rosemary
1/4 tsp ground nutmeg
80g unsalted butter
1/4 cup plain flour
1 1/4 cups strong cheddar, grated
1 1/4 cups gruyere or emmental cheese, grated
1 1/4 cups parmesan, grated
1 egg, lightly beaten
Plain flour, to dust (optional)

Make:

Cook the pasta in boiling salted water according to packet instructions.  Drain and rinse in cold water.  Transfer to a bowl, drizzle with a little olive oil, toss to combine and set aside.

Combine milk, onion, bay leaves, nutmeg and herbs in a saucepan over medium heat adn bring to a simmer.  Set aside for 30 min to infuse.

Preheat the oven to 180 C.  Grease and line a large baking dish with greaseproof paper.

Melt 40g butter in a saucepan over low heat.  Add the flour and cook, stirring, for 1-2 mins.  Strain the milk into the pan, discarding the solids. Whisk the mixture until smooth and thickened.  Add the cheeses and stir to melt and combine.  Add the egg and stir to combine.  Season with freshly ground pepper and salt if needed.

Take the pan off the heat and add the pasta, toss to coat.  Transfer the mixture to the lined oven dish and spread evenly.  Bake for 30 mins or until the top is golden. Allow to cool completely then refrigerate for several hours or overnight.

Optional:

Cut mac ‘n’ cheese into 7 to 9 slices and dust with flour.  Melt the remaining 40g butter in a frypan and cook each slice as needed for 2-3 mins on each side until golden and crisp.

Mac and Cheese Valli Little (2 of 4)

Spinach, Baby Corn and Mung Dhal Curry + Nourishing Spinach Broth

The young man always set his stall up just outside the main gate.  He would line the steel canisters up on the cheap plastic table, leaving the lids on until the first few walkers would trickle past.  The gate behind him led into a paved path, which encircled a large man-made lake called Sankey Tank.  Every morning, the sweetly smiling, crisp shirted young man would peddle his wares to the local residents who walked or jogged the popular Bangalore path.

Two large signs rested against the front row of vessels.

Nutritious and Healthy Hot Soups are Available Here explained the first one

Next to it, the other sign went on to list the options: Hot Ragi (millet).  Palak and Methi (Spinach and Fenugreek). Vegetable. Baby Corn.  Aloe Vera and Wheat Grass. 

Spinach Baby Corn Mung 2

In the earlier part of the morning, it was mainly the office-goers he served, confidently ladling hot liquids until he achieved the mixture that each customer looked forward to.  They would drink quickly, blowing into their cups between sips, then rush off with a wave to begin a new day.  Later in the morning came the housewives and retirees, often in pairs or threes.  There was no air of urgency about this bunch and they would linger a little longer around his stall, sipping the spiced, healthful broth and exchanging news.

Spinach Baby Corn Mung 1

He wore no watch, but guessed the time according to the regulars.  The old man who fed the pigeons arrived at precisely eight am, and left at nine fifteen.  There was the trickle of school children that would begin at around 8.30 and trail off around nine. And the aunty who always wore a woollen beanie, regardless of the weather, usually arrived around ten.

Then, at around ten thirty, when all the walkers had walked, joggers had jogged and soup drinkers had drunk, the young man would meticulously pack away his things and head home.  Every day he would take pleasure in the lightness of the canisters at the end of the morning.  It made him happy that people liked his soup, so full of nourishment.  And it made him even happier that the cycle home from Sankey Tank at the end of his shift was always easier than the one he had done in the wee hours of the morning.

Spinach Baby Corn Mung 4

Spinach, Baby Corn and Mung Dhal curry

Get:

2 large bunches English spinach, leaves and tender stems only, finely chopped
8-10 fresh baby corns, sliced to 2-3mm pieces
1/3 cup dried split mung dhal
Salt
Lemon juice
Boiling water
Small handful coriander, roughly chopped

For the Tempering:
2 tsp vegetable oil
1 tsp black mustard seeds
1/2 tsp turmeric powder
1/2 tsp chilly powder
2-3 dried red chillies, broken into large pieces

Make:

Boil the spinach in 2-3 cups salted water (enough to submerge it) for 5-7 minutes.  Drain and reserve the water.

In a large non-stick saucepan, dry roast the mung dhal, stirring continuously until they have gained a little colour and are fragrant.  Remove from the saucepan and set aside.

Boil the sliced baby corn in plenty of salted water until they are starting to become tender.  Then add the roasted mung dhal and cook until the dhal is mostly but not completely cooked.  Drain and reserve the water.

In the non-stick saucepan, heat the oil and add the mustard seeds.  When the seeds have popped (adjust the heat to prevent burning them), add the other tempering ingredients.  Add the spinach and cook for a few minutes, then add the baby corn and mung dhal.  If the mixture is a bit dry, add a little of the spinach water.  Add salt to taste- start with 1/2 tsp.   Stir through, taste and add more salt if needed.  Cook, covered,  until the baby corn is fairly tender and until any excess water has evaporated (you may have to cook uncovered for a few minutes at the end).

Squeeze in a generous about of lemon juice (start with a tbsp, add more according to taste) and stir through just before serving.  Enjoy with your favourite Indian flatbread.

Nourishing Spinach Broth:

Get:

The spinach and baby corn water from the previous recipe
2-3 cloves of garlic, crushed
1 green chilli, split down the middle
1-2 tsp turmeric powder
Salt and lemon juice to taste

For the Tempering:
2 tsp vegetable oil
1 tsp cumin seeds
Make:

Boil all the ingredients (apart from the oil, cumin and lemon juice) in a pot for about 15-20 mins.  Add salt only if needed after tasting.  Strain the broth to remove the garlic and chilly.  In a separate small non-stick pan, heat the oil and add the cumin seeds.  When they have popped, add the mixture to the broth and stir.  Add lemon juice to taste.

Notes:

Mung Dhal, dry red chillies and all the spices are readily available in Indian grocery stores.

Spinach Baby Corn Mung 3

Cooking with Enrico

Gnocchi Pan fried 3

He would stride confidently into the dining room, his kingdom, all six foot something of him.  He was the pulse of Antica Tenuta Le Casacce…….big hair, big smile, big personality.  His welcomes were always warm, his attire always quirky, and his enthusiasm always infectious.

Every evening with pride, he would make a booming announcement at dinner before each course.  All the diners were served the same thing.  There were no menus, buffet or orders.  Instead, we all trusted that Enrico would look after us, fill our stomachs beyond belief and leave our palates wanting more.  When he appeared in the archway, we would stop shovelling forkfuls of his food into our mouths, put down our wine glasses and cease the chitter chatter to just listen.  Animatedly, the Roman chef would describe the course before us, proudly declaring the ingredients were of this land, the Tuscan land he loved.  With a flourish of his hand, he would finish with the most important of those ingredients…….

“My olive oil, and my love!”

It was only after I heard of his passing, not long after I had left Italy, that I realised what an instrumental part Enrico Casini had been in the happiness these two weeks away had brought me.  From his warm smile to his willingness to tailor my meals to exclude beef, a real feat when it came to Tuscan cuisine, he had made a real impact on our group.  Our group was one of the last few to be welcomed to Le Casacce by Enrico.  One of the last to share his kitchen with him for a pasta-making class.  Probably the very last to tease him about his kooky, colourful spectacles.

It is some reassurance to know that he died in his sleep, a smile on his face.  Perhaps it was the same smile he wore when he taught us how to make his favourite sauces, or the cheekier one he sported when he made it a point to assure me there was no beef in the Tiramisu.

Gnocchi Pan fried 2

After two previous gnocchi disasters, Enrico’s gnocchi recipe gave me my first success.  It is cloud-like and delicious cooked in the traditional way, in salted boiling water for a few minutes.  I choose instead to pan fry it, not with Enrico’s olive oil but using Spiral Foods’ Rosemary and Garlic oil.  The range of ‘Dip ‘n Toss’ oils is a range of delicately infused organic extra virgin olive oils that also includes Sundried Tomato & Basil as well as Garlic & Parmesan.  The oil brought a wonderful crispy skin to the pillowy ricotta gnocchi, as well as imparting a herbaceous, subtle flavour.  The enoki mushrooms do a great job of soaking up the rosemary and garlic flavours of the oil, but you could use thinly sliced button mushrooms if those are all you have on hand.  This is a ricotta gnocchi, and the cheese needs to be drained for at least a few hours, requiring some forward planning.

Gnocchi Pan fried 5               Gnocchi Pan fried 6

Pan-Fried Rosemary and Garlic Gnocchi with Enoki Mushrooms

Serves 2.  Gnocchi Recipe serves 4 and can be frozen for later use

Get:

500g fresh ricotta cheese
1 egg
1/4 cup grated parmesan cheese + extra for sprinkling
1/8 tsp grated nutmeg
Plain flour (about 1 cup + more for rolling)
Salt
Sprinkle of freshly grated pepper
4 tbsp + extra Spiral Foods Organic Rosemary & Garlic Dip ‘n Toss Oil
Generous handful enoki mushrooms, fibrous part of stems cut off
Small handful fresh parsley, finely chopped

Make:

To make the gnocchi, the ricotta needs to first be drained.  Tie the ricotta up in a clean cheese cloth or thin cotton tea towel and place in a colander.  Sit the colander in the top of a deep bowl.  Place a weight (I used a tub of rice) on top of the cloth covered ricotta and leave to drain for at least 4 hours or overnight.

Once the ricotta is drained, place it in a large bowl with the egg, parmesan, nutmeg, salt, pepper and 1/2 cup of flour.  Before you start kneading, have a large tray or two small ones ready, as well as a hand held sieve/strainer.  With clean hands, knead the mixture, combining well and adding more flour until a soft and slightly sticky dough is achieved.  I ended up using about 3/4 cup of flour.  Transfer the dough onto a clean, floured surface and knead for another minute or so.  Have a small pile of flour on one corner of the bench.  Pinch off golf ball sized parts of the dough and roll into logs about 1 to 1.5 cm thick.  Cut into 1cm wide pieces and add these to the pile of flour.  When you have made all the gnocchi, toss them well in the flour.  I found this easier to do in small batches.  Sieve the gnocchi to get rid of any excess flour.  Place on trays in a single layer to dry for an hour or so, then place any gnocchi that you are not intending to use immediately in an airtight container and in the freezer.

You will need about 2 cups of the gnocchi to serve 2 people.

In a large non-stick fry pan, heat 4 tbsp Spiral Foods Rosemary and Garlic Oil.  Add 2 cups of the gnocchi and fry on medium heat, turning the gnocchi over every couple of minutes so that it is evenly browned.  Toss in the mushrooms and a generous sprinkle of salt and cover.  Cook on low heat for a further 1-2 mins until the mushrooms are tender.  Toss through before serving.

Serve with freshly grated parmesan and finely chopped fresh parsley, as well as a generous drizzle of the oil.

**Disclosure: The Dip ‘n’ Toss oils were product samples provided by Spiral Foods, however this is not a sponsored post.  Opinions are my own.

Gnocchi Pan fried 4

Roasted Brussel Sprouts with Garam Masala and Coconut

Brussel Sprouts Masala 5

An airport meal is a ritual of mine every time I embark on an international trip.  I look forward to that time, after all charms and pleas are unleashed on the person behind the check-in desk to let those extra three kilos through without charge.  After that, toiletries in plastic snap-lock bags are placed in trays, boots and belts are removed, then awkwardly pulled on again, carry-ons are hauled onto security belts and the whole juggling act is carried out whilst waving the passport and boarding card at officials every step of the way.  Finally, when documents are put away carefully and bags are reassembled, there is a simple pleasure in sitting down, catching one’s breath and either hashing out a plan for the trip to come or reflecting on the adventure that was.

I am aware that when it comes to culinary let-downs, airport food is a close second to that on the flying machines themselves.  Food in that in-between land is always overpriced, limited in variety and invariably disappointing.  Bread that is slightly stale after spending the day in an overly air-conditioned environment.  Muffins that are similarly cold and dry.  Slices of ham that are dehydrated around the edges.  Scrambled eggs that can be lifted en masse from the plate.  Sandwiches whose cost might feed a small African nation for a day.

Brussel Sprouts Masala 1

I know all this, yet I always try and make time, between that madness of the security gates and the departure gates, to sit, reflect and have a meal at the airport.  On the way to Florence, I sat at Sydney airport and nutted out that feeling I always have when I am starting on a trip.  That niggle, like a tiny stone in a shoe, that I have forgotten something.  So I sat, stared at the ascending planes, gathered my thoughts, and dissected the niggle.  I sipped my medicinal coffee and chewed on my grilled (plastic) cheese sandwich, remembered what I had forgotten and realised with relief that it was something I could live without.  Just like that, I tipped the stone out of my shoe.

Brussel Sprouts Masala 2

It’s been a few days of pizza and pasta now, and this at about the point when I begin to crave something of home.  To me, Italian food comes only second to Indian food.  I love its simplicity- a toothsome pizza base, a well simmered sauce and a handful of basil, and it is at its best.  But after a few days, I do crave a vegetable or two, preferably home-cooked in Indian spices.  Green beans, stir-fried the South-Indian way or in this simple curry would do just fine.  Or this ivy gourd and coconut stir fry.  Or these brussel sprouts, rubbed with garam masala and coconut oil, then roasted until they are slightly sweet.  Tender but still offering some resistance against eager teeth.  Interspersed with chewier coconut.  These sprouts would do very well against my current carb overload, but would also make an amazing side dish, or a main meal with a couple of poached eggs on top.

Brussel Sprouts Masala 4

Roasted Garam Masala Brussel Sprouts

Feeds 2 as a main dish or 4 as a side dish

Based on Ina Garten’s recipe in The Barefoot Contessa Cookbook.

Get:

600g brussel sprouts
1/2 cup shaved coconut (use shredded if you can’t find this)
4 tbsp coconut oil, melted
3 tsp garam masala
1/4-1/2 tsp chilli powder
1 tsp cumin seeds
3/4 tsp salt
1/2 lime

Make:

Preheat the oven to 200 degrees.

Cut the stems off the brussel sprouts and cut them in half lengthwise.

In a large roasting pan, toss all the ingredients using your (clean) hands, rubbing the spices into the cut surfaces of the sprouts.

Roast for 35-45 minutes, tossing in the pan every 10 mins, until the sprouts are crisp-edged, tender inside, but still holding together and a little chewy.

Squeeze lime juice generously over it before serving.

Brussel Sprouts Masala 3

Eight Little Women

It was a time when rounded verandahs were all the fashion, and the two girls who were old enough to know this convinced their father that a rounded verandah was the thing to have.  The little ones looked on in awe as the teak doors were painstakingly carved by hand.  Eventually, curiosity would get the better of them and they would play with the sharp wood fragments, only to be shooed away by the old carpenter.  The same teak doors still separate the rooms of the fifty-something year old house, their carved patterns intact, their hue slightly darkened with age.

rangoli

My mother is the fifth of the eight, all girls. The older ones cared for and scolded their younger sisters, in equal measure.  Over the years, the solid brick walls absorbed the gleeful chatter, melodious singing and silly squabbles of eight little women.  Clothes were bought or home sewn, handed down, fought over and innovatively re-sewn.  Nothing was wasted or carelessly tossed away. Pleasures were simple and always shared.  A pretty piece of fabric, a small bag of sweets, a new song.

Thondekaye Palya 2

Education was deemed important beyond almost anything else. Nooks were claimed for study and the safe-keeping of books.  The table, a staircase landing, the stone used to wash clothes upon and the tiny attic above the third bedroom all became valuable study areas where books were devoured and exams were fretted over.  As the older girls graduated, their spaces were relinquished to be occupied by younger sisters.  Etched into the door of a small cupboard with a knife sharpened with procrastination, is the name of one of the sisters, the surrounding wood worn smooth by the years.

My grandparents saw no reason for eight daughters to be any less academically accomplished than if they had been eight sons.  Their thinking was progressive for their time and as a result, the house churned out an assortment of doctors, scientists, accountants and teachers.  Brass plaques that were nailed into the front door bearing names and once shiny new qualifications still adorn the dark wood.  Among the plaques sits the two oldest of them, one bearing my grandfathers name and the other bearing the name of the house.

Jyothi

A brilliant light.

Thondekaye Palya 1

Stairs along the side of the house led up to the open terrace, a common feature of houses of that time.  This wide open space was for daytime yoga sessions, afternoon naps on summer days and a makeshift salon where wet hair was dried before it was braided.  My grandmother would venture up there to dry chillies and tamarind on large blankets weighed down by rocks.  Diwali saw that terrace bathed in a glorious display of light when all the girls would race up there to set off firecrackers.  Later, the wrappers would be proudly carried down and piled in front of the house, lest the neighbourhood kids think that eight little girls couldn’t set off their share of explosions.

Marriages were arranged or beaus were found, kept secret, breathlessly whispered about and finally disclosed.  Weddings were organised, the youngest still giggly schoolgirls excitedly watching their akkas (older sisters) move away with the men they chose.

Later, there were grandchildren.  Small, sprightly offspring who would climb the bars surrounding that rounded verandah.  Quieter little ones who would curl into those same nooks with story books.  Aunty Jyothi, the very daughter for whom the house was named, lives in that house now with her family and so two more daughters have been raised between the solid walls, fed from the same kitchen and have crammed for exams in the same rooms.

Thondekaye Palya 3

During my recent visit, my cousin Chaitra and I spent a morning cooking in the kitchen of the house our mothers grew up in.  It was apt, and terribly exciting that she taught me to how to cook one of my favourite vegetables.  Thondekaye (Ivy Gourd), resembling tiny cucumbers, is available only in frozen form in Australia, although those in the UK can find it fresh in Indian stores.  My love of it is widely known amongst my mum’s side of the family, meaning that many of my aunts will indulge me by cooking me a thondekaye dish whenever I visit India.  So when Chaitra, who has flourished into quite the cook, offered to teach me how to make this Manglorean Thondekaye Sukha (dry stir-fry), I was in.

It is important to cut the whole thondekaye lengthwise, into quarters or sixths.  What happens is that each piece curls lovingly around the spiced coconut matrix, the flavours settling nicely between the internal ribbing.  The sharpness of chilli, hint of jaggery sweetness and sour notes of the tamarind are offset by the freshness of the coconut, and the tiny thondekaye wedges are the perfect vehicle for this intricate mixture.

Thondekaye Palya 4

That morning, my cousin and I cooked, giggled, chatted and cooked some more.  I chopped as Chaitra grated fresh coconut.  She roasted spices to fragrant perfection while I soaked tamarind.  Each step was patiently explained to me while I madly scribbled it all down.

So it was that we added new memories to the fifty-something year old kitchen.  And the gleeful chatter of two more women mingled and were absorbed into the walls of the house with the rounded verandah.

Thondekaye Palya 5

Thondekaye Sukha (Ivy Gourd and Coconut Stir-fry)

Get:
600 grams of fresh or frozen thondekaye (ivy gourd)
Ball of dried tamarind the size of a small lime
Boiling water
1 medium onion, diced
1 cup grated coconut, fresh or frozen (defrosted)
2 tsp grated or powdered jaggery
Salt
Small handful fresh coriander, chopped (optional)

For the Spice Mix
1/4 tsp coconut oil
2 tbsp coriander seeds
1/2 tbsp cumin seeds
1/4 tsp fenugreek seeds
4-5 black peppercorns
4 dried red chillies, broken into pieces
Generous pinch asofoetida
1/2 tsp urad dhal
10-12 dried curry leaves

For Tempering:
2 tbsp coconut oil
1/2 tsp mustard seeds
1/2 tsp urad dhal
1/4 tsp turmeric powder
6-8 fresh or dried curry leaves
2 small garlic cloves, slightly crushed

Make:
Break up the tamarind and soak in 1/2 cup of boiling water in a medium sized bowl. Mash with a fork and leave to soak until the water is cool enough to touch.  Then, with clean hands, squish the tamarind in the water until the water thickens.  Strain the water into another bowl.  The tamarind flesh can be discarded or stored in the fridge and used again within a few days.

Slice the thondekaye lengthwise into quarters or sixths, depending on how thick they are.  Frozen thondekaye usually comes pre sliced.  Immerse in salted boiling water and bring to the boil again.  Simmer on low-medium heat until the insides are tender but the skin still has a bite.  This will take 5-7 mins for frozen thondekaye, and longer for fresh.

In a large non-stick pan, warm 1/4 tsp coconut oil.  Add all the spice mix ingredients except the curry leaves.  Roast on low heat until fragrant and until the red chillies become brittle between the fingers.  Transfer the mixture to your mortar and pestle or spice grinder.  In the same pan, roast the dried curry leaves for a minute or so and add to the other spices.  Grind to a fine or slightly coarse powder.

In the same large pan, heat 2 tbsp coconut oil.  Lower the heat to medium and add the mustard seeds.  Take care not to burn them! When they have popped, add urad dhal, turmeric, curry leaves and garlic.  Stir-fry for a minute or so on low-medium heat until the dhal has gained a little colour.  Add the spice mixture and stir-fry for about 2 mins.  Then, add the diced onion and saute until translucent.  Add the coconut and toss to mix.  Pour in the tamarind water and sprinkle in the jaggery and 2 tsp salt.  Mix well and cook for a further minute.  Drain the thondekaye and add to the pan. Stir-fry for another 5 minutes.  Taste and add more salt if neccessary.  If the thondekaye is still a little undercooked, cover and cook, stirring intermittently, for a further 5-10 mins.  The thondekaye should be tender and yielding but not mushy.

Sprinkle with coriander, if desired, and serve with chapatis or mixed into rice with a little more coconut oil.

Notes:

Jaggery is unrefined Indian sugar and can be found at Indian grocery stores along with frozen thondekaye, coconut, the spices, urad dhal and dried tamarind.  Jaggery has a unique flavour but if you can’t get it, soft brown sugar should work.

You can of course use powdered spices instead of whole, but believe me when I say that when you start powdering your own spices, you will never want to go back to pre-powdered ones.


Thondekaye Palya 6

Orecchiette with Zucchini

Orchiette1

A holiday on the other side of the world is all well and good, but then there’s the jetlag to contend with.  Currently, sleeping through the night is somewhat of a challenge and staying awake at work is only achieved with multiple cups of coffee and not allowing myself to sit down for too long, anywhere.  These are the times that I am thankful that I do not have a desk job.

Orchiette4

Gradually, my brain is convincing my baffled body that night is day and day is night.  Is it just my imagination that this transition gets more challenging the older I get?

The plus side to being wide awake against my will at some unearthly time is that it gives me a few unaccounted for hours with which to do things.  My hunger pangs led me to trawl through the pantry before the sun was even up and in the midst of cramming everything that was remotely edible into my mouth, I came across some lovely pasta from the good people of Barilla.  One pasta bible, a quick scramble for herbs around the still-dark garden, and half an hour later, there was a tasty, nutritious lunch to look forward to on my first bleary-eyed day back at work.

Orchiette3

You use the zucchini raw but the thin slices get partially cooked by the acidic lemon juice.  Cool, right?  I am quite partial to Orecchiette but you can, of course, use any short pasta that takes your fancy. For more pasta-related shenanigans, try out one of the classes at Casa Barilla in Sydney.Orchiette2

Orecchiette with Zucchini

Serves 3-4

Slightly modified from Pasta by Carla Bardi (page 134)

Get:
2 medium zucchini (courgette)
1 or 2 small red chillies, finely chopped
Small handful fresh mint leaves, roughly chopped
1/2 tsp salt
Freshly cracked pepper, to taste
1 tbsp fresh lemon juice
4 tbsp extra virgin olive oil

250g good quality dried Orecchiette Pasta (I used Barilla)

Grated parmesan or pecorino cheese to serve

Make:

Using a vegetable peeler, shave the zucchini lengthwise into strips.  In a large bowl, toss the zucchini strips with the chillies, mint, salt, pepper, lemon juice and olive oil.  Leave for 20-30 min.

Cook the pasta in salted water according to packet instructions until al dente.  Drain and toss the pasta with the zucchini.  Taste and add more salt or pepper as neccessary.

Serve with a generous amount of parmesan or pecorino grated over the top.

This is NOT a sponsored post, however the pasta was kindly supplied by Barilla.

Orchiette5