Balconies and Baked Yoghurts

baked-yoghurt-1

It’s the first night it’s been warm enough to sit out on the balcony. The city lights shimmer in the distance, a deceptively calm façade to the Friday night revelry within. To the right, the single red glow atop the harbour bridge winks in its rhythm, in conversation with its twin that adorns the tip of centre-point tower. To the left of the nightscape is the distinct neon green squiggle of the holiday inn, a fluorescent stairway to heaven that is another reference point. The lights merge into a softly shimmering veil on the water of the harbour, now still without even a moving boat to disturb its surface.

From across the road, a wall of jasmine sends tendrils of sweetness over the railing, a comforting reminder of spring.  Below, a couple enjoy an evening stroll, elderly dog pottering on a lead before them. Diffuse puddles of light created by street lamps briefly illuminate the tops of their heads as they make their way down the street. Somewhere in the distance, base notes of dance music are scattered into the neighbourhood breeze from a house party. It’s loud enough to remind me that someone, somewhere is on a dance floor, but far enough away to leave me glad that it isn’t me.

There are worse ways to spend a Friday evening.

baked-yoghurt-3

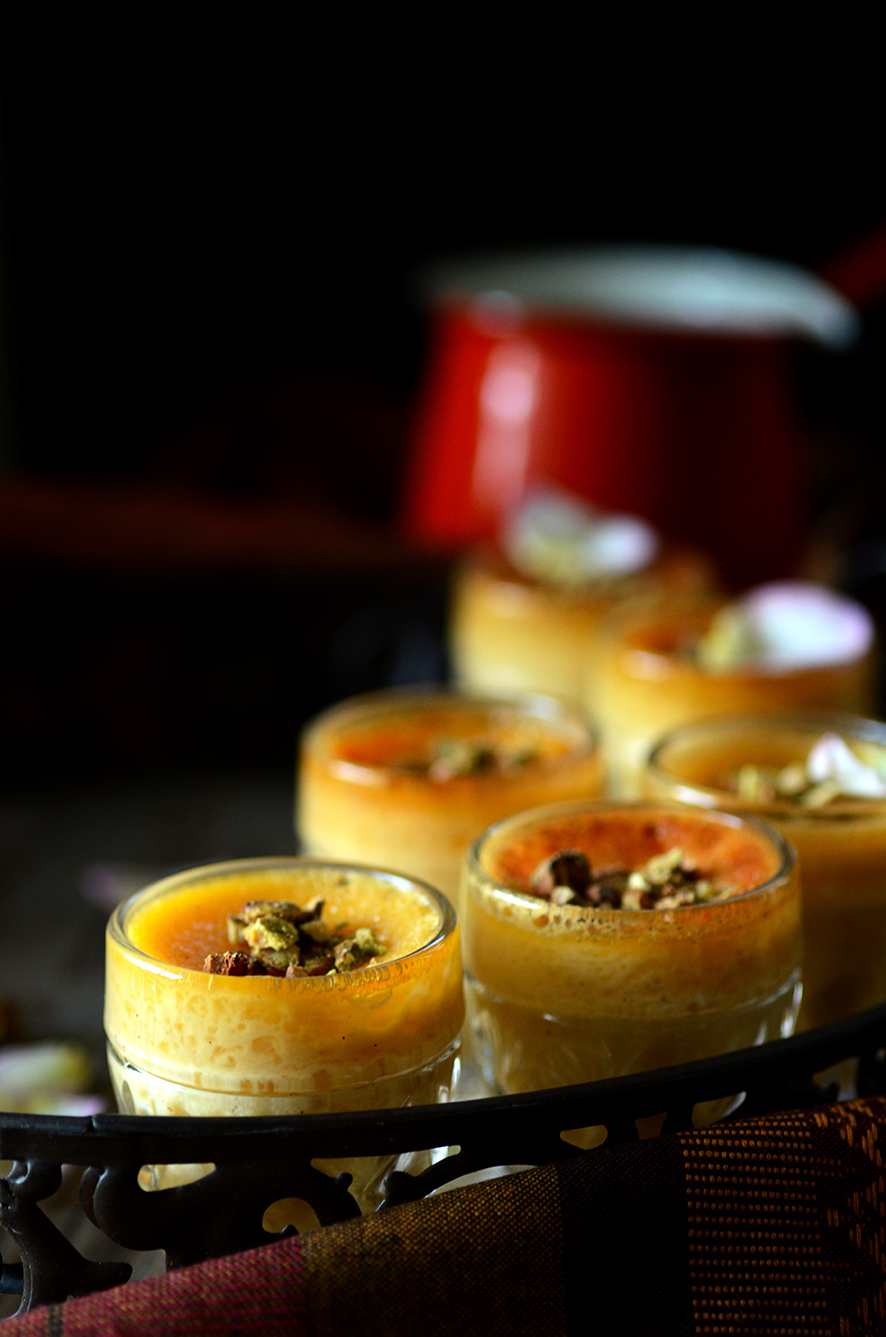
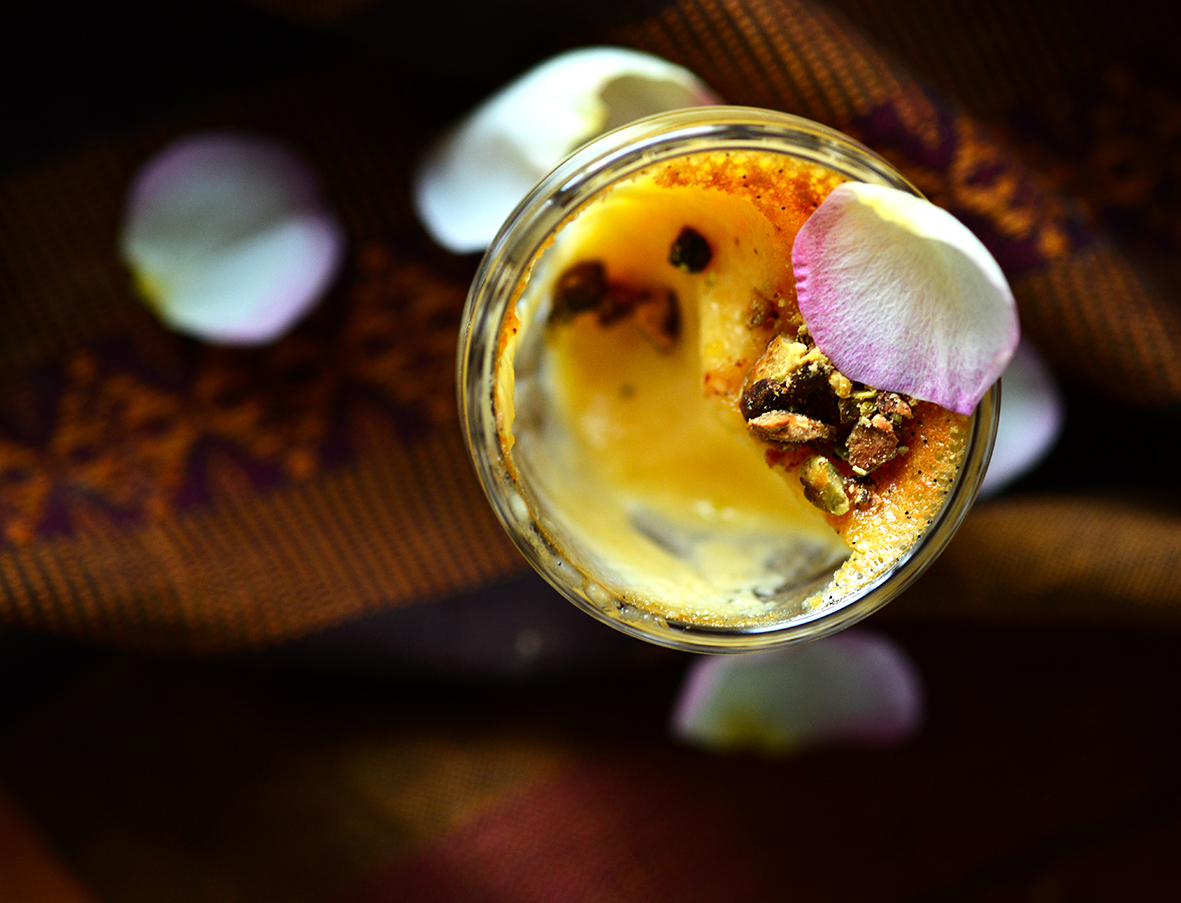
This dessert, if you get it right, is like scented silk.  The recipe’s simplicity is almost deceptive, and it almost seems unfair that something so divine can be so easy. It is an Indian dessert, but one I didn’t grow up with so when it was first made for me, I was in awe. While it is simple to make, it does take a little planning due to the hanging of the curd, baking, and chilling before it is ready to serve. Its’ texture is not unlike pannacotta if you get the baking time right. If you over-bake it, it will be a little coarser and more reminiscent of a cheesecake, and still lovely.

baked-yoghurt-2

Indian Sweet Baked Yoghurt with Cherry Vanilla Sauce

Makes 6

Get:
1 ½ cups full fat Greek yoghurt
1 tin sweetened condensed milk
¾ cup full-fat milk
Seeds of 6-8 cardamom pods, roughly powdered
Seeds of ½ a vanilla bean or ½ tsp vanilla paste
A few strands of saffron
Crushed nuts to serve

For the sauce:
200g pitted cherries, fresh or frozen
2 tbsp sugar
Squeeze of lemon juice
Seeds of ½ a vanilla bean or ½ tsp vanilla paste

Make:

Place the yoghurt in the centre of a piece of cheesecloth (for those in Australia, a clean Chux cloth works well). Tie the opposite corners together and suspend the curd from a low height where the whey can drip out. Try the faucet or a wooden spoon laid across the top of a bucket. Allow to hang for 1-2 hours.

Preheat the oven to 180 C.

If using saffron, warm a couple of tablespoons of the milk and add the saffron. Set aside for a few minutes. Place the thickened yoghurt, condensed milk, vanilla and cardamom in a large mixing bowl. Whisk or beat with an electric beater on low speed until combined. Add the milk and saffron milk (if using) and beat again until combined.

Divide the mixture between 6 ramekins or glasses. Place these in a deep oven dish and pour water into the dish and around the glasses so that the water level is ½ to ¾ to the level of yoghurt mixture. Place the dish in the oven and bake for 20-25 minutes, or until the yoghurts are set but still wobbly. Chill for at least 2 hours before serving.

To make the cherry sauce, place the sauce ingredients into a thick-bottomed saucepan with the vanilla bean husk if you used a bean. Add a splash of water (about ¼ cup). Bring to the boil, then reduce heat to a simmer. Cover and simmer on low heat for about half an hour, or until the cherries are easy to break down. Allow to cool, then discard the vanilla bean and blitz the mixture in a food processor until it is a rough puree. Spoon the mixture into the glasses on top of the chilled baked yoghurt. Top with crushed nuts just before serving.

Advertisement

Tefal Cook4Me and Spiced Chickpeas with Coconut

I’m the first to admit that I have control issues in the kitchen. The stove is a ship and I, its captain.  This makes it near intolerable for anyone who dares to help me put together a meal.  It also makes it very difficult for any sophisticated appliances to be truly useful in my kitchen.  My need for control means that I must stir the pot myself, pottering between that and chopping of the next ingredient to be added, while simultaneously shooing out anyone who ventures in.

Cook4Me 3 colours

When Tefal asked me to trial their Cook4Me Electric Pressure Cooker, I have to admit I was sceptical. I am a stovetop pressure cooker user from way back, refusing to be swayed even by an exploding-dhal-from prematurely-opened-cooker incident a few years ago.  Would I still be ‘hard core’ with an electric pressure cooker, I wondered?

I don’t know exactly when I officially joined the Tefal Cook4Me camp. Was it the heart-achingly moist, buttery fish fillets I made using the ‘Sweet Chilli Salmon’ recipe?  Or the realisation that I didn’t have to pay attention and count the whistles from a stovetop cooker in order to ensure my lentils were cooked but not pureed?  Whatever the trigger, the result is that I now use my Tefal Cook4Me almost every day.

You guys, this thing not only cooks things to perfection, retaining moisture and flavour, but it also tells you how to do it!! It is programmed with loads of gorgeous recipes that take you through the cooking process, step by step, for 2, 4 or 6 people. Even an intuitive cook like me is quite happy to minimise the firing of neurons at the end of the day and still end up with a delicious, healthy meal.  Also, this thing is one sexy looking machine! I know, I know……I saved the most important bit till last.

Picture 4166
Picture 4166

A lot of things are supposed to change your life these days…..appliances, cars, cosmetics. The Tefal Cook4Me may not change your entire life, but it sure will transform the way you cook, especially if you like quick, healthy, simple meals that are easy to clean up afterwards and so, so good to eat.

Oosli, or Spiced Black Chickpeas with Coconut, is a traditional South Indian Dish, popular during festival times but made throughout the year. It is a protein rich dish, perfect for those who rely on non-meat sources of protein, but also delicious as a filling workday lunch.  The earthiness of the legume is offset by the freshness of coconut and a subtle-but-definitely-there hint of lemon.  If you can’t find black chick peas, you can also use regular chick peas.

Tefal Cook4Me was kindly provided by Tefal Australia, however all opinions are my own.  Cook4Me images are from Tefal.

Spiced Chickpea coconut  (4 of 5)

Spiced Chickpeas and Coconut (Oosli)

Serves 2-4 as a side dish

Get:

1 cup dried small black chick peas, soaked overnight
2 tsp coconut or vegetable oil
1 tsp black mustard seeds
1/2 tsp turmeric powder
Pinch asafoetida
½ to 1 hot green chilli, split down the middle
2 dried red chillies broken into large pieces
8-10 curry leaves
3 tbsp fresh or fresh frozen (thawed) grated coconut
Salt
Lemon Juice
Small handful coriander, roughly chopped

Special Equipment:
Tefal Cook4Me Electric Pressure Cooker

Make:

Drain and rinse the soaked chickpeas. Place in the Cook4Me pot with plenty of the water (chick peas should be completely submerged with about 1 cm of water above them).  Choose manual on the Cook4Me panel and reduce the time using the dial to 2 minutes. Press ok to start.  Once your Cook4Me beeps to indicate that it is finished cooking, allow the pressure to dissipate (about 5-10 minutes).  Open the lid of the Cook4Me and remove the pot to drain the water from the chick peas.  The chick peas should be cooked through but firm.

Replace the empty pot into the Cook4Me and use the manual option to choose the ‘Browning’ setting. With the lid now left open, heat the oil in the Cook4Me pot.  Add the mustard seeds. Once they have popped, add turmeric, asafoetida, red chillies and green chilli.  Cook, stirring gently for 1-2 mins.  Add 4-5 curry leaves (they will splutter so step back or momentarily lower the lid).  Once the curry leaves have crisped, remove the green chilli and discard.

Drain the cooked chick peas and add to the pot. Add 1/2 tsp salt to start with.  Stir and leave to cook, with the lid lowered (but not latched), for a couple of minutes.  Add the coconut and remaining curry leaves, toss through.  Taste and add more salt if needed.  Stir again.

Turn off the Cook4Me and add 1 tsp lemon juice. Toss through, taste and add a little more lemon juice to taste.  The dish should be a little lemony but this shouldn’t be a dominant flavour.

Sprinkle with coriander just before serving. Serve as a side dish or as a vegan protein-rich main dish with flatbreads.

Notes:

All the ingredients should be available in Indian grocery stores.

Spiced Chickpea coconut (3 of 5)

Better with time

Being away from this space for four months has been tough.  It’s not that I didn’t want to be here, that I just wandered off without a care.  I thought about it a lot, I did! But this here little world of mine was crowded out by a new challenge, a study related one which according to the experts in my life makes me a glutton for punishment.

channa masala (1 of 4)

You see, if I post here, I want to be all here, giving it all I have.  This space needs nurturing.  It needs balance, the right amount of everything.  It is a cocktail, to be balanced with the right dash of spirit, a touch of sweetness and a zip of acidity.  It is a curry, spices tempered before the star of the show enters.  Cold tomato puree meets sizzling oil and popping cumin seeds.  The temperature plunges, then climbs again, liquid spluttering as the fire under the pot catches up.  In goes the protein and enough moisture to engulf it, stewing it in heat and flavour.  This is when you step back a little, letting the good things happen.  Chick peas that are firm to begin with, left to simmer in a sea of flavour, to soften slowly until they are barely holding together.  And when they meet a spoon or a tooth? All bets are off.

Those slowly softening chickpeas don’t ask for much.  A bath that is voluptuous with flavour.  For the sharpness of the chilli to tingle the tip of the tongue, then let others shine before it leaves an impression that accumulates with every bite.  That the slightly sour acidity of the tomato sings its song to brighten the palate.  That the sweetness of the onion and tomato develops with time, but never becomes more than an undertone.  And the salt? It’s the last to join the cacophony, in careful increments, giving all the other elements the power to do what they do best.

The chick peas soften, greedily absorbing spicy, sour, sweet and fragrant.  And we wait.  We cover, we simmer, we stir.  We stir first lovingly, then impatiently.  Most importantly, we taste and we tweak and we wait.

channa masala (3 of 4)

Like so many things, the flavour gets better with time.  A nice long simmer, yes but if you manage to make a big enough batch to save some for the next day, a type of magic happens overnight in that pot.  The kind of magic that makes yesterday’s curry strike an even deeper chord than it did when you first made it.  You see, a night together allows all the ingredients to get to know each other, to understand each other’s strengths and limitations, to work out how to interact harmoniously.  To wind up so flavourful that you can’t help but “Oh!” when you come back to it a day later.

There are probably a hundred or more minute variations to this classic dish. This is how I like it.  Plump, yielding chick peas.  A full-bodied sauce.  Sliced onions, a little firm and prominent enough to partner the chick peas.  And time.

Love, patience and time.

channa masala (2 of 4)

Channa Masala (Chick Pea Curry)

Get:
1 1/2 cups dried chick peas, soaked overnight or 2 tins of chickpeas
2 tbsp vegetable, canola or sunflower oil
1 onion, halved then sliced in half-rings
1/2 onion finely diced (you will use the other half in the sauce)
2 tsp Channa Masala
2-3 Bay Leaves
4 Cloves
3 tsp cumin seeds
1/2 tsp amchur powder
1/4 tsp chilli powder (optional)
Salt
Small handful fresh coriander, roughly chopped
Plain yoghurt (optional)

For the Sauce:
1 medium sized garlic clove, peeled
4cm fresh ginger, peeled
1/2 onion roughly chopped
1 tin tomato, or 4-5 ripe fresh tomatoes, quartered
2 hot green chillies
1 tsp salt
1/2 tsp coriander seeds
1/2 tsp cumin seeds

Make:

If using soaked dry chick peas, they will need to be soaked overnight.  Once soaked, cook them in a pressure cooker or over a stove until they are cooked but still quite firm.  If done over the stove, they will take at least 30 minutes.  Drain once cooked and set aside.  If using tinned chick peas, drain and rinse in cold water.

Lightly toast 1/2 tsp coriander seeds with 1/2 tsp cumin seeds in a pan, until fragrant.  Grind these together to a rough powder with a mortar and pestle or electric grinder.

Add to all the other sauce ingredients and 1 cup water in the bowl of your food processer. Pulse a few times until a reasonably smooth consistency is reached.

For the tempering, gently heat the oil in a large saucepan.  Do not allow the oil to reach smoking stage, use a moderate heat.  Add the 3 tsp of cumin seeds and when they have sizzled for a few seconds, add the cloves and bay leaves.   Add the diced onion half.  Fry for a few minutes on low-medium heat, taking care not to burn the cumin seeds, until the onion is a little softened.  Add the channa masala and chilli powder (for a spicier curry). Fry on low heat for another minute or so.

Add the sauce to the pan.  Add about 1/2-1 cup water to the food processor, blitz a few times, then add this water, with the remains of the sauce, to the pan.  Bring to a gentle boil, cover and simmer on low heat for 3-4 minutes.

Taste and add a little more salt or chilli powder if required. Drain and rinse the chick peas.  Add these to the pan, stir and cover.  Bring to the boil again and simmer on low-medium heat for about 30 min, stirring intermittently. Cook until the chick peas are softened and just holding together (they should not be allowed to disintegrate).  Add the sliced onions, separating the layers with your fingers, a few minutes before the chick peas are at that stage. If the sauce becomes too reduced, add a little water along the way to maintain a gravy consistency.

Taste and ensure the flavour is balanced how you like it.  Add a little more salt, chilli powder or amchur if needed.  if adding more chilli powder, cook for a few more minutes, stirring intermittently.  If you find the curry is too spicy, stir through 1-2 tbsp of plain yoghurt just before turning off the stove.  For a vegan option, leave out the yoghurt or use a little coconut cream.

Garnish with fresh coriander and serve with your favourite Indian bread, with raita or plain yoghurt on the side.  Like all other curries, this one tastes better the next day.

Notes:

Dried chick peas, Channa masala and amchur (dried green mango) powder, along with the other spices are available in Indian grocery stores.  Channa masala is a spice mix made specifically for this dish.

To speed things up use 1/2 tsp each of cumin powder and coriander powder instead of grinding these from whole seeds.  However I steer clear of bottled minced ginger and garlic.

Christmas Chivda (An Indian Street Snack)

Separating the beach from the road was a thickness of stalls that sold juice, tea, pav bhaji, fritters and other street snacks, the many-layered flavours of which could never be replicated in the sanitary conditions of a restaurant.  Rickety square stalls with torn calico coverings were stacked side by side, each a busily functioning unit within itself, much like cells in biological tissue.

Cries of vendors declaring the delights on offer were carried on the warm Bombay breeze alongside the scents of deep-fried chickpea batter, a myriad of masalas and the inescapable, faint undertone of sewage.  Juhu beach stretched beyond the bustle, less populated but still littered with vendors, children’s rides and sand artists with their temporary sculptures.

I would always ask for a paper cone, either filled with roasted peanuts or a dry street snack, Chivda.  They were portable, neat and most importantly allowed me to keep walking, the little girl trailing behind her parents.  They were also considered ‘safe’ to eat……not a drop of water or unwashed vegetable in sight.

Chivda (1 of 4)

When the lovely Claire of Claire K Creations organised the Foodie Secret Santa, I jumped at the chance to participate.  The idea is to make a Christmas treat and send it out to the three people you are allocated.  Soon enough, each blogger receives three treats from different bloggers.  So far I’ve received some moorish roasted peanuts and chilli jam from Claire herself, and some divine pecan balls that were reminiscent of a favourite childhood biscuit from another blogger who seems to wish to remain secret!

Chivda (2 of 4)

As Christmas is not a traditional festival for me, and I guessed that there would be plenty of sweetness in the air during this season as it was, I decided to make an Indian savoury street snack, Chivda.  This is my mum’s version, using flattened rice as the main ingredient.  We usually have a big bottle of this nestled in the pantry at any given time, to snack on with tea or to serve with cold drinks. The light, crisp rice flakes are dotted with crunchy peanuts and pleasantly interrupted by chewy coconut. A little salty with a suggestion of sweetness, it is naturally gluten free and vegan. Frying the poha (flattened rice) on a low heat does require some patience but after that, the process is fairly quick and uncomplicated.  This recipe makes a large quantity which can be stored in an airtight container at room temperature for at least a month or for longer in the fridge.

Here in Sydney the lead up to Christmas has been a sombre one, with the horrific tragedy of the Sydney Siege and news of other atrocities elsewhere in the world.  It seems all we can really do is pray for the human race and hope that the people affected can somehow go on to lead positive lives.  Despite everything, I wish you all, with all my heart, a Merry Christmas.

Chivda (4 of 4)

Chivda

Get:

 4tsp + 4 tsp vegetable oil
6 cups thin dried rice flakes (poha)
1 1/2 tsp black mustard seeds
1 cup raw peanuts
8 dried red chillies broken into large pieces
1/2 tsp turmeric
1/2 tsp asofoetida
25-30 fresh or dried curry leaves
1 cup coconut flakes
Salt to taste
3 tsp sugar

Make:

In a large heavy-bottomed frypan, heat 4 tsp oil.  Add the poha and reduce the heat to very low.  Toast the poha, stirring constantly to make sure the flakes are evenly toasted.  The poha should curl around the edges and gain a little colour very gradually over about 20 minutes.  When the poha has slightly browned and crumbles easily between your fingers, pour it into a large bowl and set aside.

Turn the heat up to medium and heat the remaining 4 tsp oil.  Add the mustard seeds and when they have finished popping, add the peanuts.  Take care not to burn the mustard seeds.  Fry the peanuts on medium heat, stirring constantly until they are a golden brown colour.  Add the turmeric, asofetida and curry leaves and fry, stirring, until the curry leaves have crisped.  Add the coconut flakes and fry, stirring, until they have browned a little.

Add the toasted poha back into the pan with the other ingredients with about 1/2 tsp salt and the sugar. Stir to mix well, but this time be gentle so that you do not crush the poha too much.  Taste and add a little more salt if needed, then stir again.

Transfer the chivda to a large bowl and allow to cool completely before packing into an airtight container.

Notes:

Poha, dried red chillies and spices are available at Indian grocery stores.

Chivda (3 of 4)

Spinach, Baby Corn and Mung Dhal Curry + Nourishing Spinach Broth

The young man always set his stall up just outside the main gate.  He would line the steel canisters up on the cheap plastic table, leaving the lids on until the first few walkers would trickle past.  The gate behind him led into a paved path, which encircled a large man-made lake called Sankey Tank.  Every morning, the sweetly smiling, crisp shirted young man would peddle his wares to the local residents who walked or jogged the popular Bangalore path.

Two large signs rested against the front row of vessels.

Nutritious and Healthy Hot Soups are Available Here explained the first one

Next to it, the other sign went on to list the options: Hot Ragi (millet).  Palak and Methi (Spinach and Fenugreek). Vegetable. Baby Corn.  Aloe Vera and Wheat Grass. 

Spinach Baby Corn Mung 2

In the earlier part of the morning, it was mainly the office-goers he served, confidently ladling hot liquids until he achieved the mixture that each customer looked forward to.  They would drink quickly, blowing into their cups between sips, then rush off with a wave to begin a new day.  Later in the morning came the housewives and retirees, often in pairs or threes.  There was no air of urgency about this bunch and they would linger a little longer around his stall, sipping the spiced, healthful broth and exchanging news.

Spinach Baby Corn Mung 1

He wore no watch, but guessed the time according to the regulars.  The old man who fed the pigeons arrived at precisely eight am, and left at nine fifteen.  There was the trickle of school children that would begin at around 8.30 and trail off around nine. And the aunty who always wore a woollen beanie, regardless of the weather, usually arrived around ten.

Then, at around ten thirty, when all the walkers had walked, joggers had jogged and soup drinkers had drunk, the young man would meticulously pack away his things and head home.  Every day he would take pleasure in the lightness of the canisters at the end of the morning.  It made him happy that people liked his soup, so full of nourishment.  And it made him even happier that the cycle home from Sankey Tank at the end of his shift was always easier than the one he had done in the wee hours of the morning.

Spinach Baby Corn Mung 4

Spinach, Baby Corn and Mung Dhal curry

Get:

2 large bunches English spinach, leaves and tender stems only, finely chopped
8-10 fresh baby corns, sliced to 2-3mm pieces
1/3 cup dried split mung dhal
Salt
Lemon juice
Boiling water
Small handful coriander, roughly chopped

For the Tempering:
2 tsp vegetable oil
1 tsp black mustard seeds
1/2 tsp turmeric powder
1/2 tsp chilly powder
2-3 dried red chillies, broken into large pieces

Make:

Boil the spinach in 2-3 cups salted water (enough to submerge it) for 5-7 minutes.  Drain and reserve the water.

In a large non-stick saucepan, dry roast the mung dhal, stirring continuously until they have gained a little colour and are fragrant.  Remove from the saucepan and set aside.

Boil the sliced baby corn in plenty of salted water until they are starting to become tender.  Then add the roasted mung dhal and cook until the dhal is mostly but not completely cooked.  Drain and reserve the water.

In the non-stick saucepan, heat the oil and add the mustard seeds.  When the seeds have popped (adjust the heat to prevent burning them), add the other tempering ingredients.  Add the spinach and cook for a few minutes, then add the baby corn and mung dhal.  If the mixture is a bit dry, add a little of the spinach water.  Add salt to taste- start with 1/2 tsp.   Stir through, taste and add more salt if needed.  Cook, covered,  until the baby corn is fairly tender and until any excess water has evaporated (you may have to cook uncovered for a few minutes at the end).

Squeeze in a generous about of lemon juice (start with a tbsp, add more according to taste) and stir through just before serving.  Enjoy with your favourite Indian flatbread.

Nourishing Spinach Broth:

Get:

The spinach and baby corn water from the previous recipe
2-3 cloves of garlic, crushed
1 green chilli, split down the middle
1-2 tsp turmeric powder
Salt and lemon juice to taste

For the Tempering:
2 tsp vegetable oil
1 tsp cumin seeds
Make:

Boil all the ingredients (apart from the oil, cumin and lemon juice) in a pot for about 15-20 mins.  Add salt only if needed after tasting.  Strain the broth to remove the garlic and chilly.  In a separate small non-stick pan, heat the oil and add the cumin seeds.  When they have popped, add the mixture to the broth and stir.  Add lemon juice to taste.

Notes:

Mung Dhal, dry red chillies and all the spices are readily available in Indian grocery stores.

Spinach Baby Corn Mung 3

Rose and Saffron Pots De Crème

Rose Saffron Pots 3

It’s a funny thing, is rosewater.  Too much of it in a dish and each bite is like a group hug with a gaggle of perfumed grannies.  Although, get the balance right and you are greeted with a sensation that is more a scent than a flavour.  A nuance that adds a romantic and intoxifying quality to the dish, whether it be a scented middle eastern fried rice, a soft and yielding Turkish delight or the Indian Gulab Jamun.

In India, rose is a default flavour, much like chocolate or strawberry in Australia.  Growing up, rose milk, rose Kulfi and the Gulkand (rose jam) that my mum used to buy me from tiny footpath stalls in Bangalore were well-loved and anything but exotic.

Rose Saffron Pots 4

We Indians have the middle-east to thank for rosewater, which was obtained by chemists in the ancient Islamic world using a steam distillation method.  We now not only use it in our cooking, but also in Ayurvedic medicine and as a perfume.  It is not uncommon for unsuspecting wedding guests to be sprinkled with a liberal amount of it upon their entry to the venue as a welcoming gesture.

Rose Saffron Pots 1

When a friend gifted me a copy of the beautiful Delicious Home Cooking by Valli Little, I immediately zeroed in on the recipe for Honey Pots De Crème, the cogs in my mind turning as I worked out how I could make it a fructose-free version with Indian flavours.  The result was a smooth baked custard wafting with the fragrance of roses and saffron, which lends itself to a biscuit for dipping or a sprinkling of nuts as it pleases you.

Rose Saffron Pots 7

Rose and Saffron Pots De Crème

Modified from Delicious Home Cooking, Valli Little (ABC Books, Harper Collins)

Serves 3-4 in ramekins or 7-8 in shot glasses

Get:

150ml thickened cream
1/4 cup + 1 tsp rice syrup or honey
1/4 cup milk
2 tbsp Rosewater*
Generous pinch saffron strands
1 egg plus 2 egg yolks
1/2 vanilla bean
1 tbsp pistachios (optional)

Make:

Preheat the oven to 160 C.

In a medium-sized saucepan, warm the cream, milk, rosewater, saffron and syrup or honey until just simmering (but not boiling!).  Stir gently to incorporate the syrup/honey. Take off the heat and allow to cool a little.

Split the vanilla bean and scrape the seeds into a mixing bowl.  Put the bean casing into the cream mixture.

To the bowl with the vanilla seeds, add the egg and egg yolks.  With an electric beater, beat until pale and a little thickened.  Add the egg mixture to the cream mixture and stir until well combined (do not beat or you will create more froth).  Set aside off the heat for 5 mins to infuse.  In the meantime, boil a kettle of water.

Place the ramekins (3 or 4) or shot glasses for smaller portions (8) in a deep ceramic baking dish.  You can also use small glass jars.  Strain the mixture into a jug and divide the mixture between the ramekins or shot glasses.

Set the dish with the ramekins on the middle shelf of the oven and carefully pour boiling water into the dish to a level about half of 3/4 of the way up the sides of the ramekins.

Bake for 40-45 mins or until set but with a slight wobble.

Remove the dish from the oven and carefully lift the ramekins out of the hot water and onto a tray.  Allow to cool completely, then chill in the fridge for at least an hour before serving.  I roasted the pistachios for about 6-7 mins, then crushed them and sprinkled them over the Pots de Crème before serving.  You could use anything that provides a bit of a crunch like other nuts, wafers or honeycomb.

*Rosewater is available at Indian and Middle eastern grocers.

Rose Saffron Pots 6