Orange, Almond and Pecan Cake (GF, V)

DSC_8005

We were away this past long weekend. Not far, less than two hours drive north of where we live. Briefly, I wondered why we were going away when we already live near the beach and could do a stay-cation without spending a cent. But a few hours into the holiday I knew. It was the otherness of it all, that just demanded relaxation. The absence of the urge to clean the bathroom, do laundry or even to stick to any kind of routine. It brought with it permission to just read, to move if it felt good, to open a bottle of wine at 3pm or to eat cheese with crackers on the beach in lieu of lunch.

A walk on the beach saw us clambering over boulders, hopping over waves that momentarily filled the spaces between them. We examined deep, straight fissures in rocky plains on the shore, concluding that they were the result of some long-ago sudden impact which sent shockwaves through the otherwise impenetrable stone. Over time, the sharp edges were worn into softly rounded ones on which tiny sea life made their homes. Colonies of perfectly formed grey sea snails no bigger than peppercorns crunched beneath our feet despite our best efforts to avoid them. We returned to the sand and an hour went by with us leisurely stretched out on beach towels, reading books.

On another afternoon, we meandered around the countryside visiting wineries and distilleries, sighing with pleasure when we sampled a wine made of rose petals here, wrinkling our noses not-so-subtly at the first sip of a gin infused with camomile somewhere else. Apple strudel, its buttery pastry filled with perfectly diced stewed apples was bought and shared with sips of hot tea while we lazed in hammocks. A slice of this cake would have also done nicely.

DSC_7988

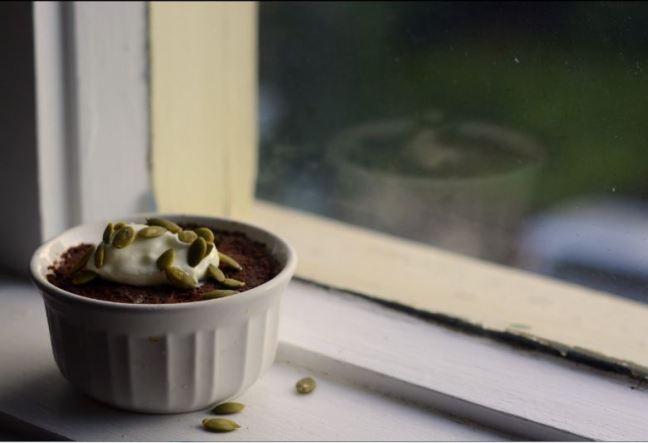
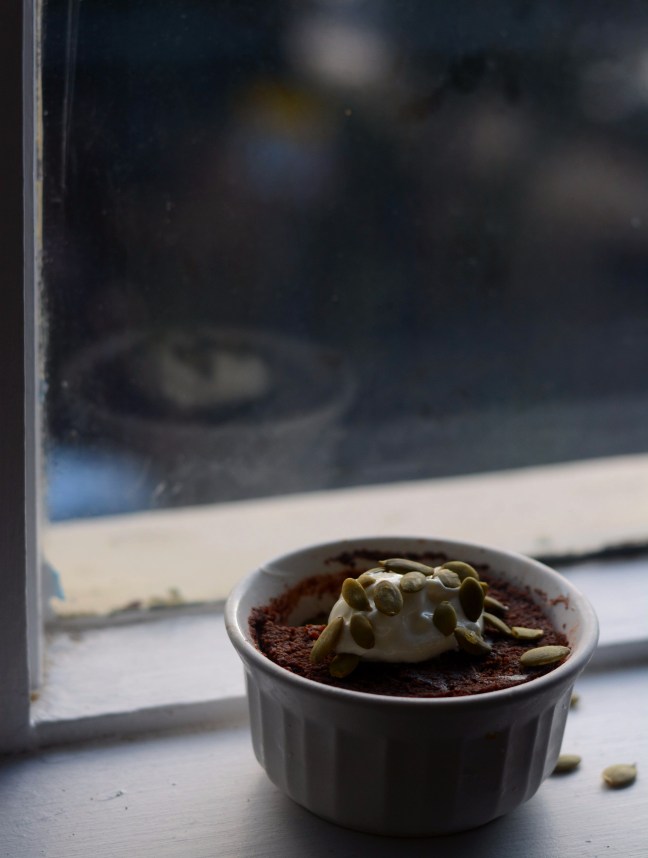
This is not a fluffy cloud of a cake. It is dense, mealy and quite frankly rather hideous looking. Rustic, if you will. This is not a cake that bothers itself with holding together or providing a scaffolding for decoration. The upside though, is that it’s very forgiving. If you don’t manage to get the aquafaba into soft peaks, fear not. Beat it for at least 4 or 5 minutes until it is nice and frothy, and the cake will still work, although without the soft peaks the result may be denser.  Forget to buy pecans? Nevermind, walnuts (or just pepitas) will work just as well. No cinnamon to be found? *Shrug* it’ll probably still be delicious. Try not to skip the cardamom though. It is vegan and gluten free. Most importantly, it is the crumbly, fall-aparty, syrup soaked nature of this cake that makes it utterly satisfying with a cup of tea.

DSC_7951

Orange, cardamom and pecan cake (GF, Vegan)

Ingredients:

6 tbsp aquafaba*
1/3 cup coconut oil
Zest of 2 oranges, finely grated
Juice of 2 oranges- 2 tbsp in cake, rest in syrup
2 cups almond meal
1 tsp baking powder
2tbsp honey for cake + 4 tbsp for syrup
1/3 cup pecans roughly chopped
1 tsp cinnamon
1 tsp Vanilla paste or powder
Pinch salt
4-6 cardamom pods- grind the seeds and reserve the skins
4 tbsp honey for syrup
Small handful pepitas or a few more pecans

Thick or whipped cream to serve

Method:

Grease a small loaf tin and line it with baking paper. Preheat the oven to 170 degrees C (340 F).

Use an electric beater (handheld or stand) to beat the aquafaba until soft peaks start to form. Add coconut oil, 2 tbsp honey, 2 tbsp orange juice, orange zest and coconut oil. Whisk briefly to combine. In a separate mixing bowl, sieve the almond meal. Add baking powder, cinnamon, vanilla, salt and ground cardamom seeds. Stir to combine.

Add the wet ingredients to the dry ones and stir gently to just combine. Add the chopped pecans and stir just a few times. The mixture will be quite a thick batter, but should still be pourable unlike a dough.

Pour into prepared loaf pan. Bake for 25-30 min on the middle shelf. On another tray, place the pepitas or remaining pecans and toast in the oven for the last 7-10 minutes. Remove cake from oven when a skewer passed into the centre of the cake comes out clean. Press toasted whole pecans into top of cake or sprinkle with pepitas. Press the nuts or pepitas lightly into the top of the cake.

To make the syrup

While the cake is cooking, place the remaining orange juice, 4 tbsp honey and the cardamom skins in a small heavy-bottomed saucepan and bring to a boil. Lower the heat and simmer for about 30 min or until the syrup thickens. The syrup should be about half as thick as maple syrup.

When the cake is cooked, still in the tin, and still warm, use a fork to poke holes all over the top. Pour the syrup evenly over the cake. Remove and discard the cardamom skins. Gently move the tin around to spread the syrup evenly. Leave at room temperature for at least 20 minutes for the syrup to soak into the cake.

Serve with thick cream and a cup of tea.

Notes:

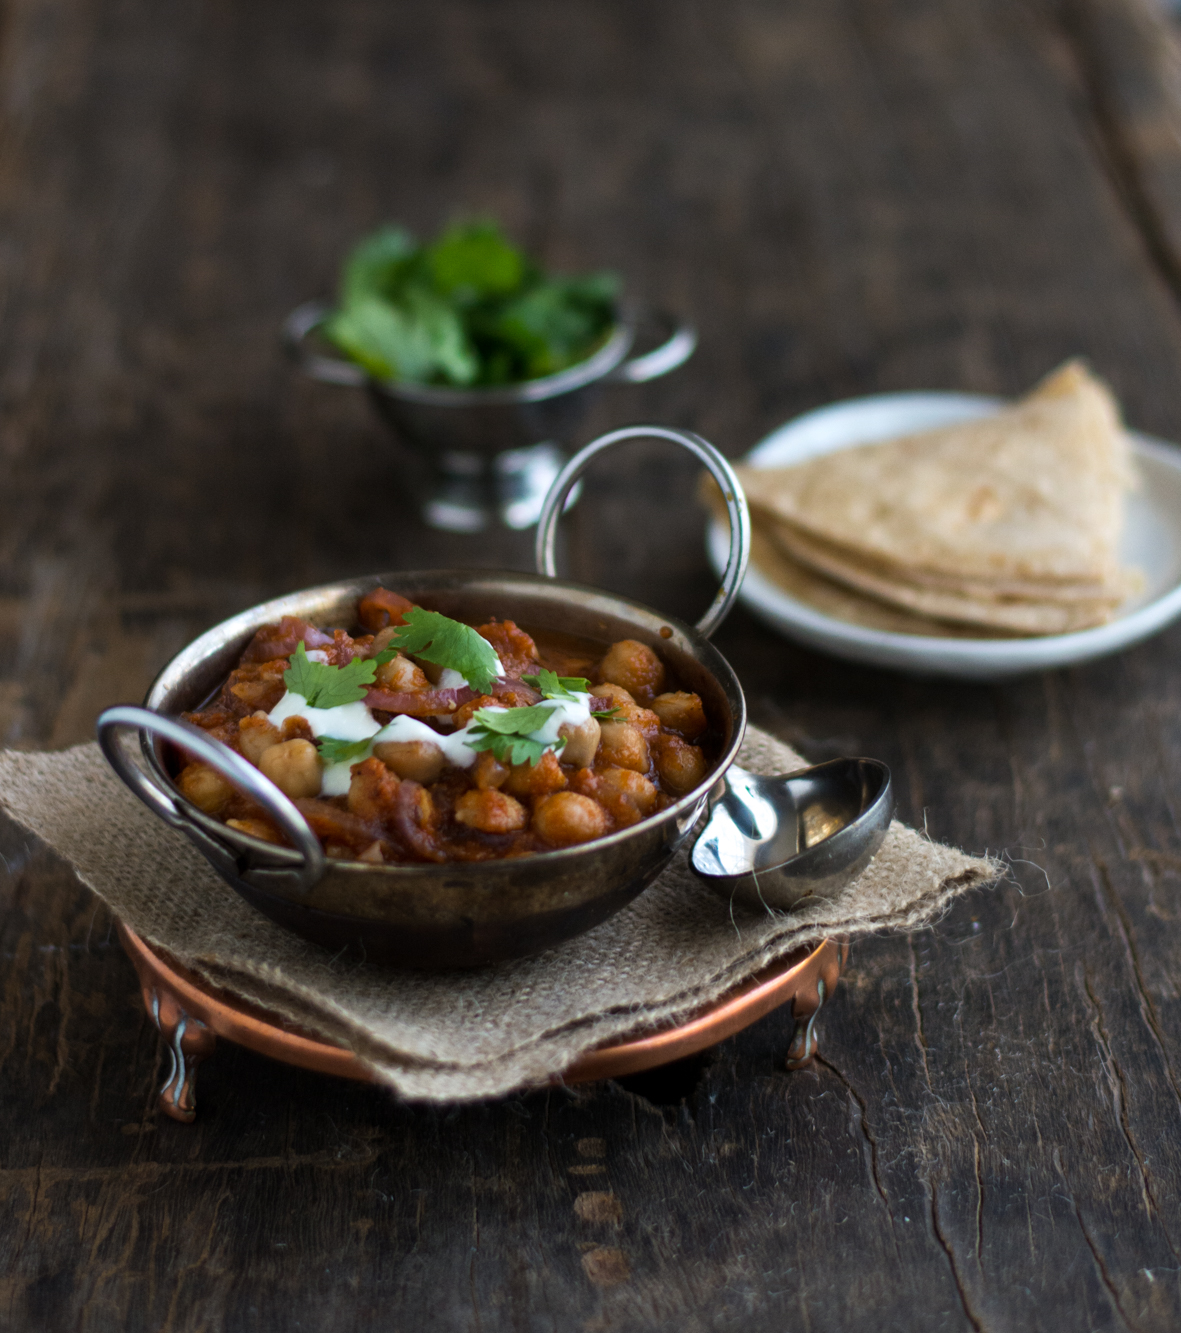
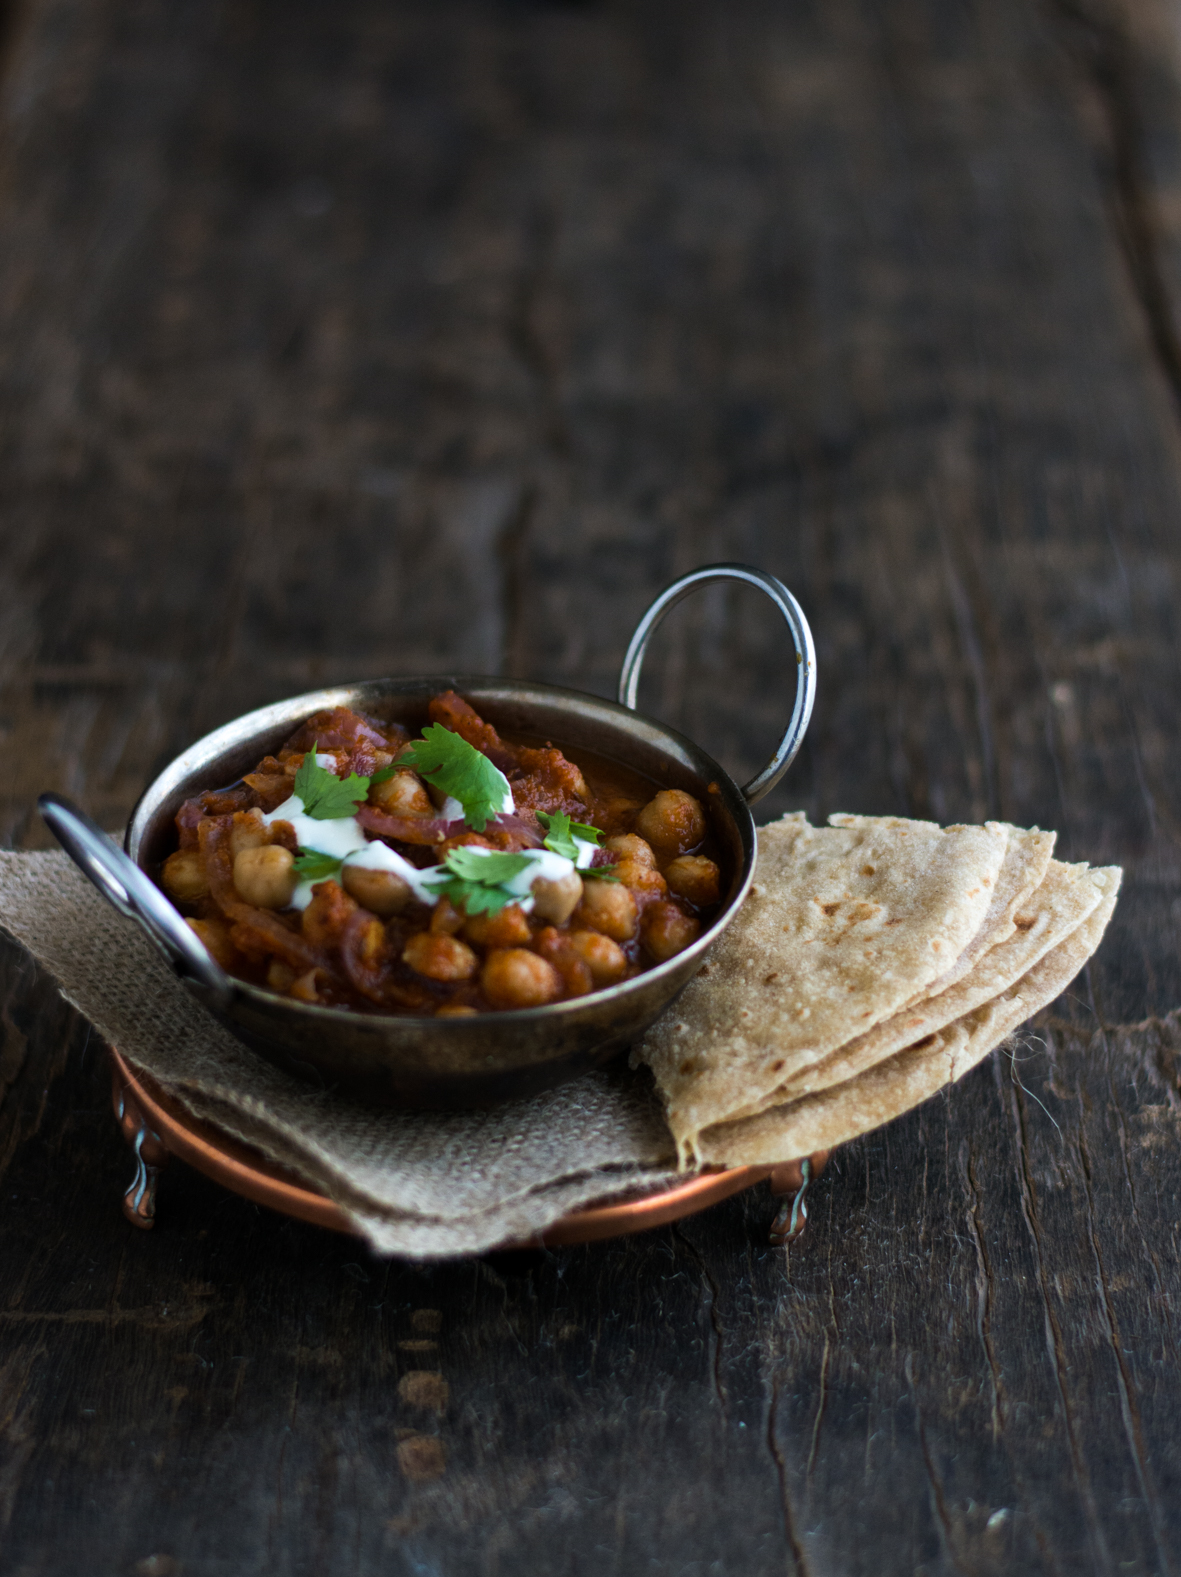
*Aquafaba is the liquid from a tin of chick peas or beans. You can also use the liquid that you would normally drain away after you cook chick peas or beans.

Advertisement

Lime and Pepper Rasam (broth)

The air has gotten a whole lot colder here in Sydney. Our balcony, while offering us unimpeded views of the city, is also exposed to sometimes aggressive winds. We often come home to find that anything that is not heavy or secured down has been ruthlessly thrown out of its place. Vegetation must be limited to heavy, solid pots against the sheltered wall. The gardenia I resurrected from a dried-up stick trembles behind the cane chair, refusing to bloom under such conditions. The spiny succulent sits against the door, resolutely maintaining its preference for the outdoors while it cowers in the corner of the door frame. There’s a trough of herbs which I planted with almost no hope for their survival, given my dubious history with keeping anything edible alive. Surprisingly, they stare at me defiantly, a few leaves tattered but still very much alive and almost productive enough to harvest for tossing through dishes.

Rasam Lime Pepper (4 of 10)_edited

The winter quilt and heaters came out a few weeks ago. Winter clothes were unraveled from suitcases, some forgotten about, the reminder of their existence like a small retail-therapy buzz. Dragging ourselves out of bed an hour earlier to fit in a gym session seems like a mammoth undertaking, and we are more frequently hitting the snooze button to favour a little extra time in the warmth instead. Noses run unbidden and at the most inconvenient of times. Our throats are scratchy on occasion and each time, we wonder whether it’s a cold or worse still, the dreaded flu.

There are cravings for soup and these are dutifully satisfied. Rasam is a South Indian staple. It is what every southie kid remembers eating several times a week, mixed with rice and accompanied by a vegetable side dish. It is the antidote to sniffles, colds, and even the dreaded flu. Rasam is a delicate balance of spice, sourness and salty undertones. It takes a little practice but it’s worth getting just so. This version uses limes, as I was gifted a bag of these by a generous colleague with an overactive lime tree. Also, pepper to soothe the throat, the comforting sourness of tamarind and a few basic spices. Rasam is often made with lentils, but this one is more of a clear broth.

For more wintery comfort foods, try this dhal, Palak Paneer, or this Egg Curry.

Rasam Lime Pepper (7 of 10)_edited

Lime and Pepper Rasam

Get:

1 golfball sized chunk of dried tamarind
2 L boiling water
7-8 cm fresh ginger, finely grated
½ tbsp freshly ground pepper
1 tsp whole peppercorns
1 tsp cumin powder
1 tsp coriander powder
1 ½ tbsp tightly packed soft brown sugar or jaggery
Salt to taste
3-4 tbsp lime or lemon juice
Small handful fresh coriander, roughly chopped

For tempering:

2 tsp vegetable oil
2 tsp cumin seeds
Pinch asofoetida (optional)
6-8 fresh curry leaves

Make:

Shred the tamarind with your fingers and place in a bowl with 1 cup boiling water, set aside. Place 6 cups boiling water in a medium sized saucepan on the stove. Add ginger, spices and jaggery. Bring back to a boil and then reduce to a simmer for 10 to 15 minutes. When the water that is soaking the tamarind is cool enough to handle, squeeze the tamarind within your fingers to extract the flavor into the water. Yes, it feels kind of gross but no pain, no gain. Set aside for another few minutes. Add salt to the rasam mixture, starting with 1 tsp. Stir to dissolve, and taste- you may need to add another ¼ to ½ tsp.

Strain the tamarind water into the rasam mixture, taking care not to include any chunks of tamarind. Simmer for another 10 minutes. If the mixture is getting too concentrated, add a little boiling water. Taste along the way. There should be a nice balance of pepperiness, and sourness form the tamarind which is offset by salt and sugar. Remember this is a savoury dish so sugar should not be the predominant flavor.

Once you are happy with the flavor balance, boil for another 10 minutes, then take off heat. Add 3 tbsp lemon or lime juice, taste and add a little more if a subtle flavor is not coming through.

To temper: In a small saucepan, heat oil on the stove. Add cumin seeds and allow them to pop. Add asofoetida, then curry leaves and stand back because they will sizzle and pop in a violent fashion. You may need to turn the heat down before you bolt to the other side of the kitchen. Once the spluttering tantrum is over, add the tempered mixture into the rasam and stir through.

Finally, add coriander leaves and stir. Serve mixed with rice or on its own as a clear soup. If it is a little too spicy for you, allow the sediment to settle and scoop the clearer liquid from the top, which will be less peppery.

Rasam Lime Pepper (1 of 10)_edited

Cucumber Raita

cucumber-raita-onesmallpot-3-of-5

I’ve been dabbling in a spot of scuba diving. A surprise to myself as well as those who know me. Being painfully un-athletic and colossally uncoordinated (who put that wall there?!), I never saw myself in a wetsuit, 20-something metres underwater, breathing from a tank and incredibly, not freaking out!

Being a serial over-thinker is something I’ve had to push aside. Because really, if I allowed myself the luxury of thinking about it……………..I am underwater, people!! Breathing from a tank!! With compressed air in my lungs!! Air that can diffuse into my bloodstream and form painful bubbles if I come to the surface too quickly!! This is not natural!! Humans were not supposed to breathe underwater!! What was I thinking?? Why would I jump out of a perfectly good boat or walk off a perfectly good shore to breathe through a tank underwater?!?!

So as you can see, my usual over-thinking habit has no place here. Instead, I am learning to quiet my mind and enjoy the peace and beauty of the underwater world. The stillness and slowness and floatiness of it all makes it a beautiful, almost a meditative experience.

If I’m lucky, I’ll see something awesome to distract me when my mind wanders to unwanted places. A gorgeous school of fish, zebra-striped with fluorescent green dorsal fins, engaged in a perfectly coordinated dance. An underwater flash mob.  Or will it be a baby shark, hiding under a soft coral, biding its time until it is big enough to survive the big bad ocean?

cucumber-raita-onesmallpot-4-of-5

Raita has nothing to do with scuba diving. Nothing whatsoever. There is nothing unnatural about this refreshing yoghurt dish, a standard side in every Indian restaurant. It is the cooling element to any Indian meal. This is the way I like it, with a base of smooth yoghurt, sans cream and sugar which seem to feature in many restaurant versions.  Ginger and some light spices give it depth but keep it light and refreshing. Finally, tempered cumin seeds add a crunch that makes you want to interpose them between your front teeth just to enjoy it.

cucumber-raita-onesmallpot-2-of-5

Cucumber Raita

Get:

2 cups loose/watery plain yoghurt OR 1 1/2 cups yoghurt and 1/2 cup water
2-3 cm ginger, finely grated
1/2 tsp cumin powder
1/2 tsp coriander powder
1/4 tsp mild paprika (optional)
Salt to taste
1 telegraph cucumber or 2 small lebanese cucumbers, finely diced (peeled or unpeeled)
1/2 small red onion, finely diced (omit this if you dislike raw onion)

For the Tempering:

1 1/2 tsp vegetable/canola/sunflower oil
1 tsp cumin seeds
4 or 5 curry leaves
2 dried red chillies
Small handful coriander, roughly chopped

Make:

Place yoghurt (or yoghurt + water) in a large bowl with ginger, cumin powder, coriander powder, paprika and 1/2 tsp salt. Stir with a whisk until well combined and smooth. Taste and add more salt if needed- the mixture should only be salty enough to neutralise the tartness of the yoghurt.  The mixture should be no thicker than a pancake batter, so add a little more water and stir through if needed.

Add cucumber and onion and stir through gently.

In a small non-stick pan, heat the oil. Turn the heat down to low-medium and add the cumin seeds. Once they have popped, add curry leaves and dried chillies. Fry for a minute or two until the leaves are crisp. If using fresh leaves, you may need to step back or use a lid to protect yourself from oil splutter (see my post on tempering here).  Add the oil mixture to the Raita and stir through.

Garnish with coriander and serve as a side dish.

cucumber-raita-onesmallpot-5-of-5

A Giveaway! And Chocolate Cake for One (Vegan, Gluten-free).

It’s been almost a decade since I last lived on my own, in a poky little flat above a veterinary clinic in North-West London. It was furnished with mismatched, tired looking pieces, and in the kitchen was a washing machine which I initially thought was cactus.  One day, a couple of kicks and a few expletives later, it miraculously came back to life and worked surprisingly well from then onwards.

The flat shared an entry with the clinic’s waiting room, and so I would often find myself sidling past curious wet noses who would sniff eagerly at my bags of groceries on the way in or garbage on the way out. The bathroom was adorned in lustrous, cracked maroon tiles with gold accents that may have had its’ glory days in the 1970’s. Entertainment was provided intermittently by the patrons of the Irish pub next door and by another neighbour who would regularly and loudly assure the entire neighbourhood that ‘Jesus would save them!’ at convenient times such as four o’clock in the morning. The apartment was what the kinder of us would call ‘full of character’, an apt introduction to the colourful place that is London.

At the time, I bought myself a book called Live Alone and Like it by Marjorie Hillis, whose cover declared it to be ‘A 1935 Bestseller’. The quirk in me couldn’t resist as not only was it on the ‘3 for 2’ table at Borders, but it boasted chapters titled A Lady and Her Liquor, Pleasures of a Single Bed and the intriguing You’d Better Skip This One.

Ms Hillis’ advice, although many decades old, is strangely still relevant. She advises against self-pity at being alone, warning that “Not only will you soon actually be all alone; you will also be the outstanding example of the super-bore”.  She doles out practical advice on the merits of saving money, for example, and cautions that “…..eventually, if no husband has turned up and no obliging relative has died, there comes a horrid conviction that putting aside a little something for a rainy day is not such a bad idea.”  In a chapter delightfully headed When A Lady Needs a Friend, Marge gets straight to the point with “….the truth is that if you’re interesting, you’ll have plenty of friends and if you’re not, you won’t- unless you’re very, very rich”.  Truest of all are her words on furnishing and decor, “This is your house, and it’s probably the only place in the world where you can have things exactly as you please.”

And the discovery that I could do just what I wanted in my space was a delightfully liberating one. Bake cookies at midnight! Paint the wall bright blue! Accumulate framed art that I never hang! Walk around without pants on! (Close the blinds first!!)

Oh…..and chocolate cake for dinner!

I want to equip you with this recipe, for those times when nothing but chocolate cake will do. This is a recipe for chocolate cake for one, made in the Tefal Cook4Me electric pressure cooker (which I have gushed about previously in my last post), so that it’s nice and moist.  If you are interesting enough to have a friend or a chocolate-loving date over, then just double the recipe and divide it into two ramekins.  It is gluten free, can be easily made vegan, and is (gasp!) even nourishing, with its healthy fats and proteins.  Most importantly, it is quick to make and fuss free.

choc pud 2b

Oh! Oh! Oh!! I also have some gorgeous Tefal 17cm Santoku knives to give away to you, my dear readers! To enter, drop me a comment here.  What I want to know is, what do you enjoy doing when you have the house to yourself?  Please keep it clean, obviously! I will pick a couple of my favourite revelations to send these gorgeous, soft-handled knives to.  I can only send to Australian addresses, and you can enter as many times as you want with separate comments.

So tell me, what is your favourite home-alone activity or indulgence?

*Cook4Me and Santoku knives were kindly provided by Tefal, however all opinions are my own.

choc pud 3

Pressure Cooker Chocolate Cake for One

Get:

1/3 cup almond meal
1 tbsp buckwheat flour
½ tsp baking powder
2 tbsp cocoa powder or raw cocoa
2-3 tsp brown sugar
¼ tsp vanilla paste or powder
Tiny pinch salt
2 tsp milk (use non-dairy milk for vegan option)
1 tsp coconut oil, melted
1 tsp full-fat youghurt or aquafaba (for vegan option)

1 1/2 cups water

Make:

Place all the ingredients apart from the water in a small mixing bowl and mix until just combined. Place in a ramekin.

Remove the steamer basket from the Tefal Cook4Me. Pour 1 1/2 cups of water in the bottom of the main pot. Place the ramekin in the main pot. The water should come up to about halfway up the outside of the ramekin.

Close and lock the lid of the Tefal Cook4Me. Choose recipes, then choose the ‘Chocolate Sponge Pudding’ setting.  Press enter through all the steps and then accept the cooking time.

When cooked, carefully remove the hot ramekin from the cooker and eat the cake straight out of the ramekin with a dollop of cream, ice-cream or Greek yoghurt. Feel free to enjoy for dinner without judgement or disapproving eyes.

Notes:
Aquafaba is the liquid from a can of chick peas or beans, or the cooking liquid from the same. It is full of protein and a great vegan egg replacer.

Tefal Cook4Me and Spiced Chickpeas with Coconut

I’m the first to admit that I have control issues in the kitchen. The stove is a ship and I, its captain.  This makes it near intolerable for anyone who dares to help me put together a meal.  It also makes it very difficult for any sophisticated appliances to be truly useful in my kitchen.  My need for control means that I must stir the pot myself, pottering between that and chopping of the next ingredient to be added, while simultaneously shooing out anyone who ventures in.

Cook4Me 3 colours

When Tefal asked me to trial their Cook4Me Electric Pressure Cooker, I have to admit I was sceptical. I am a stovetop pressure cooker user from way back, refusing to be swayed even by an exploding-dhal-from prematurely-opened-cooker incident a few years ago.  Would I still be ‘hard core’ with an electric pressure cooker, I wondered?

I don’t know exactly when I officially joined the Tefal Cook4Me camp. Was it the heart-achingly moist, buttery fish fillets I made using the ‘Sweet Chilli Salmon’ recipe?  Or the realisation that I didn’t have to pay attention and count the whistles from a stovetop cooker in order to ensure my lentils were cooked but not pureed?  Whatever the trigger, the result is that I now use my Tefal Cook4Me almost every day.

You guys, this thing not only cooks things to perfection, retaining moisture and flavour, but it also tells you how to do it!! It is programmed with loads of gorgeous recipes that take you through the cooking process, step by step, for 2, 4 or 6 people. Even an intuitive cook like me is quite happy to minimise the firing of neurons at the end of the day and still end up with a delicious, healthy meal.  Also, this thing is one sexy looking machine! I know, I know……I saved the most important bit till last.

Picture 4166
Picture 4166

A lot of things are supposed to change your life these days…..appliances, cars, cosmetics. The Tefal Cook4Me may not change your entire life, but it sure will transform the way you cook, especially if you like quick, healthy, simple meals that are easy to clean up afterwards and so, so good to eat.

Oosli, or Spiced Black Chickpeas with Coconut, is a traditional South Indian Dish, popular during festival times but made throughout the year. It is a protein rich dish, perfect for those who rely on non-meat sources of protein, but also delicious as a filling workday lunch.  The earthiness of the legume is offset by the freshness of coconut and a subtle-but-definitely-there hint of lemon.  If you can’t find black chick peas, you can also use regular chick peas.

Tefal Cook4Me was kindly provided by Tefal Australia, however all opinions are my own.  Cook4Me images are from Tefal.

Spiced Chickpea coconut  (4 of 5)

Spiced Chickpeas and Coconut (Oosli)

Serves 2-4 as a side dish

Get:

1 cup dried small black chick peas, soaked overnight
2 tsp coconut or vegetable oil
1 tsp black mustard seeds
1/2 tsp turmeric powder
Pinch asafoetida
½ to 1 hot green chilli, split down the middle
2 dried red chillies broken into large pieces
8-10 curry leaves
3 tbsp fresh or fresh frozen (thawed) grated coconut
Salt
Lemon Juice
Small handful coriander, roughly chopped

Special Equipment:
Tefal Cook4Me Electric Pressure Cooker

Make:

Drain and rinse the soaked chickpeas. Place in the Cook4Me pot with plenty of the water (chick peas should be completely submerged with about 1 cm of water above them).  Choose manual on the Cook4Me panel and reduce the time using the dial to 2 minutes. Press ok to start.  Once your Cook4Me beeps to indicate that it is finished cooking, allow the pressure to dissipate (about 5-10 minutes).  Open the lid of the Cook4Me and remove the pot to drain the water from the chick peas.  The chick peas should be cooked through but firm.

Replace the empty pot into the Cook4Me and use the manual option to choose the ‘Browning’ setting. With the lid now left open, heat the oil in the Cook4Me pot.  Add the mustard seeds. Once they have popped, add turmeric, asafoetida, red chillies and green chilli.  Cook, stirring gently for 1-2 mins.  Add 4-5 curry leaves (they will splutter so step back or momentarily lower the lid).  Once the curry leaves have crisped, remove the green chilli and discard.

Drain the cooked chick peas and add to the pot. Add 1/2 tsp salt to start with.  Stir and leave to cook, with the lid lowered (but not latched), for a couple of minutes.  Add the coconut and remaining curry leaves, toss through.  Taste and add more salt if needed.  Stir again.

Turn off the Cook4Me and add 1 tsp lemon juice. Toss through, taste and add a little more lemon juice to taste.  The dish should be a little lemony but this shouldn’t be a dominant flavour.

Sprinkle with coriander just before serving. Serve as a side dish or as a vegan protein-rich main dish with flatbreads.

Notes:

All the ingredients should be available in Indian grocery stores.

Spiced Chickpea coconut (3 of 5)

True-Brown Aussie

Mango mac coconut truffles onesmallpot (1 of 3)

My first long haul flight was when I was just over the threshold of eight years of age.  I’m afraid my memories of it are scant, the strongest one being that I had the special job of carrying the mantapa, the small Hindu altar that my great-grandfather had carved out of rosewood.  A close second is the memory of the confusing emotions that each of us, myself and my parents, carried with us.  A healthy scoop of excitement stirred through a pinch of sadness and a heaped tablespoon of apprehension at the thought of starting a new chapter at our destination, Australia.

I had no appreciation of how brave my parents were then, leaping into a new life in a country they had never even visited.  Approaching with a few thousand rupees, a weak currency against the dollar even then, and a pocketful of hope, we were Sydney-bound with very little idea of what to expect.  As a family, we learnt our way around not only the Sydney streets, but also the Australian culture and vernacular.  We learnt fairly quickly that “How ya going?” invited an answer of “Good thanks!” or “Not bad!”, and not the reply “By bus!”.  It was a hard lesson when we realised that ‘Bring a plate’ meant a prepared dish, not what the phrase implies in a literal sense.

More than twenty-five years later, we are about as Australian as the average Australian.  We make pakoras on Christmas day, party on New Year’s Eve and go to the temple for Hindu new years.  When asked about our background we identify as Indian but while travelling outside Australia we are fiercely proud to declare ourselves Aussie.  We wear saris and bindis at Diwali to exchange gifts of new clothes, and gorge on chocolate eggs at Easter.  Rather than barbeques laden with meat and onions on Sunday afternoons, we spread dosa (south Indian rice crepes) onto hot pans and dunk them in chutney and sambhar.  On  Australia day, we have the added celebration of Indian Republic day, an interesting coincidence.  Some years, to be honest, it’s simply rest-day or spring-cleaning day!

The mantapa now inhabits my spare room, enclosing my small shrine.  It is where I pray before I go forth to conquer the day and before I sit down to a meal, whether Indian, Italian, Thai or Australian.  Like me, it is Indian-manufactured and Australian-developed, it’s wood as solid and un-weathered as my cultural identity.

Mango mac coconut truffles onesmallpot (3 of 3)

There are days when I feel not Indian enough and a few cents short of Aussie enough.  And other days when I know I am standing comfortably in the middle of the see-saw, perfectly balanced.  I am more a True-Brown Indian-Australian than a True-Blue Aussie, and this seems to work just fine.

Mangoes and coconuts are well-loved ingredients in both India and Australia and the Mango-Macadamia combination is a popular on in my adopted country.  These truffles pack all the flavour of mangoes, with the textural elements of coconut and macadamia butter.  They are vegan and free of refined sugar and gluten.

Happy Australia Day and Indian Republic day folks!

Mango mac coconut truffles onesmallpot (2 of 3)

MMC (Mango, Macadamia and Coconut) Truffles

Get:

100g dried mango, soaked in water for 1-2 hours
1/3 cup macadamia butter
2 tbsp coconut sugar
1/4 cup sunflower seeds
3 tbsp protein powder
1 tbsp flaxseed meal
2 tbsp quinoa flour (or another 2 tbsp protein powder)
1/4 cup shredded coconut + more for coating
Coconut oil (optional)

Make:

Drain the water from the soaked mango.  Pulse the mango with all the ingredients, except for the extra shredded coconut and the coconut oil, in a high-speed food processor, until a smooth mixture forms.  Roll into tbsp sized balls, adding a little coconut oil if the mixture is too firm. Toss the truffles in the extra shredded coconut and refrigerate for at least 4-6 hours.

Better with time

Being away from this space for four months has been tough.  It’s not that I didn’t want to be here, that I just wandered off without a care.  I thought about it a lot, I did! But this here little world of mine was crowded out by a new challenge, a study related one which according to the experts in my life makes me a glutton for punishment.

channa masala (1 of 4)

You see, if I post here, I want to be all here, giving it all I have.  This space needs nurturing.  It needs balance, the right amount of everything.  It is a cocktail, to be balanced with the right dash of spirit, a touch of sweetness and a zip of acidity.  It is a curry, spices tempered before the star of the show enters.  Cold tomato puree meets sizzling oil and popping cumin seeds.  The temperature plunges, then climbs again, liquid spluttering as the fire under the pot catches up.  In goes the protein and enough moisture to engulf it, stewing it in heat and flavour.  This is when you step back a little, letting the good things happen.  Chick peas that are firm to begin with, left to simmer in a sea of flavour, to soften slowly until they are barely holding together.  And when they meet a spoon or a tooth? All bets are off.

Those slowly softening chickpeas don’t ask for much.  A bath that is voluptuous with flavour.  For the sharpness of the chilli to tingle the tip of the tongue, then let others shine before it leaves an impression that accumulates with every bite.  That the slightly sour acidity of the tomato sings its song to brighten the palate.  That the sweetness of the onion and tomato develops with time, but never becomes more than an undertone.  And the salt? It’s the last to join the cacophony, in careful increments, giving all the other elements the power to do what they do best.

The chick peas soften, greedily absorbing spicy, sour, sweet and fragrant.  And we wait.  We cover, we simmer, we stir.  We stir first lovingly, then impatiently.  Most importantly, we taste and we tweak and we wait.

channa masala (3 of 4)

Like so many things, the flavour gets better with time.  A nice long simmer, yes but if you manage to make a big enough batch to save some for the next day, a type of magic happens overnight in that pot.  The kind of magic that makes yesterday’s curry strike an even deeper chord than it did when you first made it.  You see, a night together allows all the ingredients to get to know each other, to understand each other’s strengths and limitations, to work out how to interact harmoniously.  To wind up so flavourful that you can’t help but “Oh!” when you come back to it a day later.

There are probably a hundred or more minute variations to this classic dish. This is how I like it.  Plump, yielding chick peas.  A full-bodied sauce.  Sliced onions, a little firm and prominent enough to partner the chick peas.  And time.

Love, patience and time.

channa masala (2 of 4)

Channa Masala (Chick Pea Curry)

Get:
1 1/2 cups dried chick peas, soaked overnight or 2 tins of chickpeas
2 tbsp vegetable, canola or sunflower oil
1 onion, halved then sliced in half-rings
1/2 onion finely diced (you will use the other half in the sauce)
2 tsp Channa Masala
2-3 Bay Leaves
4 Cloves
3 tsp cumin seeds
1/2 tsp amchur powder
1/4 tsp chilli powder (optional)
Salt
Small handful fresh coriander, roughly chopped
Plain yoghurt (optional)

For the Sauce:
1 medium sized garlic clove, peeled
4cm fresh ginger, peeled
1/2 onion roughly chopped
1 tin tomato, or 4-5 ripe fresh tomatoes, quartered
2 hot green chillies
1 tsp salt
1/2 tsp coriander seeds
1/2 tsp cumin seeds

Make:

If using soaked dry chick peas, they will need to be soaked overnight.  Once soaked, cook them in a pressure cooker or over a stove until they are cooked but still quite firm.  If done over the stove, they will take at least 30 minutes.  Drain once cooked and set aside.  If using tinned chick peas, drain and rinse in cold water.

Lightly toast 1/2 tsp coriander seeds with 1/2 tsp cumin seeds in a pan, until fragrant.  Grind these together to a rough powder with a mortar and pestle or electric grinder.

Add to all the other sauce ingredients and 1 cup water in the bowl of your food processer. Pulse a few times until a reasonably smooth consistency is reached.

For the tempering, gently heat the oil in a large saucepan.  Do not allow the oil to reach smoking stage, use a moderate heat.  Add the 3 tsp of cumin seeds and when they have sizzled for a few seconds, add the cloves and bay leaves.   Add the diced onion half.  Fry for a few minutes on low-medium heat, taking care not to burn the cumin seeds, until the onion is a little softened.  Add the channa masala and chilli powder (for a spicier curry). Fry on low heat for another minute or so.

Add the sauce to the pan.  Add about 1/2-1 cup water to the food processor, blitz a few times, then add this water, with the remains of the sauce, to the pan.  Bring to a gentle boil, cover and simmer on low heat for 3-4 minutes.

Taste and add a little more salt or chilli powder if required. Drain and rinse the chick peas.  Add these to the pan, stir and cover.  Bring to the boil again and simmer on low-medium heat for about 30 min, stirring intermittently. Cook until the chick peas are softened and just holding together (they should not be allowed to disintegrate).  Add the sliced onions, separating the layers with your fingers, a few minutes before the chick peas are at that stage. If the sauce becomes too reduced, add a little water along the way to maintain a gravy consistency.

Taste and ensure the flavour is balanced how you like it.  Add a little more salt, chilli powder or amchur if needed.  if adding more chilli powder, cook for a few more minutes, stirring intermittently.  If you find the curry is too spicy, stir through 1-2 tbsp of plain yoghurt just before turning off the stove.  For a vegan option, leave out the yoghurt or use a little coconut cream.

Garnish with fresh coriander and serve with your favourite Indian bread, with raita or plain yoghurt on the side.  Like all other curries, this one tastes better the next day.

Notes:

Dried chick peas, Channa masala and amchur (dried green mango) powder, along with the other spices are available in Indian grocery stores.  Channa masala is a spice mix made specifically for this dish.

To speed things up use 1/2 tsp each of cumin powder and coriander powder instead of grinding these from whole seeds.  However I steer clear of bottled minced ginger and garlic.

Monsoon Mocha Ice-Cream Sandwiches for a Nespresso Challenge, and a Giveaway!

Decoction (noun)

A concentrated liquor resulting from heating or boiling a substance, especially a medicinal preparation made from a plant.

                                                                – Oxford Dictionary

Monsoon malabar ice cream sandwich (2 of 6)

It’s a jarring sound, decoction.  A sudden awakening from slumber by the cries of the vegetable seller from the street, and the racket of steel on steel as the maids wash the morning dishes.  It is the clanging of the heavy temple bell as early worshippers wake the Gods, offerings of fruit and flowers balanced in the other hand.  It is the impatient tooting of the horns of scooters ridden by morning commuters, some with saree clad wives perched sideways on the passenger seat.

Di-caack-shun when pronounced by a mami (aunty), is a little softer.  It is what South Indians call their coffee, brewed strong and slow, through a filter.  It’s rich aroma floats from the kitchen with that of freshly ground coconut flesh that is to be blended into chutney.  It wafts across the courtyard of a traditional Tamilian home to mingle with the intoxicating scent of jasmine blossoms and delicate incense smoke.  It is an unmistakeable morning scent, the promise of piping hot coffee in tiny steel cups alongside fluffy idlis (steamed rice cakes) and fragrant chutney.  For many South Indians, it really is somewhat of a medicinal preparation, an essential start to the day.  Until the first dose is taken, the morning cacophony can wait.

mocha ice cream (1 of 1)

No European coffee, prepared by professionals using noisy steam-spurting machines comes close to South Indian philter kaapi, lovingly brewed by mami baristas.  Rich and deep without bitterness and creamy with full-cream milk, sipping dose after dose from those stainless steel cups is an experience that cannot be mimicked by western coffee in paper cups.  When Nespresso sent me their new, limited edition Monsoon Malabar Grand Cru capsules however, I was surprised at how much the aroma and taste reminded me of South Indian coffee.  It’s deep, warm tones lend themselves perfectly to dessert and I couldn’t wait to create a sweet treat that incorporated this gorgeous blend.  My Monsoon Mocha Ice-Cream Sandwich uses a modification of a spiced Indian biscuit, known as nankhatai, with rich and creamy no-churn mocha ice cream.  Coffee is no stranger to spices, at least in the middle-east, and the sharpness of cardamom helps cut through the sweetness and warm coffee tones.

Monsoon malabar ice cream sandwich (4 of 6)

It takes a little planning, this one.  The ice-cream should be given at least 12-24 hours to freeze, and the biscuit dough can be made and refrigerated at the same time.  The next day, leave yourself a little time to roll out, cut and bake the biscuits, then allow them to cool before crumbly biscuit meets cold, luscious ice cream.  The result will be a pleasantly surprising combination of flavours and textures, a dessert that does full justice to the lovely Monsoon Malabar Grand Cru.

Monsoon malabar ice cream sandwich (5 of 6)

Before we get too carried away with this intoxicating business of coffee, ice-cream and whatnot, I have a couple of important things to mention.  Firstly, I would be super grateful if you would please head over to the Nespresso Facebook page at the end of this week, like the page and vote for my Monsoon Mocha Ice-cream Sandwich Recipe in the blogger challenge.  Thank you in advance!

Secondly, and more excitingly, I have a giveaway!  It is a stunning cookbook by Chef Kumar Mahadevan and his wife Suba Mahadevan, who own two of the best Indian restaurants in Sydney. Chef Kumar has also appeared on Masterchef Australia as an expert Indian chef.  From a personal perspective, my family and I are frequent diners at both restaurants and long before this giveaway was even in the works, I placed both Abhi’s and Aki’s in the guide to my favourite Indian restaurants in Sydney on Stay.com.  Having indulged in Chef Kumar’s dishes at the restaurants as well as at various events, I know that the recipes will not only work but will be delectable.  What makes this book special in my opinion is it’s lean towards South Indian dishes, delicacies from my part of India, many of which are not available in the majority of Indian restaurants outside India.

Monsoon malabar ice cream sandwich (1 of 6)

I have a copy of Chef Kumar’s cookbook, ‘From India: Food, Family & Tradition’  to give away to a lucky reader, along with a sleeve of the limited edition Nespresso Monsoon Malabar Grand Cru.  For a chance to win, tell me in the comments box at the end of this post, about your most memorable cup of coffee. What made it special? Was it the place? The person who was sitting across the table from you? Was it linked to an important event? Or was it just the taste of the coffee itself, good or bad?

The competition is open to those living in Australia only, and closes at midnight Sydney time on the 23rd of April.  Please leave me some way of contacting you- either a link to your blog or check in here for a reply in case you win! If I don’t hear back from you within 3 days of me contacting you, I will have to pick another winner.

I look forward to your entries and your memories.  Oh and I would be forever grateful for your votes (Click here, then vote for the recipe from One Small Pot)!

*This competition is based on skill and I will choose the answer based on my discretion.  Prizes have been kindly provided by Nespresso and Chef Kumar.  Monsoon Malabar Grand Cru capsules and a loan machine were also provided by Nespresso for creation of the recipe.  Words and opinions are my own.

**Update : the winner of the giveaway was Ilana Mendels with her gorgeous words about the coffee she sipped during her first visit to her home country. Congratulations Ilana!

Monsoon malabar ice cream sandwich (3 of 6)

Monsoon Mocha Ice-Cream Sandwich

Makes 24-28

Ice-cream recipe modified from a Nigella Lawson recipe.

Get:

For the Mocha Ice-cream:

240g (just over 2/3 cup) sweetened condensed milk
320ml double cream
120g good quality 70% dark chocolate
2 freshly brewed espresso shots Nespresso Monsoon Malabar Coffee

For the Coffee Nankhatai Biscuits:

180g butter at room temperature
3/4 cup brown sugar
Seeds from of 8 cardamom pods. roughly ground
2 tsp cinnamon powder
2 freshly brewed espresso shots of Nespresso Monsoon Malabar (about 3 tbsp brewed coffee)
1 1/4 cups besan (chickpea) flour
1/2 cup plain flour
1/4 cup coarse semolina
1/2 tsp baking powder
1/4 tsp salt

Special Equipment:

Nespresso Machine

Make:

To make the ice-cream:

Melt the chocolate in a double boiler or in the microwave in 20 to 30 second bursts.

Brew the coffee and place in the freezer to cool.

Once the coffee and chocolate are cool, lightly whisk together the condensed milk and cream in a bowl, then add the coffee and chocolate.  Lightly whisk until combined.

Pour into a container and place in the freezer for 12-24 hours.

Be patient!!

To make the biscuits:

Brew the coffee and place in the freezer to cool.

In a large bowl, cream the butter with the sugar and the cardamom and cinnamon powders. Whisk through the cooled coffee until combined.

In a separate bowl, sift all the flours, baking powder and salt together.

Add the flour mixture to the butter and sugar mixture and combine with a spatula.  You will then have to get your (clean) hands in there to form a dough. Knead the dough for a couple of minutes until it is smooth.  If it is too sticky, put it in the fridge for about 10 mins. Knead again for a minute.

Wrap in cling wrap and chill for at least 2 hours.

Divide the dough into 3-4 parts. Flour the outside of the dough and place between 2 sheets of grease-proof paper. Roll out evenly into 5 mm thick sheets. using a round cookie cutter (about 7 cm diameter), cut the cookies out of the sheet. Leave the rest of the dough in the fridge and just take out sections as you are ready to roll them.  Repeat until all the dough is finished.

Lay the cookies out on baking trays lined with baking paper.  Leave 2-3 cm between cookies as they will spread a little.  Place the trays in the fridge for at least 10 minutes.

Preheat the oven to 170 C.

Bake on the middle shelf of the oven for 10-12 minutes mins.  The cookies are done when they have spread a little and are slightly browned at the top and bottom.  They will be soft initially but will firm up after they cool.  Allow to cool completely before assembling.

To assemble, scoop the ice-cream into a rough ball using an ice-cream scoop and a dinner spoon.  Place the ball of ice-cream in the centre of one biscuit and place another biscuit on top.  Apply gentle, even pressure to the top biscuit with the flat palm of your hand until the ice-cream spreads a little between biscuits.  The biscuits will break easily, so it is important to be gentle.

Serve immediately!

Monsoon malabar ice cream sandwich (6 of 6)

Freekah, Mint Pesto and Vegie Bowl (Vegan)

Freekah Mint Veg Bowl (2 of 5)

I guessed that by this time of the summer, the mint scattered along the side of the house would have flourished, perhaps even enough for a pesto.  The crop started many years ago as a couple of tiny plants, one of regular mint and one of chocolate mint.  The chocolate mint has never served a purpose per se, but I defy any of you to walk past a cute little pot of emerald green leaves that smells ever so slightly of an After Eight mint without wanting it in your garden.

At some point in the history of the garden, both plants escaped the pots, intermingled and took up their sprawling residence in the garden bed along the side of the house.  It’s a little unruly, this part of the yard.  Little chartered territory given a slightly more dangerous edge by the stump of the lemon tree that my dad had to chop down owing to its infestation of ominous looking black citrus bugs with their toxic venom.  Definitely not for barefoot wanderings.

Freekah Mint Veg Bowl (4 of 5)

Be-sandaled and armed with a basket and scissors, I made my way around the Tulsi (holy basil) and picked my way among the weeds, past the stumpy citrus.  Squeezing around the water heater, I was met with a lush mint crop large enough to supply a toothpaste factory.  A pesto was surely in order.  I tossed it with freekah (a type of cracked wheat) and with a few fresh vegetables, it made the freshest, most healthful lunch I’ve had in some time.  Sweetcorn is a must I think but as far as other vegetables go, You can pretty much pick your favourites.  I threw in carrot and snowpeas, but cherry tomatoes, blanched asparagus or broccoli, or pan-fried zucchini would work beautifully.

Want more healthy and filling vegetarian salad ideas? Try this lentil salad or quinoa salad.  Or screw the salads and make this fudge 🙂

Freekah Mint Veg Bowl (1 of 5)

Freekah, Mint Pesto and Vegetable Bowl

Get:

3/4 cup dry Freekah
1 ear of corn
Olive oil
Other vegetables according to preference
Small handful sunflower seeds.

For the Mint Pesto:
1 1/2 cups loosely packed fresh mint leaves
1 cup loosely packed baby spinach leaves
2 tbsp almond meal
1/2 hot chilli
Small garlic clove (optional)
1/4 cup olive oil
A good squeeze of lemon juice
Salt to taste

Make:

Place Freekah on the stove with twice the amount of water and 1 tsp salt.  Bring to the boil and simmer for 20-25 mins until cooked.  It should be tender but still a little firm and nutty. Drain, rinse  and set aside.

At the same time, boil the peeled corn in salted water in another pan for about 10 min.  Rub the corn with olive oil and char on an open flame or in the grill.  With a knife, carefully cut the corn off the cob.  Prep the other vegetables.

To make the pesto, blitz all the pesto ingredients (start with 1/2 tsp salt and add more to taste) in a food processor until a rough paste is formed.  Taste and add salt or lemon juice as needed.

Toss the pesto through the freekah.  Divide into 3 or 4 bowls.  Top with corn and whatever vegetables you choose. Finally, sprinkle with sunflower seeds.

Freekah Mint Veg Bowl (3 of 5)

Christmas Chivda (An Indian Street Snack)

Separating the beach from the road was a thickness of stalls that sold juice, tea, pav bhaji, fritters and other street snacks, the many-layered flavours of which could never be replicated in the sanitary conditions of a restaurant.  Rickety square stalls with torn calico coverings were stacked side by side, each a busily functioning unit within itself, much like cells in biological tissue.

Cries of vendors declaring the delights on offer were carried on the warm Bombay breeze alongside the scents of deep-fried chickpea batter, a myriad of masalas and the inescapable, faint undertone of sewage.  Juhu beach stretched beyond the bustle, less populated but still littered with vendors, children’s rides and sand artists with their temporary sculptures.

I would always ask for a paper cone, either filled with roasted peanuts or a dry street snack, Chivda.  They were portable, neat and most importantly allowed me to keep walking, the little girl trailing behind her parents.  They were also considered ‘safe’ to eat……not a drop of water or unwashed vegetable in sight.

Chivda (1 of 4)

When the lovely Claire of Claire K Creations organised the Foodie Secret Santa, I jumped at the chance to participate.  The idea is to make a Christmas treat and send it out to the three people you are allocated.  Soon enough, each blogger receives three treats from different bloggers.  So far I’ve received some moorish roasted peanuts and chilli jam from Claire herself, and some divine pecan balls that were reminiscent of a favourite childhood biscuit from another blogger who seems to wish to remain secret!

Chivda (2 of 4)

As Christmas is not a traditional festival for me, and I guessed that there would be plenty of sweetness in the air during this season as it was, I decided to make an Indian savoury street snack, Chivda.  This is my mum’s version, using flattened rice as the main ingredient.  We usually have a big bottle of this nestled in the pantry at any given time, to snack on with tea or to serve with cold drinks. The light, crisp rice flakes are dotted with crunchy peanuts and pleasantly interrupted by chewy coconut. A little salty with a suggestion of sweetness, it is naturally gluten free and vegan. Frying the poha (flattened rice) on a low heat does require some patience but after that, the process is fairly quick and uncomplicated.  This recipe makes a large quantity which can be stored in an airtight container at room temperature for at least a month or for longer in the fridge.

Here in Sydney the lead up to Christmas has been a sombre one, with the horrific tragedy of the Sydney Siege and news of other atrocities elsewhere in the world.  It seems all we can really do is pray for the human race and hope that the people affected can somehow go on to lead positive lives.  Despite everything, I wish you all, with all my heart, a Merry Christmas.

Chivda (4 of 4)

Chivda

Get:

 4tsp + 4 tsp vegetable oil
6 cups thin dried rice flakes (poha)
1 1/2 tsp black mustard seeds
1 cup raw peanuts
8 dried red chillies broken into large pieces
1/2 tsp turmeric
1/2 tsp asofoetida
25-30 fresh or dried curry leaves
1 cup coconut flakes
Salt to taste
3 tsp sugar

Make:

In a large heavy-bottomed frypan, heat 4 tsp oil.  Add the poha and reduce the heat to very low.  Toast the poha, stirring constantly to make sure the flakes are evenly toasted.  The poha should curl around the edges and gain a little colour very gradually over about 20 minutes.  When the poha has slightly browned and crumbles easily between your fingers, pour it into a large bowl and set aside.

Turn the heat up to medium and heat the remaining 4 tsp oil.  Add the mustard seeds and when they have finished popping, add the peanuts.  Take care not to burn the mustard seeds.  Fry the peanuts on medium heat, stirring constantly until they are a golden brown colour.  Add the turmeric, asofetida and curry leaves and fry, stirring, until the curry leaves have crisped.  Add the coconut flakes and fry, stirring, until they have browned a little.

Add the toasted poha back into the pan with the other ingredients with about 1/2 tsp salt and the sugar. Stir to mix well, but this time be gentle so that you do not crush the poha too much.  Taste and add a little more salt if needed, then stir again.

Transfer the chivda to a large bowl and allow to cool completely before packing into an airtight container.

Notes:

Poha, dried red chillies and spices are available at Indian grocery stores.

Chivda (3 of 4)