True-Brown Aussie

Mango mac coconut truffles onesmallpot (1 of 3)

My first long haul flight was when I was just over the threshold of eight years of age.  I’m afraid my memories of it are scant, the strongest one being that I had the special job of carrying the mantapa, the small Hindu altar that my great-grandfather had carved out of rosewood.  A close second is the memory of the confusing emotions that each of us, myself and my parents, carried with us.  A healthy scoop of excitement stirred through a pinch of sadness and a heaped tablespoon of apprehension at the thought of starting a new chapter at our destination, Australia.

I had no appreciation of how brave my parents were then, leaping into a new life in a country they had never even visited.  Approaching with a few thousand rupees, a weak currency against the dollar even then, and a pocketful of hope, we were Sydney-bound with very little idea of what to expect.  As a family, we learnt our way around not only the Sydney streets, but also the Australian culture and vernacular.  We learnt fairly quickly that “How ya going?” invited an answer of “Good thanks!” or “Not bad!”, and not the reply “By bus!”.  It was a hard lesson when we realised that ‘Bring a plate’ meant a prepared dish, not what the phrase implies in a literal sense.

More than twenty-five years later, we are about as Australian as the average Australian.  We make pakoras on Christmas day, party on New Year’s Eve and go to the temple for Hindu new years.  When asked about our background we identify as Indian but while travelling outside Australia we are fiercely proud to declare ourselves Aussie.  We wear saris and bindis at Diwali to exchange gifts of new clothes, and gorge on chocolate eggs at Easter.  Rather than barbeques laden with meat and onions on Sunday afternoons, we spread dosa (south Indian rice crepes) onto hot pans and dunk them in chutney and sambhar.  On  Australia day, we have the added celebration of Indian Republic day, an interesting coincidence.  Some years, to be honest, it’s simply rest-day or spring-cleaning day!

The mantapa now inhabits my spare room, enclosing my small shrine.  It is where I pray before I go forth to conquer the day and before I sit down to a meal, whether Indian, Italian, Thai or Australian.  Like me, it is Indian-manufactured and Australian-developed, it’s wood as solid and un-weathered as my cultural identity.

Mango mac coconut truffles onesmallpot (3 of 3)

There are days when I feel not Indian enough and a few cents short of Aussie enough.  And other days when I know I am standing comfortably in the middle of the see-saw, perfectly balanced.  I am more a True-Brown Indian-Australian than a True-Blue Aussie, and this seems to work just fine.

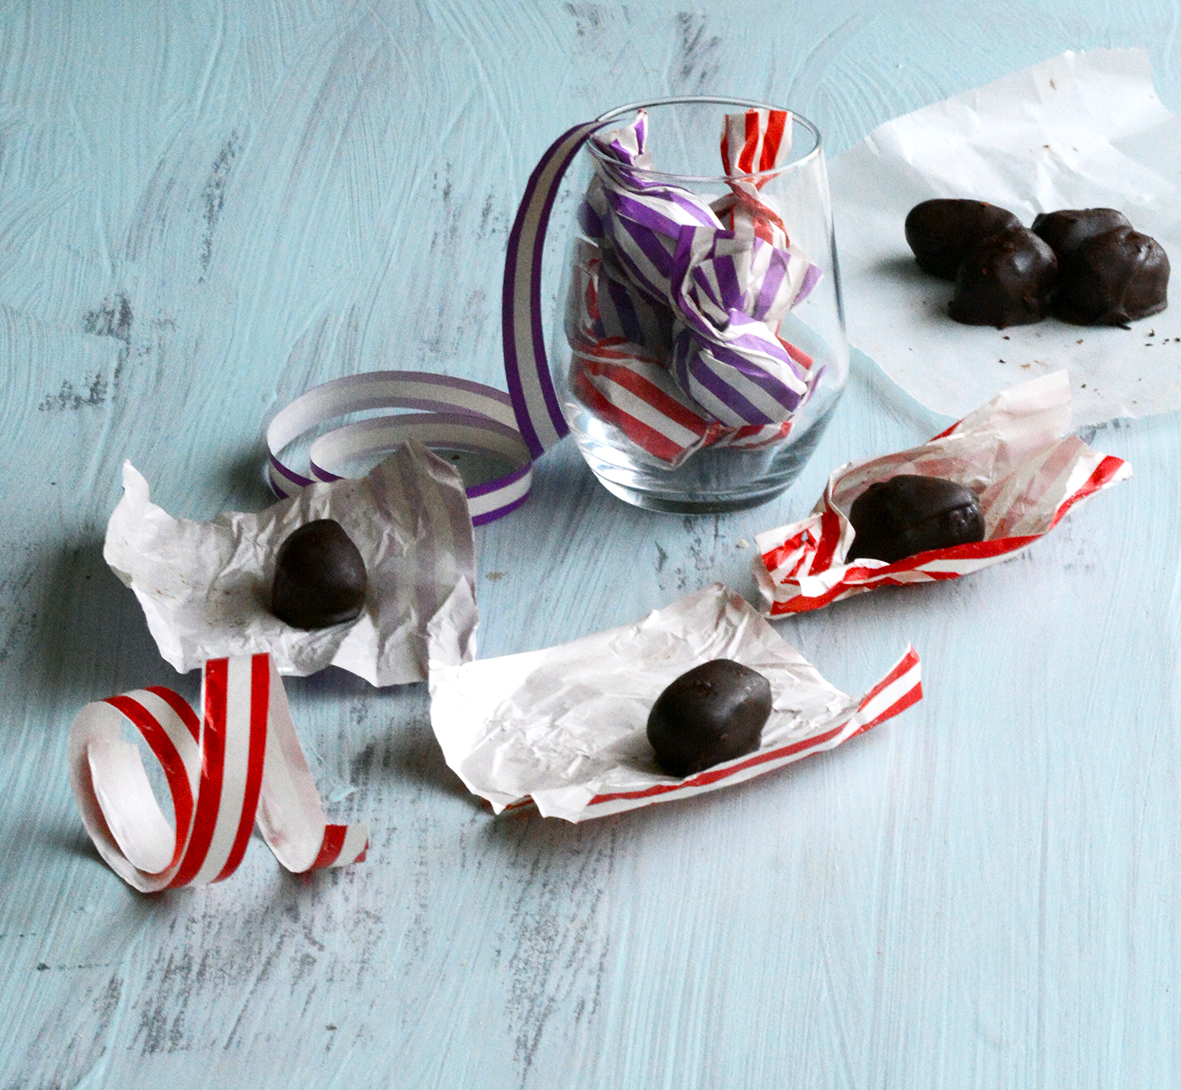
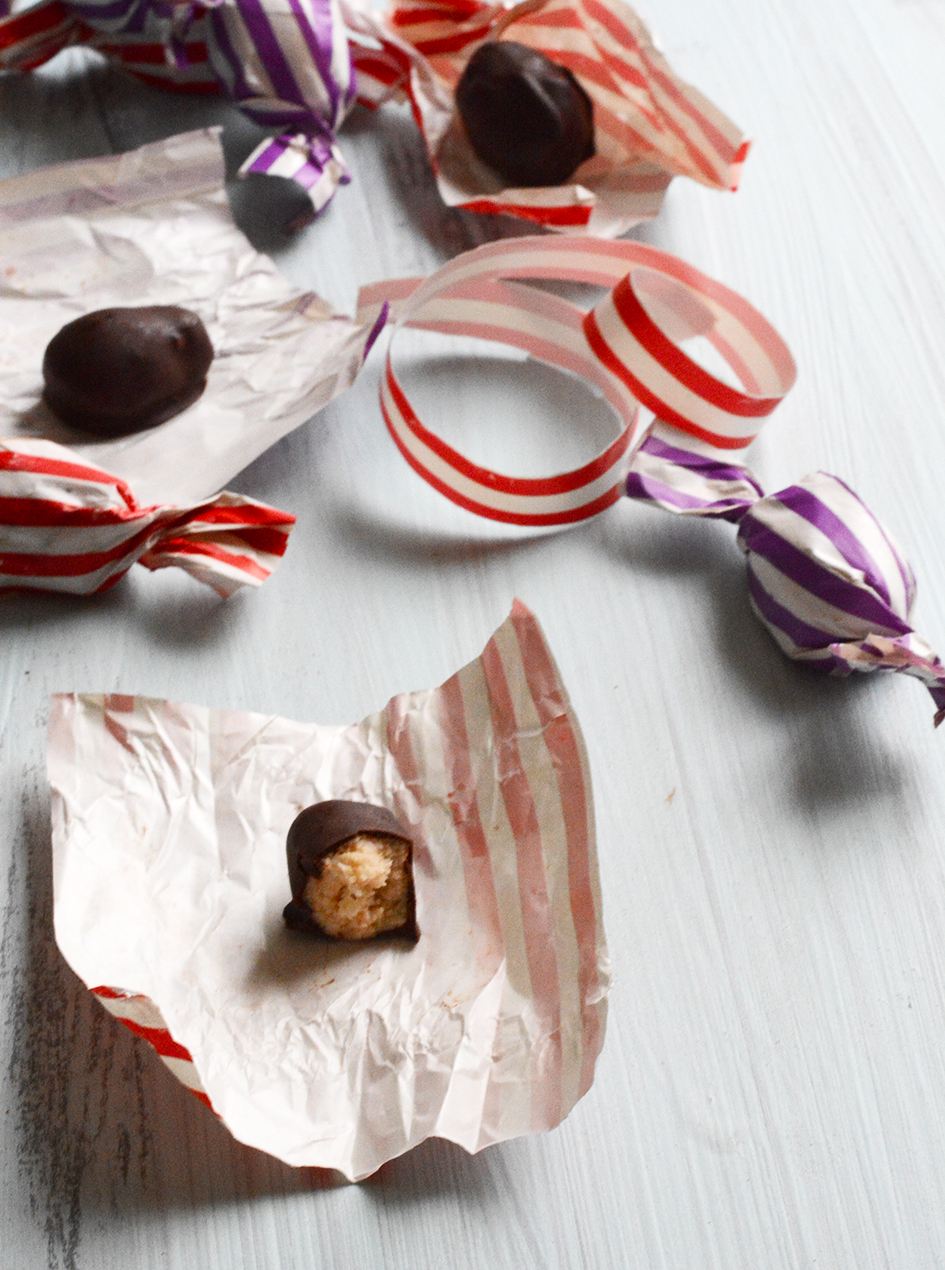
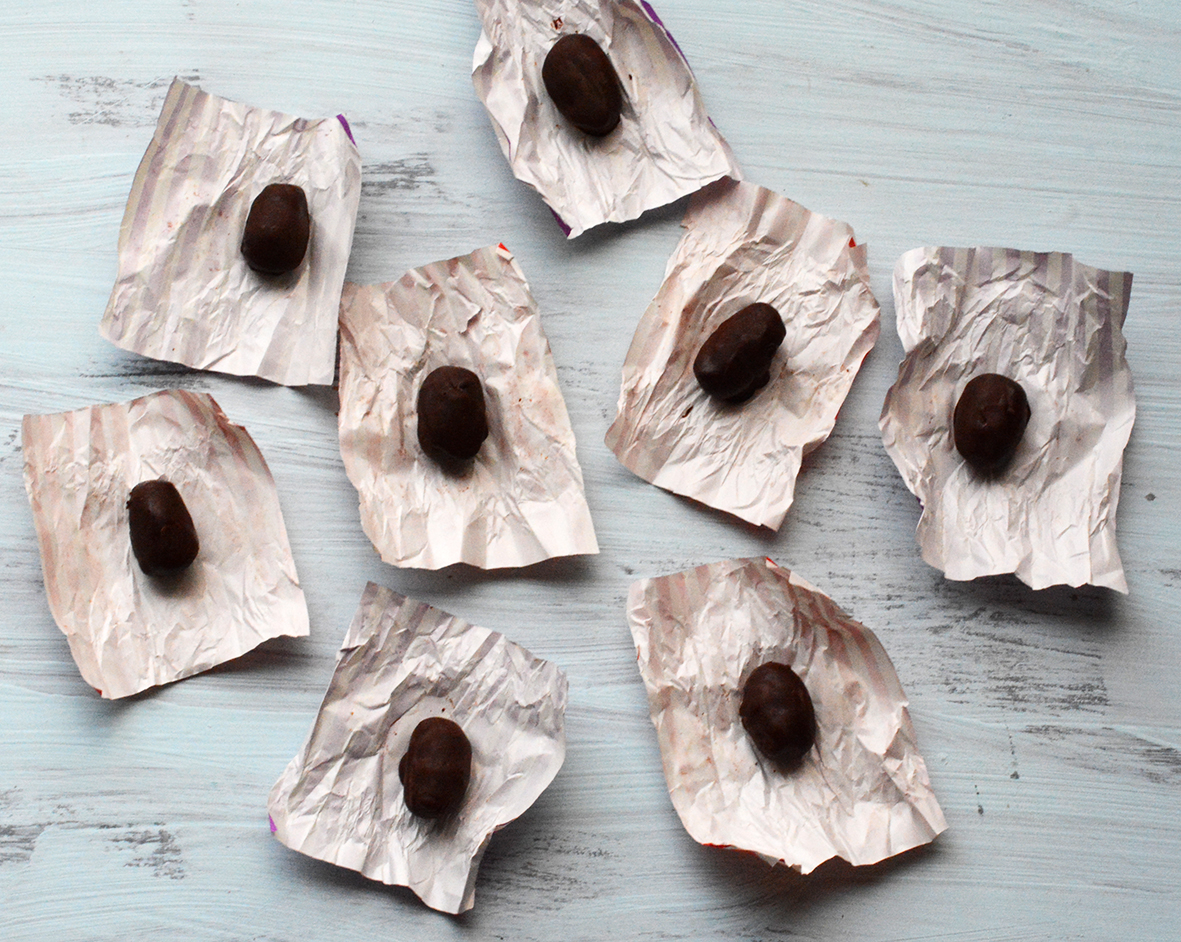
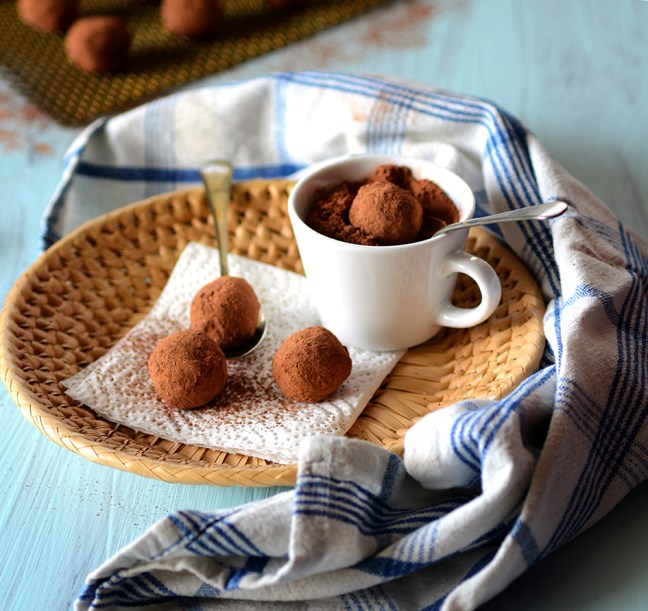
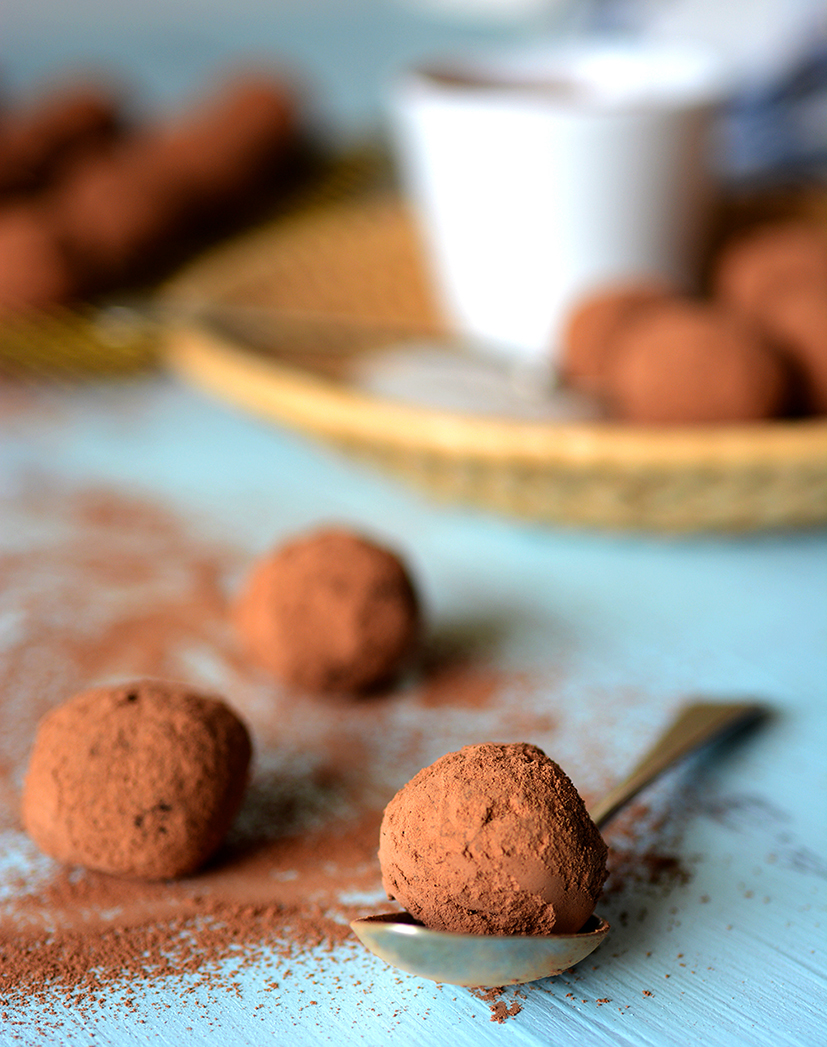
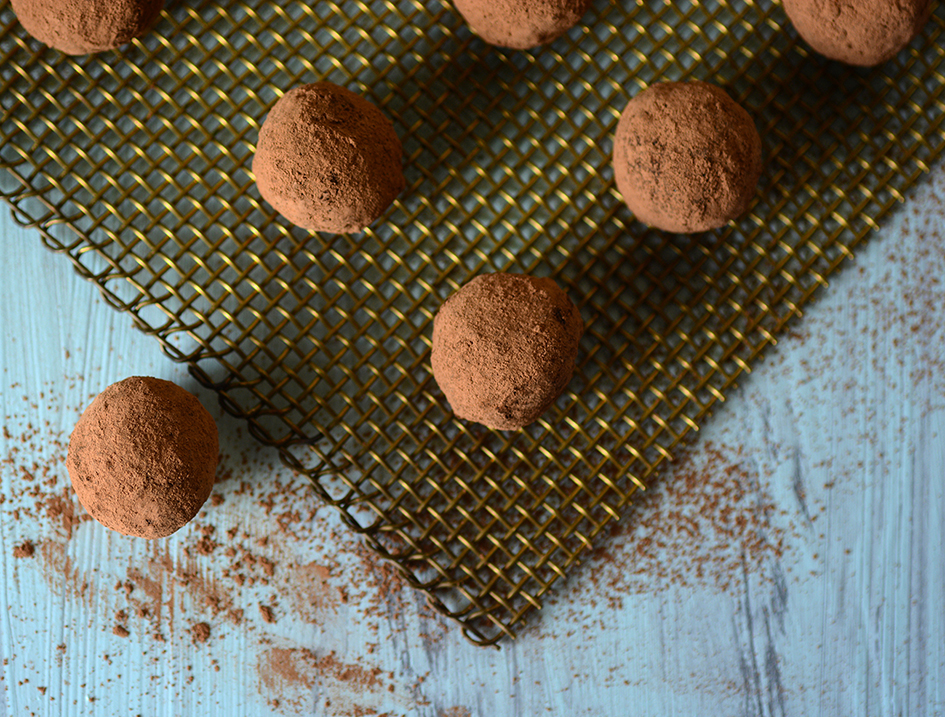
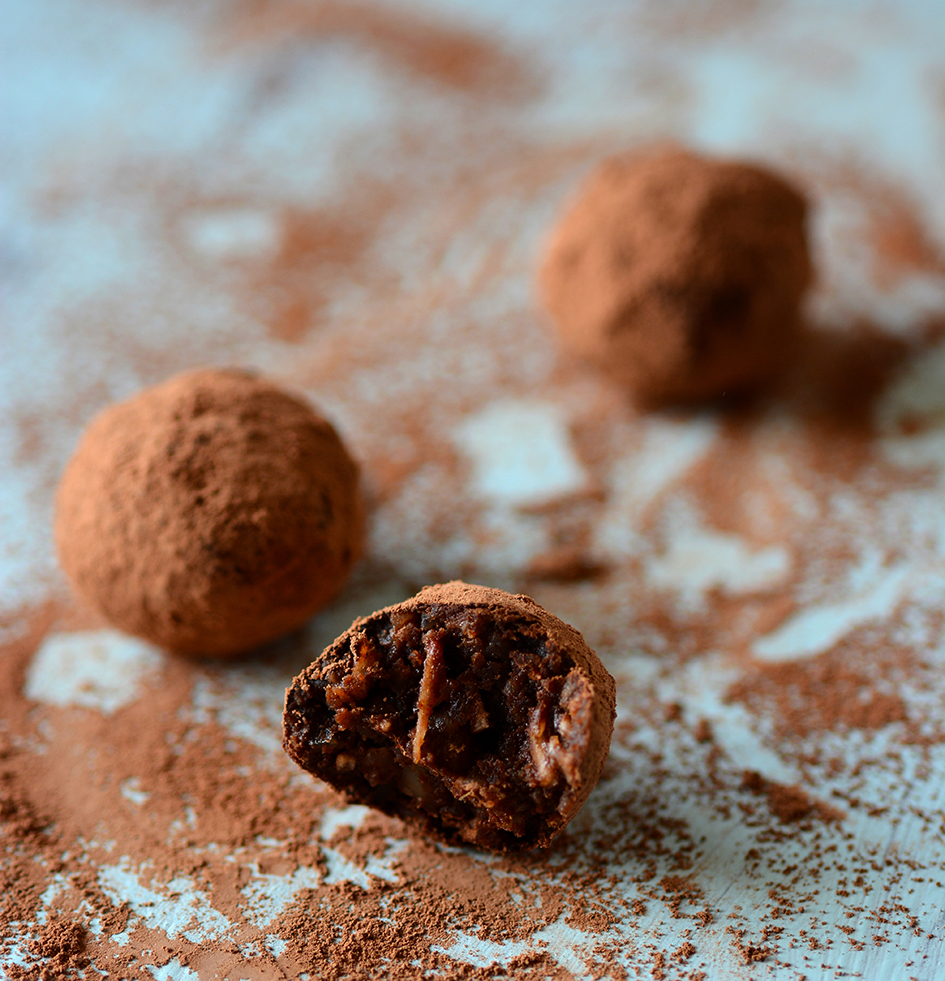
Mangoes and coconuts are well-loved ingredients in both India and Australia and the Mango-Macadamia combination is a popular on in my adopted country.  These truffles pack all the flavour of mangoes, with the textural elements of coconut and macadamia butter.  They are vegan and free of refined sugar and gluten.

Happy Australia Day and Indian Republic day folks!

Mango mac coconut truffles onesmallpot (2 of 3)

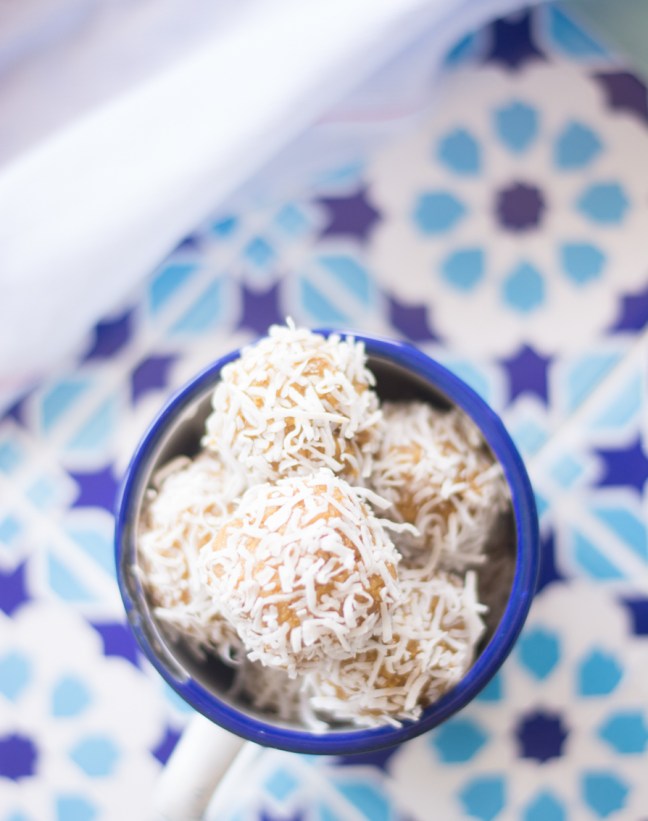
MMC (Mango, Macadamia and Coconut) Truffles

Get:

100g dried mango, soaked in water for 1-2 hours
1/3 cup macadamia butter
2 tbsp coconut sugar
1/4 cup sunflower seeds
3 tbsp protein powder
1 tbsp flaxseed meal
2 tbsp quinoa flour (or another 2 tbsp protein powder)
1/4 cup shredded coconut + more for coating
Coconut oil (optional)

Make:

Drain the water from the soaked mango.  Pulse the mango with all the ingredients, except for the extra shredded coconut and the coconut oil, in a high-speed food processor, until a smooth mixture forms.  Roll into tbsp sized balls, adding a little coconut oil if the mixture is too firm. Toss the truffles in the extra shredded coconut and refrigerate for at least 4-6 hours.

Advertisement

Mocha Tartlets

Mocha Tartlets OSP (1 of 4)

It took me a long time after university to stop associating coffee with the torture of exams.  Despite being an over-achiever at school, it took me quite a few years to get my groove at uni.  And so frantic, caffeine fuelled all-nighters were the rule rather than the exception during vet school, much to the surprise of those who knew me in high-school.  Couple that with the academically, physically and emotionally demanding nature of a vet degree, and it was a sure formula for one hot mess of a vet student come exam time.  That year that we had 10 exams to complete in a two week period is particularly memorable, and I think it was after that year that I resolved to get my act together so that I wouldn’t have to sit important papers on two hours of sleep and a whole lot of liquid stimulation.

A forced wake-up from an unfairly short sleep wasn’t even the worst of it.  The kicker was the mind-fog through which I would command the answers to surface as I tried to focus on the words on the page.  Finally, there was the fumble of a bus ride home, when my brain was too numb with lack of sleep to even process whether I had performed adequately in the exam.  Even to this day, looking at an energy drink brings back the faint nausea of those delirious, desperate and disillusioned all-nighters that I and my friends (yes, I had company in this silly behaviour) subjected ourselves to for 2 weeks every semester.

Mocha Tartlets OSP (4 of 4)

In the last few years I have felt that I am adult enough and forgetful enough to be able to savour the taste of coffee without the bone-chilling memories that my disorganised uni student self had attached to it.  Good coffee, made well, truly is a wonderful thing.  Those first few sips whose aromas fill the nostrils and which leave a trail of warmth down the oesophagus are a comfort and a wake-up call in one.

I take mine without sugar, always have, and find it is actually an offense to the coffee if sugar masks any of its flavour.  On days when I’m feeling a bit decadent, I will also dip a piece of dark chocolate into it, holding it in there for a few seconds so that I can inelegantly suck off the top layer of melted chocolate before dipping it back in.  Occasionally I will also drop a cube of chocolate in while the coffee is still very hot, so that I have something lovely to scoop out with a spoon after my last swig.

I don’t think there’s any uncertainty that I am all for the marriage of coffee and chocolate.  These mocha tarts combine those two great lovers, and the nutty, gluten-free base does much to ground the whole thing and cut through the bittersweetness.

Mocha Tartlets OSP (2 of 4)

 Mocha Tartlets (Gluten-free, refined sugar free)

Makes 18-20

Get:

For the Crust:
3 cups almond meal
115g butter at room temperature, plus extra for greasing
1 tbsp rice syrup or honey
1 pinch salt

For the filling:
2 cups raw cashews
1/3 cup strongly brewed, good quality coffee
1/3 cup Rice Syrup or honey
1/2 tsp cinnamon powder
150 g 70% dark chocolate
1/3 cup double cream

Special Equipment:
Mini tart cases or a muffin tin, greased well
A high speed food processor

Method:

Preheat the oven to 160 degrees Celsius.  Spread the cashews out on an oven tray and bake for 4-5 mins until just starting to gain colour.  Remove from the oven and allow to cool completely.

To make the crust, cut the butter into cubes and place in a large mixing bowl with the other crust ingredients.  Using clean hands, rub the butter into the other ingredients to form a dough that you can knead.  Knead for 2-3 minutes.

Pinch off portions of the dough the size of ping-pong balls (23-25g each).  Flatten each ball between the palms and press into the tart cases or cups of the muffin tin.  Press the dough evenly at the base and sides of the tins to a 3-4mm thickness.  Place the tins on the middle shelf of the oven and bake for 10-15 mins until the cases are an even golden brown colour.  Remove from the oven and allow to cool completely before removing the cases from the tins.  Use the tip of a sharp knife to gently loosen the tart cases and facilitate removal from the tins.

While the tart cases are baking, make the filling.  Place the cooled cashews in the bowl of the food processor and blitz on high speed, stopping intermittently, until a smooth butter is formed.  Initially a meal will form, then a thick dough, then a smooth butter.  Add the coffee, cinnamon and honey or rice syrup and blitz until an even mixture forms, stopping to scrape down the sides and bottom of the bowl to ensure all the nut butter is incorporated.

When all the tart cases are baked, cooled and removed from the tins, fill each one 1/2 to 2/3 with the filling.  Place them in the freezer for an hour or so until they are firmly set.

Melt the chocolate in a double boiler or in the microwave in 20 to 30 second bursts.  Take off the heat and add the cream, stirring quickly to form a smooth ganache.  When the coffee filling has set, spoon small amounts (about a tsp) of the ganache onto the top of each tart and spread out a little with the back of the spoon.

Refrigerate until the ganache is firm. Serve as is or with a dollop of cream.

Leftover chocolate and coffee filling? Mix them together, firm up in the fridge and roll into balls to make mocha truffles!

Notes:

You could probably make 1 large tart in a standard sized tart tin if you prefer, although I have not tried that with this recipe.

Mocha Tartlets OSP (3 of 4)

Curry Leaf Thambuli

Curry Leaf Coconut Raita 1

My parents are farmers, of sorts.

Not really, but in one corner of the garden is a curry leaf tree of grand proportions.  It towers above the hibiscus, overshadows the quietly achieving chilli plants and puts the tiny basil crop to shame.  The slender, lustrous leaves caress the fence and carpet the garden bed, softly making their presence known.  They tickle your face as you walk past, filling the nostrils with their subtle but unmistakable scent.

It is quite common for Indian families to have a curry leaf plant.  The herb is a staple in South Indian cuisine, most dishes bearing a scattering of the deep green leaves.  That they aid digestion is well known, but curry leaves are also packed with iron, buzzing with antioxidants and help regulate blood glucose levels.

Curry Leaf Coconut Raita 6

Couple that with the fact that a small package of shriveled leaves, their fragrance but a distant memory, will set you back at least four dollars in most Australian supermarkets, and growing your own just makes good sense.  My parents’ version however, is one of mammoth proportions that surpasses what is dictated by that good sense.  It turns out that this particular Indian has taken a liking to Aussie climate and soil.  This piece of urban foliage could probably supply a small Indian city or a large Indian town without too much trouble.  It certainly does supply a sizable sector of my parents’ friends circle on a regular basis and anyone who dares to ask for a few curry leaves is usually bombarded with an overstuffed shopping bag of vegetation that will suffice for the coming year or so.

Curry Leaf Coconut Raita 2

The tree’s offspring have been adopted out to various friends and colleagues in the past and are now thriving like leafy teenagers in pots and backyards.  When it begins to flourish out of control, Dad has been forced to prune the tree back lest it completely destroy their pergola and invade the garden, engulfing the house and possibly even the entire street.

This Curry Leaf Thambuli sees the leaves blended with fresh coconut and yoghurt to make a spicy cold soup or condiment.  This is another recipe from my cousin Chaithra, you know, the one who brought you that delicious ivy gourd and coconut dish, Thondekaye Sukha.  You will have to make a trip to the local Indian store for this one, and a good food processor is important.  Eat it on its own, stir it through rice or even drizzle it onto a piece of grilled, Indian spiced fish.  Should you find yourself in possession of a large overstuffed shopping bag of these leaves, this is a fabulous way to use them up in a healthy, nutrient-rich way.  If you do not have access to such a bounty, well then the investment is probably worthwhile.

DSC_3786

Curry Leaf Thambuli

Serves 2-4 as a side dish

Get:

2 tsp ghee
70-80 curry leaves (or the leaves from 4 sprigs)
1/3 cup fresh or frozen grated coconut
1 cm ginger
1-2 hot green chillies (I used frozen ones), to taste
1 tbsp + 1/4 cup Greek style yoghurt
Water
Salt, to taste

For the tempering:
1/2 tsp ghee
1/2 tsp cumin seeds
1/2 tsp black mustard seeds
1 dried red chilli, broke into pieces
Pinch asafoetida
2 tsp urad dhal

Make:

In a small saucepan, melt and heat 2 tsp ghee.  Add the curry leaves.  If they are fresh, they will splutter, so stand back.  When they are browned and crisp, take off the heat and allow to cool a little.

In a food processor, blitz the ghee/curry leaf mixture, coconut, ginger, green chillies 1 tbsp yoghurt and a couple of tbsp water.  When it is a slightly coarse paste, add it to the remaining yoghurt in a bowl.  Add 1/4 tsp salt and stir through.  Taste and add a little more salt if needed.  The mixture should be spicy and slightly sour.  The salt serves to balance out the sourness of the yoghurt.

In a small saucepan, on medium heat, melt and heat the ghee.  Add the mustard and cumin seeds and when they are popping, turn the heat down to low.  Add the other tempering ingredients and stir until the urad dhal browns a little.  If it is browning quickly, take the pan off the heat and just stir the hot oil mixture.  Add a few more curry leaves if available and stir until they are crisp.

Add the tempered mixture to the Thambuli and stir through.  Serve with rice or as a sauce.

Curry Leaf Coconut Raita 3

Chocolate, Cranberry and Pistachio Granola

Choc Cranberry Pistachio Granola 3

It began with the subtlest of signs.  A hole in a paper bag from which plain flour poured when I was shifting things around to look for something.  A perfect circle the size of a ten cent piece that I convinced myself was a tear.  I cleaned up the mess, found what I needed and thought nothing more of it.

Then on another day, another hole……..this time in the wholemeal flour bag.  And another pile of flour underneath to clean up.  On the other side of the pantry, there were tiny holes nibbled into the bag of pepitas.

Nibbled!

By tiny teeth!

Choc Cranberry Pistachio Granola 1

It was then that we noticed the scattering of tiny black pellets.  After all, when you’ve been busy scooting around on tiny feet and munching your way through a pantry full of food, nature will inevitably call and a trail will be left behind.

Feeling somewhat invaded and unclean, we set out the humane traps.  They were not lured by the bread that we offered on the first two nights, not the sweet piece of dried coconut that we tried next.  Predictably, it was the cheese that did it.  Not the holey Swiss cheese that attracts cartoon mice, but a small piece of Grana Padano…….the expensive kind.

Choc Cranberry Pistachio Granola 6

Once both the tiny furry terrorists were caught and released in the park down the road, Mum and I set about on our cleaning mission.  It was a much needed push to spring clean the pantry.  Old ingredients and those that were blessed by rodents were thrown out, shelves were wiped down, and glass jars were filled, labelled, and arranged in height order.

Ingredients that I had purchased and forgotten about were rediscovered.  An afternoon of experimentation led to a rich, chocolatey granola, low enough in sugar to make it ok to eat chocolate in the morning.  I used some unsweetened cocoa mass that was uncovered in the mouse hunt, and added rice syrup for a slight sweetness.  You could do the same, or just use 70 or 80 % dark chocolate.

Choc Cranberry Pistachio Granola 2

Chocolate, Cranberry and Pistachio Granola

Get:

1 1/2 cups shredded coconut
1/2 cup sunflower seeds
80g dark chocolate (I used unsweetened cocoa mass + 2 tsp rice syrup)
2 tbsp cashew or macadamia nut butter
1 tbsp protein powder or milk powder (optional)
1 tbsp chia seeds
1 tsp cinnamon
1/8 tsp salt
2 tsp coconut oil
1/2 cup shelled pistachios, roughly chopped
1/4 cup dried cranberries, roughly chopped

Make:

Preheat the oven to 160 C.  Spread the coconut and sunflower seeds out on an oven tray and toast in the oven for 7-8 minutes, or until the coconut has turned a light brown.  Spread the pistachios on a seperate tray and roast until they have gained a little colour- they may take a bit longer than the coconut and sunflower seeds.  If making the nut butter from scratch, this is the time to roast those on a separate tray.

Melt the chocolate in a double boiler or in the microwave in 20-30 second bursts (use a large bowl either way).  If using cocoa mass, stir in the rice syrup well.  While the chocolate is warm, add the coconut oil and nut butter, cinnamon and salt, and stir well.

Add the other ingredients and toss until they are all well coated in chocolate.  Place the bowl in the fridge for 20-30 minutes.

Remove from the fridge and crumble with your fingers.  Store at room temperature for up to 3-4 weeks or in the fridge for longer. Eat with milk, nut milk, yoghurt or on it’s own!

Choc Cranberry Pistachio Granola 4

Stepping-Stone Nutty Chocolate Eggs (low-fructose)

Beyond the overstuffed floral sofas, past the assortment of porcelain milkmaids and ceramic puppy dogs, there was a scuffed old desk pushed up against the wall.  The tiny old lady gingerly pulled out the chair and perched herself on it, gesturing for my uncle and I to take a seat nearby.  She was my uncle’s dearest patient, and he had brought me along on a house visit to meet her.

stepping stone eggs 1

Carefully, she pulled open a draw and held out a plastic tube, paper thin skin stretching over arthritic knuckles as her hands curled around it.  Peering into the container, my eight-year old eyes widened in delight.  Eggs of all sizes were nestled in together.  They twinkled in their colourful foil wrappers, unlike anything I had seen before.

‘Pick one’ urged my uncle.  I snapped out of my bewilderment to choose a bright blue one, about the size of a chicken egg, and unwrapped it slowly.  A cobblestone chocolate surface was revealed as the soft foil fell away under my eager fingers.  The hollow centre was a real surprise, and there was something about that thin chocolate shell, perhaps the way it just seemed to give way on my tongue, that did it for me.  I’ve been weak at the knees for Easter eggs ever since.

stepping stone eggs 2

Those first few months after we migrated to Australia are mostly a blur, but there are certain memories, like this one that linger vividly within the childhood section of my mental filing cabinet.

The lovely old lady is long gone.  But that little girl’s first taste of a chocolate Easter egg, sitting in the living room of her uncle’s favourite patient, is never to be forgotten.

stepping stone eggs 3

These eggs were a happy accident in my quest to create a low-sugar creme egg.  While they are not quite what I envisioned, they are a stepping-stone towards a creme egg, and turned out too good not to share with you. The centres of these are creamy, albeit a bit too firm to call them a creme egg.  They have a natural sweetness provided by the nuts and boosted by the tiny amount of sweetner, which is nicely balanced by the bitter dark chocolate shell.  As for the original goal…..well, there’s always next Easter.

For other low-sugar chocolaty treats, try these or these.  Or even these.

Happy Easter to you all!

stepping stone eggs 4

Stepping-Stone Nutty Chocolate Eggs

Get:

Makes 12-15 small eggs

1/4 cup cashew or macadamia nut butter
100 grams (2 sachets) coconut paste
1-2 tsp rice syrup or honey
100g good quality dark chocolate

Make:

Dip the unopened packets of coconut paste in boiling water for a couple of minutes to soften.

Place the nut butter, coconut paste and syrup or honey in the food processor and blitz to a smooth paste.  Transfer to a bowl and freeze for 20 mins or so until quite firm.  Alternatively, you could pour the mixture into silicone chocolate moulds and place that in the freezer.

If hand-shaping the eggs, remove the mixture from the freezer and using the spoon, scoop out small amounts (about a tsp) of it.  Usig clean hands, knead and roll into balls, then flatten slightly to make eggs.  Place on grease-proof paper on a tray and freeze until very firm.

In the meantime, melt the chocolate in a double boiler or in 20-30 second bursts in the microwave.  Roll the frozen eggs (or whatever shape you choose) in the melted chocolate.  Use a couple of spoons to cover the eggs in the chocolate and place back on the grease-proof paper lined tray.  Refrigerate until the chocolate is set.

Eat!

Notes:

If you would like to make your own nut butter, find the method here.  You will need about 1/2 cup of nuts to make 1/4 cup of butter.

I found coconut paste in the Asian food section of large supermarkets.  I found it in a box of 5 sachets of 50 grams each.  I believe it is also available in some Asian grocery stores (thanks for the tip JJ!).

stepping stone eggs 5


Dessert Wontons with Sweet Dipping Sauce

Dessert Wontons 1

It’s not quite a recipe, really.  More like an assembling of things to be steamed, dipped and devoured.  It all started when I was invited to a Chinese themed High Tea at Four Friends, and I started to wonder what I could contribute given my very limited Asian dessert repertoire.  The thought that lingered in my mind was one of dessert wontons.

Dessert Wontons 4

You see, us Indians make a steamed rice parcel stuffed with coconut and jaggery that if done right, will fall apart in the mouth leaving behind a puddle of seductively melted brown sugar and chewy coconut.  How I went from contemplating modakam, and onto deciding to stuff my wontons with peanut butter, chocolate and coconut is probably a function of my ever tangental mind.

If you don’t have a bamboo steamer, you could use a metal colander sprayed with a little oil or lined with grease-proof paper, in a large covered pot with water in the bottom of it.  However you make them, they are best eaten fresh and dipped generously in the sauce.

Oh! And speaking of sweets…..if you live in Sydney and are of a sugary inclination, don’t forget to enter the giveaway to win tickets to the Cake Bake and Sweets Show March 21 – 23 here.

Dessert Wontons 2

Nutty, Chocolatey Dessert Wontons with Coconut Dipping Sauce

Makes about 15

Get:
75 g dark chocolate
1/3 cup peanut butter
1/2 cup shredded coconut
1-2 tbsp rice syrup or honey

Wonton Wrappers

For the dipping sauce:
1/3 cup coconut cream
2 tsp rice syrup
Few strands saffron (optional)

Make:

Blitz the filling ingredients together in a food processor until a coarse paste forms.  Start with 1 tbsp syrup and add more if you prefer it sweeter.

Fill the wonton wrappers.  I used about a tsp of mixture per wrapper, placed it in the centre and folded the edges together.  I used a little water around the edges to make them stick.

Sprinkle the wontons with water and steam them for about 20-25 mins, or until the wrappers are cooked.

Make the dipping sauce by whisking the ingredients together well.

Serve the wontons with dipping sauce for dessert.

Dessert Wontons 3

Bounty Bar Popsicles for SABH (Low-Fructose)

Bounty bar popsicles 1

I’ve ditched the sugar again and apart from a couple of planned (and one unplanned) cheat days, I have been well on track.  After I fell off the wagon towards the end of last year, I made a decision to quit the white stuff again in the new year.  Isn’t it funny how we consider new years eve such a major milestone in our decisions?  As if on the 1st of January we somehow get that extra push we need to make a positive change in our lives.  Really, it’s just another date, isn’t it?

So I’ve taken on a slightly different frame of mind now.  This time around, it is all about what I deserve….remember we talked about that?  From a health point of view, what I deserve is a healthy, well nourished body that I fill with goodness.  After all, you can’t expect to get the best from this vehicle that has been assigned to you in this life unless you give it the very best care, no?

And so it is that the menacing ‘I MUST LOSE WEIGHT’  has been replaced by ‘I deserve to be happy with myself, inside and out and a positive step towards that is to be slimmer and healthier’.  Is that not much kinder, friends?

Like any affirmation, it is to be repeated.  We humans are creatures of habit and our mental patterns, created over years, take gentle persistence to break.  So I remind myself daily of my decision to ensure I have what I deserve and try not to berate myself too much when I slip up.

Try it, dear friends.  Let’s treat ourselves with kindness, and the universe will do the same.

Bounty bar popsicles 3

I was a tad excited when this month’s Sweet Adventures Blog Hop theme of Popsicle Party was announced.  This month it is hosted by the lovely Swah from Love Swah. 
These chocolate covered, coconut popsicles are a frozen, low-sugar version of the Bounty Bar, a popular Australian chocolate bar.  If you want them to be dairy free, leave out the yoghurt but the result will be a harder popsicle.

Bounty bar popsicles 4

Bounty Bar Popsicles (Low-fructose)

Makes 6-8 depending on size of moulds

Get:

270 ml (1 tin) full-fat coconut milk
1/2 cup Greek yoghurt
4 tbsp rice syrup
1/2 cup frozen fresh grated coconut
150g good quality dark chocolate

Make:

 Whisk all ingredients together except for the chocolate.

Pour into popsicle moulds.

Freeze until set.

Melt the chocolate in a double boiler or in the microwave in 20-30 second bursts, stirring in between.

Dip  the popsicle moulds in hot water to loosen, then dip the popsicles one by one into the dark chocolate or paint it on with a pastry brush.

When the chocolate has set, place back in the popsicle moulds (they won’t fit as well) and in the freezer until ready to eat.

Notes:
Frozen coconut is available at Indian grocers.
I had a little mixture left as I have small popsicle moulds, and I poured this into an ice cube tray to throw into my smoothies.

Bounty bar popsicles 2

Black Cat Pumpkin Cheesecake bars and 5 Tips for Safe Pets this Season

Halloween is coming!  And in anticipation, I present you with these Pumpkin Cheesecake bars which I assure you, you will love as much as I do.  The base is one that refuses to play second fiddle to the fresh, tangy topping.  It is packed with nuts and shredded coconut, providing a roughage that contrasts nicely with the smoothness of the cream cheese and pumpkin.

I used melted dark chocolate to pipe these funky little black cats, and adorned them with shiny edible pearls for eyes.  You can of course choose whatever design you please; witches hats, bats, evil eyes……the world is your cheesecake!

Pumpkin cheesecake bars ingredients

Speaking of cats and holidays, for those of you who have four-legged family members, I thought I’d put together a list of ways to care for them during this season.  Our beloved furry friends can get a little neglected during the festivities and that, as well as the insanely hot summers we experience here in Oz mean that vet hospitals are the busiest during this time.

Here are a few important ways to look after our creatures over the next few months…….

1.  Watch what they gobble: Our pets love a Christmas feast as much as we do.  In fact, we often see patients that have eaten something silly, causing them to become sick.  Nothing ruins a holiday like having to spend an hour in a busy waiting room of a vet hospital!  When pets eat fatty foods such as bacon, sausages and sweets, it can trigger a condition known as pancreatitis.  This is a very painful and debilitating condition whereby the pancreas becomes inflamed, causing vomiting and a lack of appetite leading to dehydration and illness.  Most cases are treated with hospitalisation, antibiotics and IV fluids, but severe cases can be fatal.

Fatty foods aside, certain foods such as onions, chocolate, raisins and many others are actually toxic to pets.  So while you enjoy your meal, treat your pet to something pet-friendly such as a raw bone or doggy treat, and ask visiting relatives nicely not to feed the pets human food or leave it lying around within reach.

Pumpkin cheesecake bars ingredients2

2. Remember that things that are not food can seem edible:  In addition to eating inappropriate foods, some dogs (think Labrador!) have a knack for eating things that really shouldn’t be eaten by anybody!  While you are celebrating the holidays, your pooch may do the same by gulping down something that may get stuck in his or her gut causing an obstruction.  Some holiday related things that I have had to fish out of doggy intestines include wine corks, skewers, fish hooks and corn cobs.  Believe me, spending Christmas eve elbow-deep in a dog’s abdomen is no fun for the vet, the dog or the anxious owner!

3. Protect against nasty critters: In Australia, the heat tends to bring out some of those nasty creepy crawlies that we are well known for.  Paralysis ticks are a horrible little bug, and if I could choose one species to be extinct, it would me this one.  They latch onto an unassuming animal and proceed to inject them with a poison that paralysis first the legs and then the respiratory muscles.

There are one or two good products available from vets to protect dogs against these ticks and they should be used in high risk areas such as national parks and near water bodies.  Unfortunately none of these products are highly reliable and you should search your pet after visiting these areas, focusing on the head and neck.  If you notice any signs of paralysis such as weak legs, a change in bark or breathing difficulty, veterinary care should be sought immediately.

Snake bites are also more common during summer and this should also be treated as an emergency.

Pumpkin cheesecake bars 3

4.  Stay on top of routine treatments: Ensure your dogs are fully vaccinated.  Diseases such as Parvovirus and Canine Cough (Kennel Cough) are more frequently transmitted in the warmer months.  Parvovirus occurs mostly in young, inadequately vaccinated dogs and causes severe vomiting, diarrhoea and dehydration.  It is also a condition that can be fatal due to the profound dehydration and weakness it causes.  Vaccinations and worming can often be overlooked during the excitement of the holiday season so stay organised!

Pumpkin cheesecake bars 1

5.  Beat the heat: Keep your pets cool during the scorching summer months.  Keep them indoors or provide plenty of shade outdoors.  Ensure there is plenty of clean drinking water within reach, and add ice cubes to it on hotter days.  Pets should not be left in cars on hot days and if this must be done, leave a couple of windows open a notch, don’t leave them for more than a few minutes and park the car in the shade.

So with a bit of care and vigilance, your furry friends can enjoy the holiday season while staying happy, healthy and out of hospital!

Hoping I haven’t put you off your food with all this vet talk and on a brighter note, here’s the recipe for my Black Cat Pumpkin Cheesecake Bars for October’s SABH.  The lovely JJ from 84th & 3rd is hosting this one.  These bars are gluten-free, vegetarian and fructose free (not including the decoration).

Happy Halloween to you and your pets!

Pumpkin cheesecake bars 2

Black Cat Pumpkin Cheesecake Bars

Makes 8

Recipe for the base is from Sarah Wilson’s Blog

Get:

For the base:
1/2 cup nuts- hazelnuts, almonds, pistachios or macadamias work well
1/2 cup shredded or dessicated coconut
1/3 cup nut meal- I used almond
2 tbsp unsalted butter

For the topping:
1 block (200g) cream cheese
1/2 cup pumpkin puree*
2 1/2- 3 tbsp rice syrup or honey
1 tsp allspice
1/3 cup almond meal

To  decorate:
About 10 squares dark chocolate
Sprinkles, pearls, et al
A piping bag or homemade version (try this tutorial)

Make:

Preheat the oven to 160 C.

Use a food processor to grind the whole nuts to a very coarse meal with some small chunks.  Place in a large bowl and add all the other ingredients.  Using your (clean) hands, rub the butter into the dry ingredients until the mixture forms a sort ok kneadable dough.  Press the mixture into a grease-proof paper lined loaf tin or a deep baking tray if you decide to double the recipe.  The base should be about a centimetre thick.  Bake on the middle shelf for about 15 mins or until firm and very slightly browned.  Allow to cool before adding the topping.

Place the topping ingredients in the bowl of the food processor and pulse until well combined and smooth.  Pour the mixture over the cooled base and spread evenly.  Refrigerate for at least 2 hours before slicing into 8 even squares.

Line a tray with grease-proof paper or a silicon mat.  Melt the chocolate in a double boiler or in 20-30 second bursts in the microwave.  Place in the piping bag and pipe shapes of your choice.  At this point, I placed the edible pearls to make the cats’ eyes.  Place the tray in the fridge till the chocolate sets.  Once the cheesecake bars are set and sliced, decorate with the chocolate shapes and any other decorations you wish to use.

*I make pumpkin puree by placing a chunk of pumpkin, skin and all, on a tray in an oven preheated to 180 C.  Bake until the pumpkin is quite soft, about 30 min.  Scoop out the flesh and mash by hand or using a food processor.

White flowers

Powered by Linky Tools

Click here to enter your link and view this Linky Tools list…

Chocolate Orange Macadamia Truffles

Choc Orange Mac Truffles 1

The universe has a way of leading you towards things, doesn’t it? There are suggestive powers out there that not always subtly lead you towards a decision.  You may discover a new holiday destination that you want to try out, and suddenly there are references to that destination in every magazine you read.  Also three other people in your workplace have just been there and are full of stories about how amazing it is.

They show you pictures of their bare knees propped up on a beach with the ocean in the background (anyone else baffled by that trend??).  Then you get an email about holiday deals to the very same place and that decides it for you.

Sometimes, there really is no point arguing with the Universe.

Choc Orange Mac Truffles 6

Over the past couple of weeks, the Universe has been throwing balls at me.  Not the type that are made of hard rubber that people more athletic and co-ordinated than I kick around on a field on purpose (also baffling).  These are the very same type that for some reason seem to be magnetically attracted to my head and will come flying through the air to give me a concussion, even if I am no-where near the field in question.

Choc Orange Mac Truffles 3

No, the balls I’m talking about are the smaller, softer chocolatey variety. Truffles, if you will, although I’m sure you’ll agree that ‘balls’ is infinitely more fun to say.

They are all over the internet, these little spheres of goodness.  Here, and here and here. Ohh and these ones!  Last weekend my parents had people over and I was asked  to make these date truffles, so of course I was already in balling mode.  Then there was lunch at Ungaro Raw followed by their divine chocolate truffles.  And that did it for me.

If the universe wants balls, who am I to deny it?

Choc Orange Mac Truffles 2

As a lover of texture in my balls (too far?), I decided to make some chocolatey truffles that were creamy with avocado and studded with shredded coconut and crushed macadamias that would make the eating experience that much more interesting.  These are only mildly sweet as I preferred the choc orange flavour to dominate, but you can add more sweetener if you prefer.

Before you say anything or make that face, I promise you can’t taste the avocado so don’t let that stop you.

I have a box of these in my fridge and I still can’t get them out of my mind.

So, I want to know…… what has the universe been telling you lately?

Choc Orange Mac Truffles 5

Chocolate Orange Macadamia Truffles

Makes 23-25 truffles

Get:

1/2 cup raw, unsalted macadamias
3 tbsp raw cacao or cocoa powder + 2-3 tbsp for dusting
4 1/2 tbsp dextrose powder (fructose-free) or icing sugar
Flesh of 1/2 a large, softish avocado
1/2 cup shredded coconut
1/2 cup skim milk powder
Finely grated zest of 2 oranges
1 tbsp orange juice

Make:

Pulse the macadamias in the food processor until they are very coarsely crushed.  I stopped when some of the nuts were in a coarse powder but there were still lots of small un-powdered pieces.

Place the avocado flesh in a large bowl and mash well with a fork.  Sift in 3 tbsp of the cacao or cocoa powder.  Add the other ingredients.  If using icing sugar, this should be sifted as well.  Mix well with a spoon, then with clean hands like a dough.

Place the bowl in the fridge for about 30 min.

Have a tray or a large plate lined with grease-proof paper.  Place 2 or 3 tbsp of cacao or cocoa powder in a food-safe plastic bag, such as a sandwich bag.

Oil your hands a little- I used coconut oil.  Roll the mixture into balls.  I like truffles that are about 3 cm in diameter (roughly a tbsp).  Drop 3 or 4 truffles at a time into the bag of cocoa powder.  Hold the top of the bag closed and shake to coat the truffles.  Dust off the extra cocoa powder and place the balls on the plate.  When all the truffles are done, place them in the fridge for at least an hour or so before serving or devouring.

Choc Orange Mac Truffles 4

Fructose-free Lemon Curd from a Lemony Bounty

I’ve set about the task of growing herbs in my balcony with a stubborn determination which is not entirely typical of me.  Mind you, gardening for me is an undertaking that requires nothing short of the stubbornest of determinations because despite my best efforts, I seem to fail miserably at growing anything.

Anything apart from mould in bowls of questionable things in my fridge, that is.

lemons 1

Of course like all other products of my generation, I blame my mother entirely for this particular deficiency.  She once told me that when she was a child, she planted some seedlings and rushed out excitedly the next day to pull them out of the soil to check if the roots were growing.

Needless to say there was not much of anything growing after that.

Lemon Juice

As luck would have it, Dad is actually quite a competent gardener and I can almost forgive him for not passing on the gene as he keeps me adequately supplied with whatever is flourishing in their garden.

So while the basil languishes in our balcony and the dill shrivels pathetically next to it, my parents’ garden has a curry leaf tree that has reached alarming heights, chilli plants that frequently sprout their spicy red fruit and a lemon tree that produces impressive numbers of citrusy goodness every winter.

When my parents handed over a bag of the aforementioned lemons, it was immediately clear to me that I would not be able to use all of the fruit before they dried up to half of their juicy selves.

Lemon Curd 2

Following this was the thought that this would be the perfect opportunity to try my hand at making lemon curd.  That’s right, for the first time!  Surprising as I have always found the sweet, creamy tang of lemon curd at once delightful and refreshing.

I then decided that one first wasn’t enough for the day and decided to make a fructose-free version of said lemon curd.

This version uses dextrose, which is a glucose powder.  It is slightly less sweet than regular lemon curd but I found it sweet enough.  You could probably add a little more dextrose if you wanted to.  You can use lemon curd for lots of things- tarts, lemon meringue pie, cake.  Or just spread it on toast.  I am planning more lemon curd related posts in the future so stay with me fellow citrus-lovers.

So what are your favourite ways to use lemon or other fruit curds? I would love to hear your ideas in the comments section.

Lemon Curd 1

Fructose-free Lemon Curd

Makes just under a cup

Modified from Gifts from the Kitchen by Annie Riggs via The Patterned Plate

Get:

2 eggs

Juice and finely grated zest of 1 1/2 lemons

62g butter, cubed

110g dextrose

Make:

Beat the eggs and place in the heatproof top bowl of a double boiler or Bain Marie.  I used a large thick walled ceramic bowl.  Ensure the water in the lower vessel is not touching the bowl at the top.  Add the other ingredients and cook on moderate heat for 17-20mins, stirring every few mins.

Stop cooking when the mixture is the consistency of a thick custard.

Allow to cool for a few mins, then place in the fridge to speed up the cooling process.

Place into a sterilised jar and in the fridge.  Mine lasted a few days in the fridge.

Notes:

To sterilise glass jars, wash with soap and hot water and place the jars and lids upturned on a baking tray in a preheated oven at 160 C for 20 mins.

If  fructose-free is not your thing, replace the dextrose with the same amount of caster sugar.

Lemon Curd 3