Or La La Banana Bread (Paleo) from Clean Living Cookbook

We have talked before about my cookbook fascination.  You very sweetly didn’t judge me when I revealed that I own many more cookbooks than I actually use.  I recently had a glimpse of what lay in my future when I visited the home of a friend of a friend whose cookbook collection put mine to shame.  “Let me show you something” She said as she slid open her wardrobe doors to reveal a wall of cookbooks.  An entire wall.  Vintage tomes, the pages yellowed and slightly fragile sat alongside crisp, contemporary recipe collections adorned with breathtaking photography.  It was not quite heaven but pretty darn close.

Banana Bread Clean Living 1

One of the latest additions to my collection (and one step closer to the coveted cookbook wall), is the Clean Living Cookbook (Hachette, Australia), by My Kitchen Rules alumni Luke Hines and Scott Gooding.  I cooked from it no less than six times in the last two weeks, and I think it’s a safe assumption that this is one member of my cookery book army that will soon be thoroughly covered with ingredient stains, a sure sign of affection.  It is packed with uncomplicated recipes for wholesome, moreish dishes that your body as well as your taste buds will thank you for.

Banana Bread Clean Living 3

Deciding which recipe to share with you wasn’t easy, but in the end, this one was an obvious choice.  You see, I used to make banana bread with such frequency that I have been accused of buying bananas and deliberately ignoring them until they are ready for the banana retirement village that is banana bread.

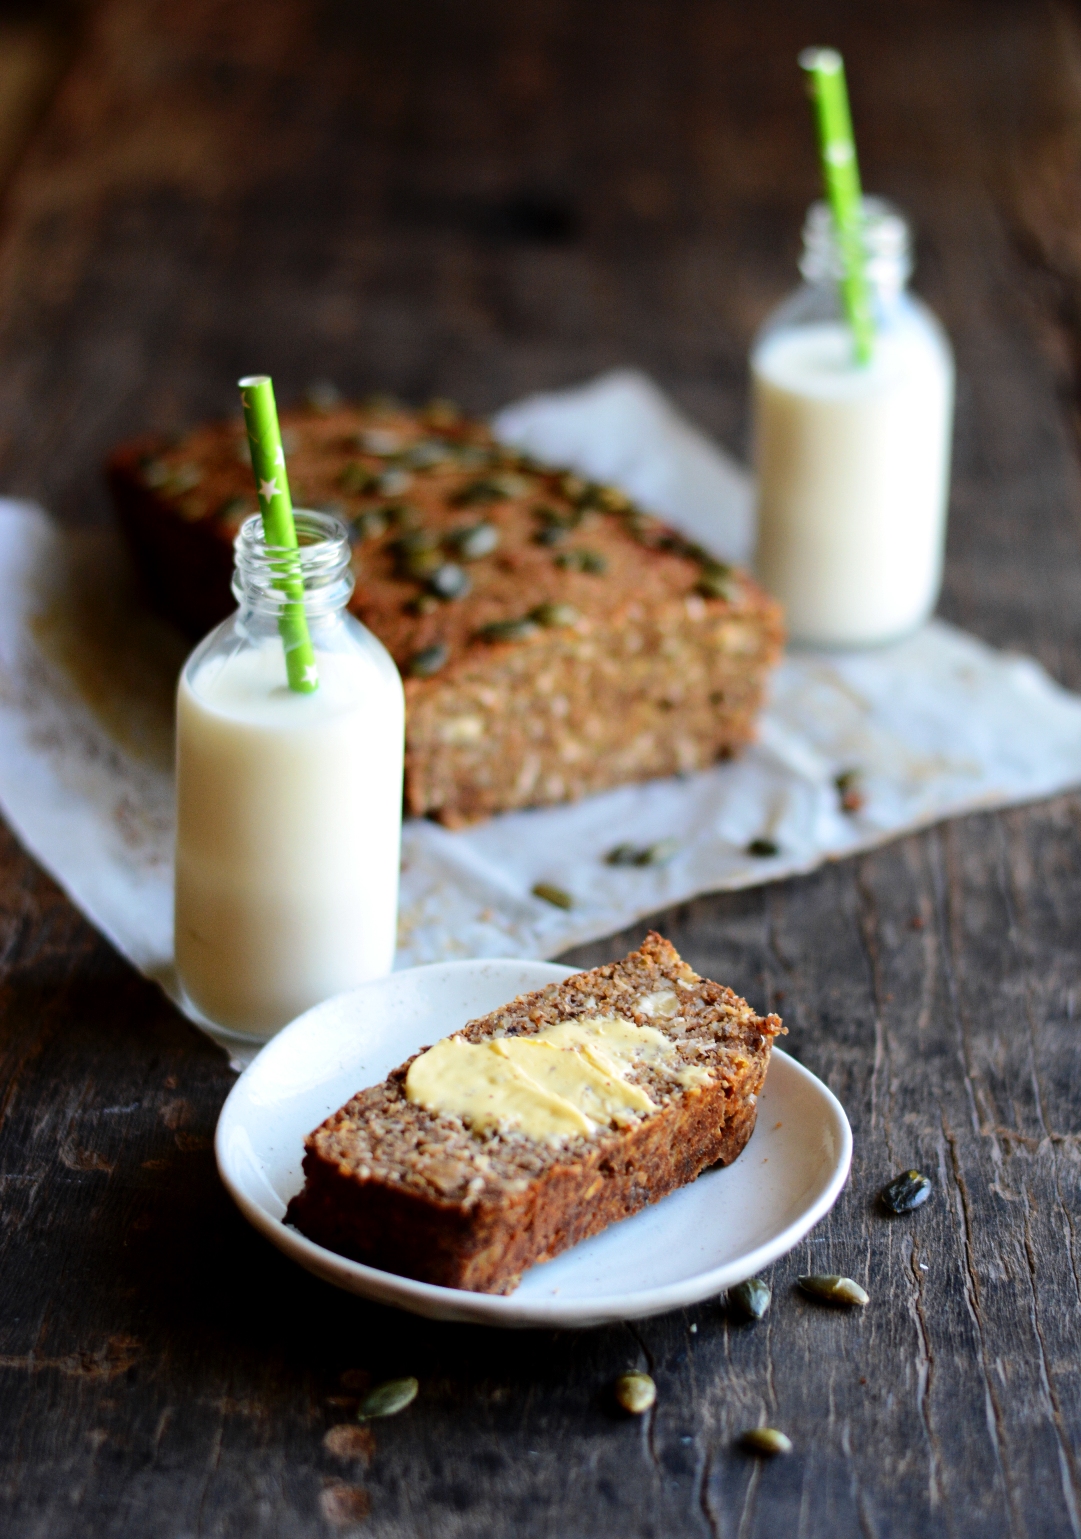
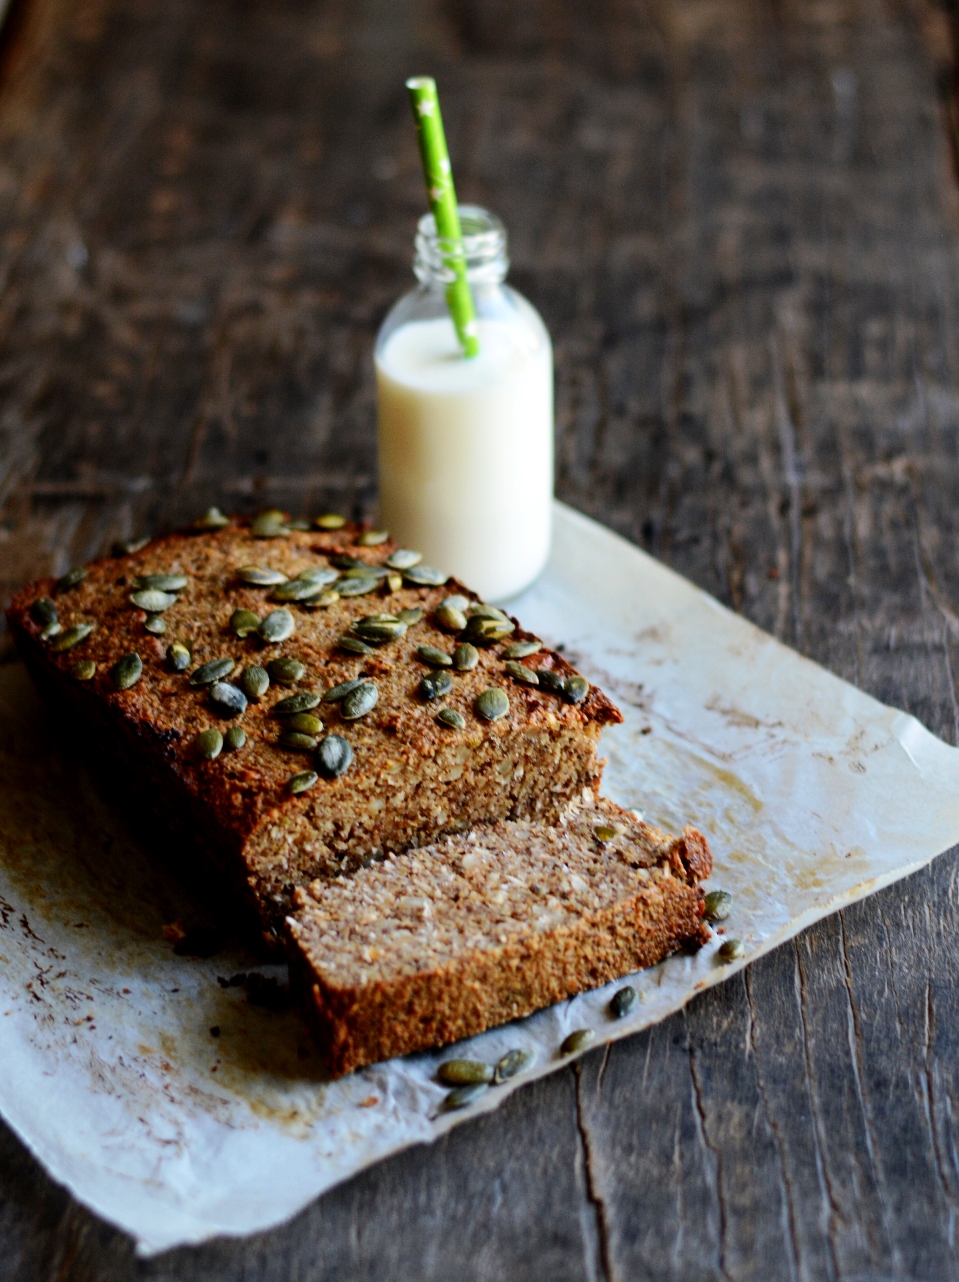
When I decided to cut down on sugar, I reluctantly gave up my habit due to the sugar content of most banana bread recipes.  Scott and Luke’s recipe on the other hand, is Paleo friendly, which makes it free of refined sugars as well as gluten.  This is not the cakey, oversweet slice you get in cafes.  No, this Or La La Banana Bread is a much more healthful loaf, dense with the chew that coconut offers and the rich, tight crumb that almond meal brings.  I tweaked it very slightly, adding a little more oil for a more moist outcome.  If you don’t have coconut oil, extra virgin olive oil would also work.

Banana Bread Clean Living 5

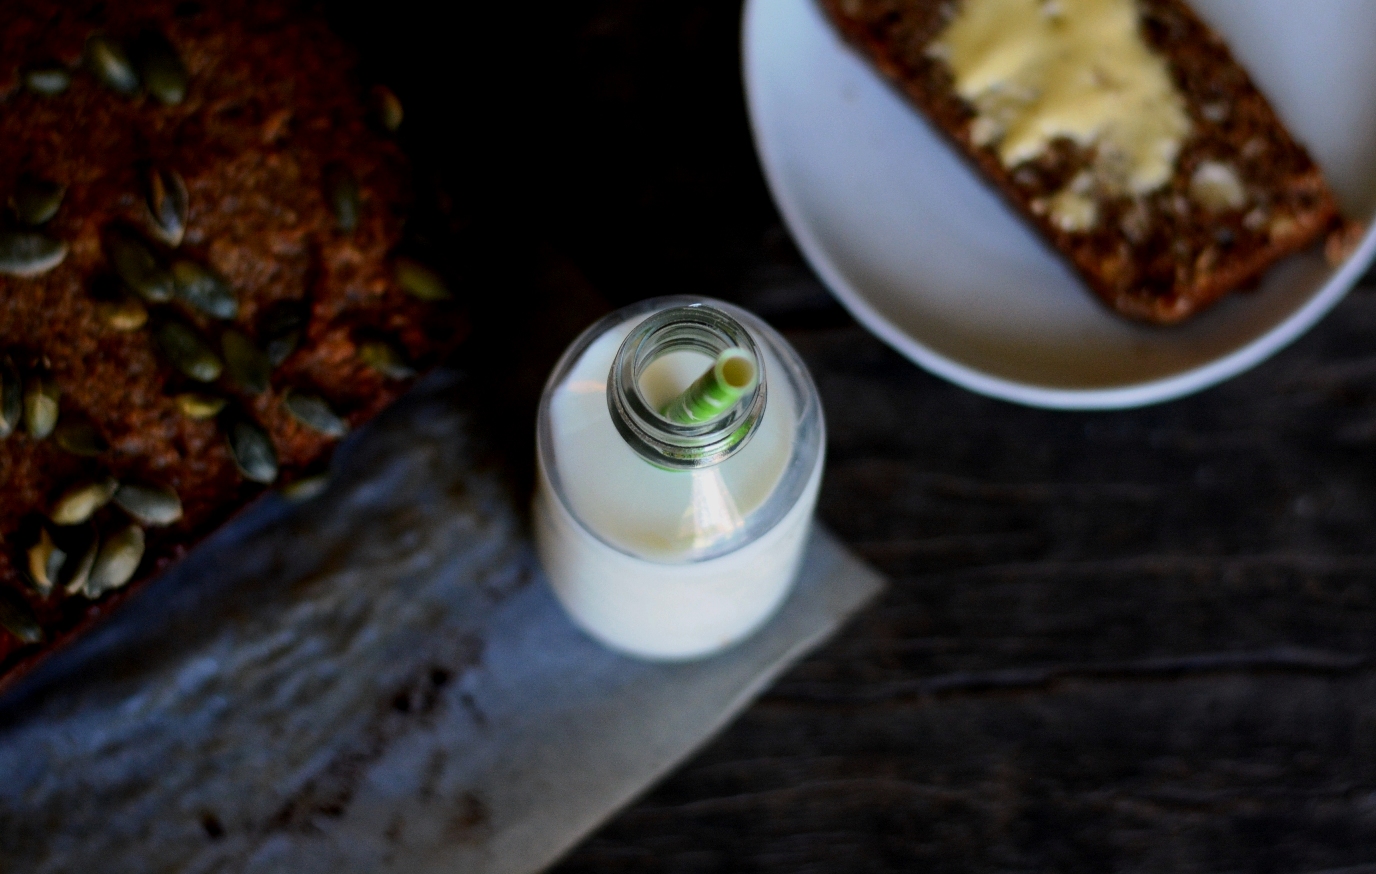
It is best straight out of the oven, still hot slices tossed gingerly between fingertips, or toasted and slathered with your favourite spread.  Soon after I made it for the first time, I happened to discover some ripe mango flesh in the freezer, a welcome remnant of the summer just gone.  So then there was a mango version, which was equally lovely and disappeared just as fast.

Banana Bread Clean Living 4

Or La La Banana Bread

Very minutely modified from Clean Living Cookbook

Makes 1 loaf

Get:

2 cups almond meal
3 eggs
2 tbsp nut butter (I used peanut)
3 tbsp coconut oil
1 tsp cinnamon
1/2 cup shredded coconut
2 large ripe to overripe bananas (or 1 cup ripe mango flesh for mango bread), mashed
1 tbsp chia seeds
1/2 cup nuts, roughly chopped (walnuts, cashews or pistachios work well)
A small handful of shredded coconut, pepitas or sunflower seeds to sprinkle on top (optional)

Make:

Preheat the oven to 180 degrees Celsius.  Grease and line a loaf tin (the boys recommend 10 x 20 cm) with baking paper.

In a large mixing bowl, mix together the almond meal, eggs, nut butter and oil into a thick batter.  Add the coconut, banana (or mango), cinnamon, chia seeds and nuts, and combine well.

Pour the batter into the tin and level out the top using a knife or spatula.  Sprinkle coconut or seeds (if desired) over the top.  Bake on the middle shelf of the oven for 25-30 mins, or until a knife passed into the centre comes out fairly clean.  Allow to cool completely before turning out (if you can wait that long!).

Banana Bread Clean Living 2

Advertisement

Nutty Bonbons for The Sweet Swap

I didn’t grow up believing in Santa Claus, the Easter Bunny or the Tooth Fairy.  There was no leaving cookies and carrots out for Santa and his hungry reindeer on Christmas Eve. I didn’t awake at Easter anticipating the search for chocolate eggs that a big furry visitor had hidden.  As for the tooth fairy, she didn’t visit till I was at least eight when we migrated to Australia.  By then I was old enough to know better and while I happily accepted coins in return for the last of my baby teeth, I knew deep down that a fairy wasn’t the one providing the compensation.

Nutty Bonbons 1

None of these things are anything to be sad about as these are western concepts that weren’t part of a typical Hindu Indian childhood.  We lived in Mumbai then, or Bombay as it was called at the time.  My parents made sure there was no shortage of wonder in my life and so there was no sense of deprivation.  I was an only child with a quirky imagination and they each had their unique ways of entertaining me.

Nutty Bonbons 5

My mother was then a stay-at-home-mum, and as for many kids who have that luxury, she lost some of her authority come nightfall.  So it was my dad who would come home from the daily grind to his duty of coaxing me to eat the healthy dinner that my mum had prepared.

Luckily he too had quite the imagination and sitting at our Formica table in our little flat, he would find a way to transform the contents of my plate into something a fussy six-year-old would find fascinating.

Rice, yoghurt, curries and sambhar would be carefully piled into an exotic looking arrangement with an equally exotic name to pique my interest.  Dad’s skills as an engineer were never so challenged as they were when he constructed these elaborate creations that gave a new meaning to playing with one’s food. The whackily christened Auburi Biselari Kuselari was one such creation, made up of whatever was on my plate and with a name that was entirely conjured up in my dad’s mind.

I like to think it is more a testament to my dad’s creativity and not a reflection of my own gullibility that this was a tactic which worked very well indeed.

Nutty Bonbons 4

Dad had another trick up his sleeve, and not just in a metaphorical sense.

Wanna see some magic? He would ask.

Now what child says no to that?

He would wave his hands around in the air, click his fingers, mumble some magicky sounding mumbo jumbo.  With spectacular pomp, dad would make a fist, wave his other hand over it and turn it over to reveal a treat as if materialised from the air.  And amazingly in his palm there would be a 5-star chocolate bar or a little pack of Gems (India’s answer to M & M’s) or a wedge of Amul cheese in its foil wrapping.

Dad knew just how to enthral and impress his little girl.

Nutty Bonbons 2

The Sweet Swap wasn’t quite the same as my dad’s wizardry, but it still involved packages of sweets appearing, as if by magic, on my doorstep.  The inaugural event involved food bloggers from all of Australia and was put together by two lovely bloggers; Sara of Belly Rumbles and Amanda of Chewtown.  Not only did the event raise funds for the charity organisation Childfund Australia, but it served to connect food nerds from all over the country, a real bonus for a newbie blogger like yours truly.  The basic gist of it was that each blogger was matched with three other bloggers.  We were instructed to make three batches of the same sweet and post them off to our matches.  In turn, we received three surprise bundles of sweets from the bloggers that we were matched to.

Now what could be better than receiving homemade goodies in the mail?

Over the course of the week, I delightedly received firstly some scrumptious Irresistaballs by Tara from vegeTARAian, followed by the heavenly, goodbye-diet, Snickers Bars courtesy of Cassandra from Food Is My Friend.  The last package contained some cloud-like Green Tea and Lemon Sherbet Marshmallows from Ed at Yaya’s Yumyums.

Left to right: Marshmallows, Irresistaballs, Snickers Bar

As for me, I decided to try and dabble in some low-fructose treats.  A little while ago, one of my colleagues, Maria, gave me a recipe for some seriously addictive bonbons that she had brought in to share.  After a few tweaks, I came up with a version that had a fructose-free middle and a coating of dark chocolate.

These bonbons have an incredible texture, with ingredients that feel really substantial in the mouth.  The bitterness of the dark chocolate beautifully cuts through the sweet nuttiness of the filling.  Remember that almond butter we made a few weeks ago?  Well, you probably didn’t need a way of using it up, but if you did, this is one.  These beauties are super easy and no-bake, which means you could easily get the kiddies involved, as long as an adult is handling the molten chocolate.  They also make a great gift and evidently survive well in the postal system.

VKD_0637

These bonbons landed on the doorsteps of Emily of  Hold the Peas, Muppy of Muppys and as nervous as I was about sending chocolate treats that I made to a professional sweet-maker, John of Perfection Chocolates.

Nutty Bonbons

Makes 30-35 bonbons

Get:

1 1/2 cup walnuts
1 cup shredded coconut
1/2 tsp cinnamon
1/4 tsp vanilla extract
2-3 tbsp almond butter
1/4 cup rice malt syrup
150g good quality dark chocolate
Desiccated coconut for sprinkling

Make:

Blitz the walnuts in a food processor until a very chunky meal is achieved.  Place in a large mixing bowl and add all the other ingredients apart from the chocolate. Start with 2 tbsp almond butter and add more later if the mixture is too dry.  Mix with a wooden spoon until it is a sticky, even mixture.  Oil your hands with a little coconut oil or a neutral oil.  Roll the mixture into balls that are a little smaller than a cherry tomato.  Spread out on a tray and place in the fridge for at least an hour.

Melt the chocolate using your preferred method- I like to use a Bain Marie.  Drop the balls into the molten chocolate two or three at a time.  Use two teaspoons to roll each ball in the chocolate until completely covered.  At this point, I sprinkled about half of them with desiccated coconut.  Place the balls on a grease-proof paper lined tray and return to the fridge. Refrigerate for at least 2 hours.

Notes:

You can substitute any other nut butter for the almond butter.

To make these completely fructose-free, you could use fructose-free chocolate which is sweetened with glucose or Stevia, and vanilla powder instead of extract.

Of course, if you are happy to embrace the fructose, you can substitute golden syrup for rice syrup and use any chocolate you like.

Nutty Bonbons 3

Date-me-you-nut Truffles

I saw these gorgeous looking Date Truffles on Prerna Singh’s equally gorgeous blog, Indian Simmer, some time ago.  I finally got around to making them, then wondered why it took me so long as they are oh so easy and rewarding.  Rich and chewy, sweet without being sickening, it is a damm good thing that these babies are actually quite healthy.

DSC_0743

The first batch I made ended up as gifts to friends and family in Adelaide, in colourful little jars along with dark chocolate truffles (it’s all about balance, I say!).

The second batch was sent to a friend who is soon undertaking the painful and soul-destroying task of moving house.  She declared it to be a fabulous ‘packing snack’, which I fervently hope meant ‘a great thing to snack on while packing’ as opposed to ‘a great snack to use as packing material’.

DSC_0786

Part 2 of the second batch made a wonderful pre-skydiving snack (yes, you heard right and more on that later).  It certainly was a much needed energy hit after rising  at an unearthly hour to drive ninety minutes to take the leap.

The third batch- and yes, I have indeed made 3 batches in the space of 2 weeks- is sitting comfortably in our fridge waiting to be gobbled.

So here goes…..the basic recipe is much the same as the original, but being me I couldn’t help but throw in a few spices.

DSC_0739

Date-me-you-nut Truffles

Makes 14-16

Modified slightly from Cocoa Covered Pistachio Date Truffles on Indian Simmer

Get:

1 tbsp unsalted butter

500g Pitted Dates
The insides of 4-6 cardamom pods, ground to a powder
1/2 tsp cinnamon powder
Dash of vanilla extract (optional)
1/2 cup shelled nuts (pistachios, macadamias, hazelnuts, pecans, almonds all work well)
About 1/2 cup dessicated coconut

Make:

In a non-stick saucepan, melt butter. Add dates, spices and vanilla and cook on medium heat until the dates soften and start to soften and go a little gooey (about 10 mins).

Place date mixture into a food processor and allow to cool a little. Process to a thick paste.  Use the pulse setting.  It may be hard for the blades to move through the mixture, but do not add any water.

Add nuts.  If using almonds or hazelnuts, I prefer to roast them in a 170-180 C oven for 7-10 mins.  Process the nuts into the date mixture so that the nuts are chopped finely but not powdered (you should still be able to distinguish the nut pieces).

If the mixture is very hot, allow to cool further. Pinch off small amounts and form into balls, rolling them between clean hands.  I like to make the truffles about 3 cm in diameter.

Place dessicated coconut in a small food-safe plastic bag (such as a snap-lock sandwich bag).  Throw in truffles 3-4 at a time, hold the bag closed and shake around so that the truffles are coated in coconut.  Place the coconut covered truffles in the fridge for at least a couple of hours.

Other options are to coat the truffles  in cocoa powder, as specified in the original recipe, or in crushed nuts.

Gift or gobble as appropriate.

DSC_0742