Dessert Wontons with Sweet Dipping Sauce

Dessert Wontons 1

It’s not quite a recipe, really.  More like an assembling of things to be steamed, dipped and devoured.  It all started when I was invited to a Chinese themed High Tea at Four Friends, and I started to wonder what I could contribute given my very limited Asian dessert repertoire.  The thought that lingered in my mind was one of dessert wontons.

Dessert Wontons 4

You see, us Indians make a steamed rice parcel stuffed with coconut and jaggery that if done right, will fall apart in the mouth leaving behind a puddle of seductively melted brown sugar and chewy coconut.  How I went from contemplating modakam, and onto deciding to stuff my wontons with peanut butter, chocolate and coconut is probably a function of my ever tangental mind.

If you don’t have a bamboo steamer, you could use a metal colander sprayed with a little oil or lined with grease-proof paper, in a large covered pot with water in the bottom of it.  However you make them, they are best eaten fresh and dipped generously in the sauce.

Oh! And speaking of sweets…..if you live in Sydney and are of a sugary inclination, don’t forget to enter the giveaway to win tickets to the Cake Bake and Sweets Show March 21 – 23 here.

Dessert Wontons 2

Nutty, Chocolatey Dessert Wontons with Coconut Dipping Sauce

Makes about 15

Get:
75 g dark chocolate
1/3 cup peanut butter
1/2 cup shredded coconut
1-2 tbsp rice syrup or honey

Wonton Wrappers

For the dipping sauce:
1/3 cup coconut cream
2 tsp rice syrup
Few strands saffron (optional)

Make:

Blitz the filling ingredients together in a food processor until a coarse paste forms.  Start with 1 tbsp syrup and add more if you prefer it sweeter.

Fill the wonton wrappers.  I used about a tsp of mixture per wrapper, placed it in the centre and folded the edges together.  I used a little water around the edges to make them stick.

Sprinkle the wontons with water and steam them for about 20-25 mins, or until the wrappers are cooked.

Make the dipping sauce by whisking the ingredients together well.

Serve the wontons with dipping sauce for dessert.

Dessert Wontons 3

Advertisement

Apple, Coconut and Jaggery Hand Pies for SABH

This month’s Sweet Adventures Blog Hop theme is Childhood Favourites, hosted by Sophie from the Sticky and the Sweet. The theme set my mind racing.  After all, aren’t we all spoilt for choice when it comes to the sweets we were introduced to as kids? For me as a small child in India, there were gems (Indian equivalent of Smarties), 5-Star Chocolate bars, Amul Pista ice-cream and countless traditional Indian sweets.  When I moved to Australia, there was even more sugary goodness to be discovered and toffee apples, Chupa Chups, push pops, Buffalo Bill ice-creams and Jelly Pythons came into the picture.

Apple coconut jaggery pies 2

It is a special quality of childhood enjoyments that often when we try them as adults, we either don’t quite enjoy them as much, or we do but are old enough to know how appallingly lacking in nutrition they are (I’m talking to you, sherbies and redskins!).

So I decided to choose something that I would happily indulge in even now, and not just for the sake of nostalgia.  Two things, to be precise.  The first is that bubbly pastry pocket of lava-hot goodness, the McDonalds Apple Pie.

The second is a South Indian dessert that my mum has made for as long as I can remember.  It is mostly made as a religious offering on festival days a few times a year, making it all the more appealing.  Sliced bananas are tossed in jaggery (unrefined Indian brown sugar), cardamom and fresh grated coconut.  Sometimes a little saffron or a handful of raisins and cashews are sprinkled in.  It is good fresh, amazing half an hour later and a sludgy, syrupy mess the day after, if it even makes it that far.

Apple coconut jaggery pies 1

I used apples instead of bananas for two reasons.  They stand up better when baked in pastry than do bananas, and I had an abundance of them after going apple picking in Bilpin last week.  So it was that two desserts from my two worlds came together in these hand pies.

The pastry was the trusty sour cream pastry from Smitten Kitchen that I have now used several times because it is so good.  In hindsight though, a traditional, thinner shortcrust pastry may have suited these pies better, although I’m certainly not complaining abut the outcome.  The apple pie filling was enhanced by the coconut and almost caramel-like jaggery, with a bite of cardamom just to remind me exactly where I’m from.

Apple coconut jaggery pies 3

Apple, Coconut and Jaggery Hand Pies

Makes 12-15

Get:

Filling:
5 or 6 small red apples, diced (I used Aussie Royal Galas)
1 ½ cups (about 300g) of firm Jaggery
1/2 cup fresh grated coconut
The insides of 15-18 cardamom pods, powdered
Generous pinch saffron strands

3 quantities of this pastry (leave out the ajwain and cumin seeds and only use 1/2 the amount of salt)

Make:

Toss the filling ingredients together in a bowl and allow to sit for 10-20 mins.

Roll out the pastry to 4-5mm thickness.  Cut out shapes of your choice.  I went for squares, so I cut strips of pastry that were about 25 cm x 10cm.  I spooned the filling into the middle of one side of the pastry, leaving the edges clear.  I then folded the pastry over to cover the filling.

Use your fingers, then a fork to press around the edges.  Place the pastries in the fridge again for about 20 mins.  In the meantime, preheat the oven to 200 C.

Place the tray of pastries in the oven and bake for about 20-25 mins or until the pastry is crisp and cooked.

Apple coconut jaggery pies 4

Rose and Raspberry Celebration Tart for OSP’s 1st Blogiversary!

Rose raspberry tart 1

I’ve been like an excitable little kid, anticipating this day. The day that marks a year of blogging for me. A year of breathlessly rushing into the kitchen after a day at work to try out a new idea I had. To make it truly amazing so that I can share it with you all. A year of thinking way too much about every canape, main meal and dessert I ate. Of putting every dish through a deep analysis to figure out how I could make it at home, what interesting twist I could give it and more recently, what I could do to make it sugar-free. Twelve months of drawing on my imagination and the things that have inspired me to decide how I want to style the dish and the best way to photograph it to provide a visual complement to my words.

Also, perhaps closest to my heart, the words themselves. The stories I would tell and the windows that dish would open up into the inner workings of my mind. Because for me, food is as important as it is because it always tells a tale, triggers a memory or incites an emotion. There is a commonality between my mother’s family’s puliyogare, and a terrine served at a fine dining restaurant. Between that three ingredient fudge and that delicate, seven layer cake that graces the window of the upmarket patisserie, looking far too pretty to plunge a spoon into.

Raspberries 1

That connection may not be in the ingredients, the method or how it is served. What all food has in common is that it was made by hands that are controlled by a mind with a story to tell, a history to either reveal or protect and thoughts to express.

Food is sustenance, for nourishing and for fulfilling. But it is also for sharing, for drawing people in and for bringing them together. A bowl of warming soup that you slowly savour while watching television, curled up on the couch on a wintery evening. The pudding that is eaten slowly, each syrupy spoonful punctuating words that you share with someone you are just getting to know, while you try desperately not to let the sauce dribble inelegantly down your chin. The cup of too-hot tea that you blow the steam off before you settle your head back onto the shoulder of your sweetheart.

Rose raspberry tart 3

It is a privileged position, this one. To be able to view food this way is a function of a comfortable life. But it is how I view food, and I thank you for allowing me to share that with you for the past year. This yearling space of mine means more to me than perhaps I could ever explain. A creative outlet, a happy place and a raft that has helped keep me afloat through what has been a challenging year. Each comment, glowing or otherwise, every tiny piece of interaction and encouragement has made my heart smile.

At the basest level I have discovered rosewater, cashew cream, how to steam puddings and how wonderfully therapeutic bread-making is. I have found rice syrup, Quinoa and kale. I have worked out what makes a good food prop and just how much light I need for a photo session. Beyond that, this small corner of mine has given me so much more.

Rose raspberry tart 4

We have come a long way, you and I. From that first kulfi recipe with its endearingly awkward photographs to now, when I finally feel I am getting a grasp of things. We can go further, we know this. We have so much more to discover about each other, to share over a cup of coffee and a chocolate truffle.

This blog is growing too. I am working to make some positive changes here in this space and outside it.  So do stick with me.  For there is no-one else in the world I can imagine moving forward with.

Thank you all for sharing the past year with me, it has meant more to me than you could possibly know.

Rose raspberry tart 6

Rose and Raspberry tart (Vegan, Gluten-Free, fructose-free)

Feeds 6-8

Crust recipe modified from here

Get:

For the crust:
2 1/2 cups almond meal
Generous pinch salt
1/4 tsp baking powder
4 1/2 tbsp coconut oil
3 tbsp rice syrup

For the rose and cashew cream filling:
1 1/2 cups raw cashews
Water
2 tbsp rosewater
1/3 – 1/2 cup rice syrup or honey

To decorate:
2 small punnets raspberries, washed and patted dry
Anything else you desire- chocolate, crushed nuts etc etc etc.

Make:

Immerse the cashews in water and soak for at least 3 hours.

To make the crust:
Preheat the oven to 175 C.

Place the almond meal, salt and baking powder in a large bowl and mix well.
In another bowl, whisk the coconut oil and syrup. They will not mix very well but do your best. Add the wet ingredients to the dry ingredients and with clean hands, crumble everything together and knead lightly until a dough is formed.

Grease a tart tin and press the mixture evenly into its base and about 1 1/2 cm up the sides. Bake for 15-20 min or until golden brown.

To make the filling:
Drain the cashews and rinse. Place them in the bowl of a high speed food processor. Add rosewater, syrup or honey and 1/3 cup water. I found 1/3 cup of syrup to be adequate, but taste and add a little more if desired. Process on high speed until a smooth or slightly coarse cream forms, scraping down the sides as needed.

When the tart base has cooled, remove it from the tin and fill with the cashew cream, spreading evenly. Refrigerate for 20 mins before decorating with raspberries and whatever else you choose. I used some dark chocolate leaves that I piped.  You can of course, opt for another fruit if you wish!

Raspberries 3

Bounty Bar Popsicles for SABH (Low-Fructose)

Bounty bar popsicles 1

I’ve ditched the sugar again and apart from a couple of planned (and one unplanned) cheat days, I have been well on track.  After I fell off the wagon towards the end of last year, I made a decision to quit the white stuff again in the new year.  Isn’t it funny how we consider new years eve such a major milestone in our decisions?  As if on the 1st of January we somehow get that extra push we need to make a positive change in our lives.  Really, it’s just another date, isn’t it?

So I’ve taken on a slightly different frame of mind now.  This time around, it is all about what I deserve….remember we talked about that?  From a health point of view, what I deserve is a healthy, well nourished body that I fill with goodness.  After all, you can’t expect to get the best from this vehicle that has been assigned to you in this life unless you give it the very best care, no?

And so it is that the menacing ‘I MUST LOSE WEIGHT’  has been replaced by ‘I deserve to be happy with myself, inside and out and a positive step towards that is to be slimmer and healthier’.  Is that not much kinder, friends?

Like any affirmation, it is to be repeated.  We humans are creatures of habit and our mental patterns, created over years, take gentle persistence to break.  So I remind myself daily of my decision to ensure I have what I deserve and try not to berate myself too much when I slip up.

Try it, dear friends.  Let’s treat ourselves with kindness, and the universe will do the same.

Bounty bar popsicles 3

I was a tad excited when this month’s Sweet Adventures Blog Hop theme of Popsicle Party was announced.  This month it is hosted by the lovely Swah from Love Swah. 
These chocolate covered, coconut popsicles are a frozen, low-sugar version of the Bounty Bar, a popular Australian chocolate bar.  If you want them to be dairy free, leave out the yoghurt but the result will be a harder popsicle.

Bounty bar popsicles 4

Bounty Bar Popsicles (Low-fructose)

Makes 6-8 depending on size of moulds

Get:

270 ml (1 tin) full-fat coconut milk
1/2 cup Greek yoghurt
4 tbsp rice syrup
1/2 cup frozen fresh grated coconut
150g good quality dark chocolate

Make:

 Whisk all ingredients together except for the chocolate.

Pour into popsicle moulds.

Freeze until set.

Melt the chocolate in a double boiler or in the microwave in 20-30 second bursts, stirring in between.

Dip  the popsicle moulds in hot water to loosen, then dip the popsicles one by one into the dark chocolate or paint it on with a pastry brush.

When the chocolate has set, place back in the popsicle moulds (they won’t fit as well) and in the freezer until ready to eat.

Notes:
Frozen coconut is available at Indian grocers.
I had a little mixture left as I have small popsicle moulds, and I poured this into an ice cube tray to throw into my smoothies.

Bounty bar popsicles 2

Red Velvet Bundt Cake

I just wanted to share this cake with you today.  Red Velvet cake is probably my favourite type of cake, and yes I realise what a big statement that is.  I am prepared to stand by it.

Red Velvet Bundt 1

This was Billy Law’s Have You Eaten? Baking Club challenge for this month.  You may remember that I did a food photography workshop taught by Billy a few months ago.

I made this cake for a friend’s house-warming party and as it turned out this was the perfect excuse to make my first Red Velvet cake.  This friend and I were roomies (flatties?) during our London days.  We had an excellent system going where I would cook and she, the neat freak would clean up after me before I could even finish setting the oven timer.  She was also a fellow Red Velvet lover and the two of us with our third flat-mate would wander down to Portobello Markets on a Saturday.  Once there, we would meander among the stalls of antiques, kitsch souvenirs and free-size clothing to the Hummingbird Bakery.  There was always a queue in the narrow store, the number of people waiting almost equal to the number of cupcakes on display.

Two red velvet cupcakes would be ordered, and another flavour, so insignificant compared to red velvets that I can’t even remember what the favourite of our other flatmate was.  Then, clutching our treats, we would continue to make our way through the crowds of Londoners, expats and tourists, relishing each crumb of cake and smear of icing along the way.

Red Velvet Bundt 2

I really didn’t change much in the recipe that Billy provided, so there is not much point typing it out again here.  I threw in a second tablespoon of cocoa powder to intensify the chocolate flavour because, well, this is me we’re talking about.  I also had misplaced my gel food colourings so I used a liquid food colouring of which I used 2 tsp, but would recommend using 3 or 4 tsp judging by the resultant colour.  And yes, I realise that you can’t get an idea of the colour from these pictures but I really didn’t feel comfortable taking a cut up cake to a party.

Lastly I should mention that this was a super easy recipe which yielded wonderful results and an empty platter at the end of the party, which I always think provides better feedback than any words ever could.

I hope you all enjoyed your Christmas and I wish you all a decadent, happy-boozy New Years Eve.

Red Velvet Bundt 3

Spiced Tamarind and Date Truffles

Anyone who has lived in India will know about Dabur’s Hajmola, the digestive tablet packed with various spices that are known to aid digestion.  Hajmola became so popular that they released candy with same spices in two different flavours, Imli (tamarind) and Aum (Green Mango).  Now I’ve made no secret of my love for tamarind here and here and my almost equal love for green mango here.

So it is a logical conclusion that I went through a phase when I was positively addicted to Hajmola candy.  I may or may not have, on one trip to India, purchased all of the candies at one tiny street-side shop to bring back with me.  I left the shop keeper completely bewildered, as he handed over the large bag of candies to a fully grown adult with not a kid in sight.

Tamarind Date Truffles

When December’s Sweet Adventures Blog hop theme of Truffles was announced by JJ of 84th & 3rd, I had the borderline insane idea of creating a Hajmola candy inspired spiced tamarind truffle.  It was one of those things that could have failed miserably and yet in a strange way, it worked and the results were really quite enjoyable. I have avoided adding sugar but if you like things a little sweeter, throw in about a tablespoon of honey.

I have said before that I like things to be textural around here, so I added cashews but you could choose any nut.  The toasted sesame seeds that coat the whole business add a lovely crunch and totally redeem themselves for getting annoyingly stuck in your teeth, but you could use shredded coconut or more crushed nuts if you feel like it.

Tamarind Date Truffles 2

Spiced Tamarind and Date Truffles

Get:

 1 ping pong ball sized piece of tamarind
3/4 cup boiling water
1/2 tsp cumin seeds
1/2 tsp black pepper
4 cloves
3/4 tsp kala namak (Indian black salt)
1 tbsp coconut oil
1/3 cup cashews
500g dates
1/2 cup sesame seeds

Make:

 Shred the tamarind roughly with your fingers and place in a small bowl.  Pour the boiling water over it.  Allow it to soak until the water cools enough to handle, mashing with a fork a couple of times while it is still hot.

In a non-stick fry pan, roast the cumin, black pepper and cloves until fragrant.  Grind to a powder with a mortar and pestle or spice grinder and set aside.

In the same pan, toast the sesame seeds until they are golden brown.  Remove from the pan and set aside in a food-grade plastic or paper bag.

In the same pan, heat the coconut oil and fry the cashews till golden brown.  With a spoon, remove the cashews from the pan and set aside, leaving as much of the oil behind as possible.

When the tamarind/water mixture has cooled enough to handle, use a (clean) hand to squish the tamarind between your fingers to make a thick tamarind flavoured water.  Strain the water into the frypan with the oil, on medium heat.  Allow to cook for 2-3 minutes or until the water has visibly reduced.

Add the dates and cook, stirring, until the dates are softened (about 7-10min).  While stirring, add the spice mix and black salt.

Allow to cool and blitz in the food processor with the cashews until a smooth dough forms.  Roll into balls (mine were about a tablespoon of mixture each).  Drop the balls into the bag of sesame seeds, 3 or 4 at a time.  Hold the top of the bag closed and shake the bag to coat the truffles.  Place the sesame coated truffles on a plate or tray and place in the fridge for at least 2 hours to firm up before eating or serving.

Tamarind Date Truffles 3

Crumbly Olive oil, Rosemary and Pear Cake

I don’t have many words for you today. What I do have though, is a cake.  A simple offering that is so thoroughly unattractive that you just know it’ll be divine.

Last weekend, this cake was my plus one to lunch at the home of my sparkly friend Julia.  Lunch was followed by a dessert buffet of sorts.  Some stunning cupcakes, a decadent chocolate mousse, giant scoops of ice cream and of course, this cake.

I intended to take more photos of my offering……some action shots of it being devoured perhaps.  Or more of it’s slices, so that you can gain a better visual appreciation of the robust exterior surrounding the moist crumb, studded generously with perfectly baked chunks of pear.

Olive oil Pear cake 2

Suffice it to say that when a dish disappears so fast that you don’t get a chance to photograph it as you intended, that can only really be a good thing.

The recipe is from Valli Little’s delicious. Love to Cook, and for once I followed the recipe fairly closely.  The only exception is the addition of cinnamon, which was politely requested by the pears themselves.

Olive oil Pear cake 3

Crumbly Olive Oil, Rosemary & Pear Cake

Modified slightly from delicious. Love to Cook, Valli Little (ABC Books, Harper Collins)

Get:

1 1/2 cups (225g) plain flour
3/4 cup (120g) wholemeal flour
3/4 cup castor sugar
1 1/2 tsp baking powder
1 tsp cinnamon powder
3 eggs
1 1/4 cups extra virgin olive oil (fruity or light variety)
1 tsp vanilla extract
2 cups peeled and diced pears (about 3-4 pears)
2 tsp chopped rosemary leaves
1/4 cup dried cranberries, currants or sultanas
mascarpone, creme fraiche or whipped cream to serve

Make:

Preheat the oven to 180 C.  Grease and flour a cake tin- mine was 18 cm, Valli Little uses a 26cm tin.

Sift together flours, baking powder and cinnamon into a large mixing bowl.  Add sugar and mix.

In a separate bowl, beat eggs, olive oil and vanilla, then add to the flour mixture and stir to combine.  Gently fold through pear, rosemary and currants

Spoon mixture into cake tin and level out with a spatula.  Bake on the middle shelf for 45-55 mins or until a skewer that is inserted into the centre comes out clean.

Best served warm with a dollop of mascarpone or cream.

Olive Oil Pear Rosemary cake

Six Ingredient Microwave Chocolate Burfi (Indian milk sweet)

Yes, yes I know….it’s been a bit of a dessert overload around here, hasn’t it?  I mean, there were these Pots de Crème and these feline Pumpkin Cheesecake Bars.  Oh OH! And this Crumble!

But let’s just think about that phrase…..dessert overload.

Is there such a thing, really?

No, no I thought not.

Chocolate burfi 2

Certainly not at this time of the year when the air is ripe with the cheer of one festival or another.  For Hindus, the one just gone by, Diwali, is a major one and surely not a time to be worrying about silly things like the waistline.

Diwali, or Deepavali is the festival of lights.  Yes you read that right- a festival named after me.  Or was it the other way around?  I’m not keeping track.

The lighting of lamps and the setting off of firecrackers symbolises an awakening.  An illumination by the light of truth to dispel the darkness of ignorance.

Diwali to us is like our Christmas and New Years rolled into one.  We pray to the Goddess Lakshmi for prosperity and exchange gifts of new clothes to symbolise fresh beginnings.

And after the prayer is done, lamps are lit and gifts are given, we do what we do best…….cook up a storm and eat ourselves into a food and sugar coma.

Chocolate burfi 1

This year, Mum and I put together several sweets in addition to the main meal.  I decided to try my hand at Chocolate Burfi, which it will surprise none of you to hear is one of my favourite Indian sweets.  There are two versions of this sweet that I have seen.  Many like to mix cocoa powder in with the basic burfi (milk sweet) mixture.  My preference is the way that the sweet shop down the road from me used to make it when I lived in London.

The base is a fudgy, milky layer and it is topped by a good thick layer of dark chocolate.  I like a chocolate to milk sweet ratio of around 1:2. You could use milk chocolate, but I enjoy the way the dark chocolate cuts through the sweetness of the bottom layer.

I hope you enjoy this as much as I do.  For those who celebrate, I hope your Diwali was filled with love and decadence, and was the fresh start you needed.

Chocolate burfi 4

Chocolate Burfi

Makes 32

The microwave milk sweet technique is also described here

Get:

For the milk sweet layer:
120g butter, cubed
1 can condensed milk
2 cups full-cream milk powder

For the chocolate layer:
200g good quality dark chocolate (I like Plaistowe 70%)
2 tbsp thickened or double cream
1/3 cup nuts coarsely ground (I used pistachios)

Make:

Prepare a tray.  I used a greased silicone 20cm x 20cm baking pan.  If you are using a non-flexible pan, I suggest you grease it and line it with baking paper.

In a large microwave safe bowl, place butter and microwave until melted (about a minute).  Add condensed milk and milk powder and whisk well.

Microwave on high for a minute, then whisk again till smooth.

Microwave on high for another minute and whisk again.

Microwave on high for 30 seconds, then 30 seconds again, whisking in between.

Spoon into the prepared tray and spread evenly.  Refrigerate for at least an hour.

When the milk sweet layer has set, melt the chocolate in a microwave safe bowl in 20-30 second bursts, stirring in between.  When the chocolate has melted, stir in the cream.  If the mixture starts to seize up, microwave for a further 20 seconds.

Pour the chocolate mixture over the milk sweet layer and spread evenly. Sprinkle with coarsely ground nuts and refrigerate until the chocolate is set (at least 3 hours).

With a sharp knife, cut into shapes of your choice. I went for squares that were then cut diagonally to make triangles.

Chocolate burfi 3

Rose and Saffron Pots De Crème

Rose Saffron Pots 3

It’s a funny thing, is rosewater.  Too much of it in a dish and each bite is like a group hug with a gaggle of perfumed grannies.  Although, get the balance right and you are greeted with a sensation that is more a scent than a flavour.  A nuance that adds a romantic and intoxifying quality to the dish, whether it be a scented middle eastern fried rice, a soft and yielding Turkish delight or the Indian Gulab Jamun.

In India, rose is a default flavour, much like chocolate or strawberry in Australia.  Growing up, rose milk, rose Kulfi and the Gulkand (rose jam) that my mum used to buy me from tiny footpath stalls in Bangalore were well-loved and anything but exotic.

Rose Saffron Pots 4

We Indians have the middle-east to thank for rosewater, which was obtained by chemists in the ancient Islamic world using a steam distillation method.  We now not only use it in our cooking, but also in Ayurvedic medicine and as a perfume.  It is not uncommon for unsuspecting wedding guests to be sprinkled with a liberal amount of it upon their entry to the venue as a welcoming gesture.

Rose Saffron Pots 1

When a friend gifted me a copy of the beautiful Delicious Home Cooking by Valli Little, I immediately zeroed in on the recipe for Honey Pots De Crème, the cogs in my mind turning as I worked out how I could make it a fructose-free version with Indian flavours.  The result was a smooth baked custard wafting with the fragrance of roses and saffron, which lends itself to a biscuit for dipping or a sprinkling of nuts as it pleases you.

Rose Saffron Pots 7

Rose and Saffron Pots De Crème

Modified from Delicious Home Cooking, Valli Little (ABC Books, Harper Collins)

Serves 3-4 in ramekins or 7-8 in shot glasses

Get:

150ml thickened cream
1/4 cup + 1 tsp rice syrup or honey
1/4 cup milk
2 tbsp Rosewater*
Generous pinch saffron strands
1 egg plus 2 egg yolks
1/2 vanilla bean
1 tbsp pistachios (optional)

Make:

Preheat the oven to 160 C.

In a medium-sized saucepan, warm the cream, milk, rosewater, saffron and syrup or honey until just simmering (but not boiling!).  Stir gently to incorporate the syrup/honey. Take off the heat and allow to cool a little.

Split the vanilla bean and scrape the seeds into a mixing bowl.  Put the bean casing into the cream mixture.

To the bowl with the vanilla seeds, add the egg and egg yolks.  With an electric beater, beat until pale and a little thickened.  Add the egg mixture to the cream mixture and stir until well combined (do not beat or you will create more froth).  Set aside off the heat for 5 mins to infuse.  In the meantime, boil a kettle of water.

Place the ramekins (3 or 4) or shot glasses for smaller portions (8) in a deep ceramic baking dish.  You can also use small glass jars.  Strain the mixture into a jug and divide the mixture between the ramekins or shot glasses.

Set the dish with the ramekins on the middle shelf of the oven and carefully pour boiling water into the dish to a level about half of 3/4 of the way up the sides of the ramekins.

Bake for 40-45 mins or until set but with a slight wobble.

Remove the dish from the oven and carefully lift the ramekins out of the hot water and onto a tray.  Allow to cool completely, then chill in the fridge for at least an hour before serving.  I roasted the pistachios for about 6-7 mins, then crushed them and sprinkled them over the Pots de Crème before serving.  You could use anything that provides a bit of a crunch like other nuts, wafers or honeycomb.

*Rosewater is available at Indian and Middle eastern grocers.

Rose Saffron Pots 6

Black Cat Pumpkin Cheesecake bars and 5 Tips for Safe Pets this Season

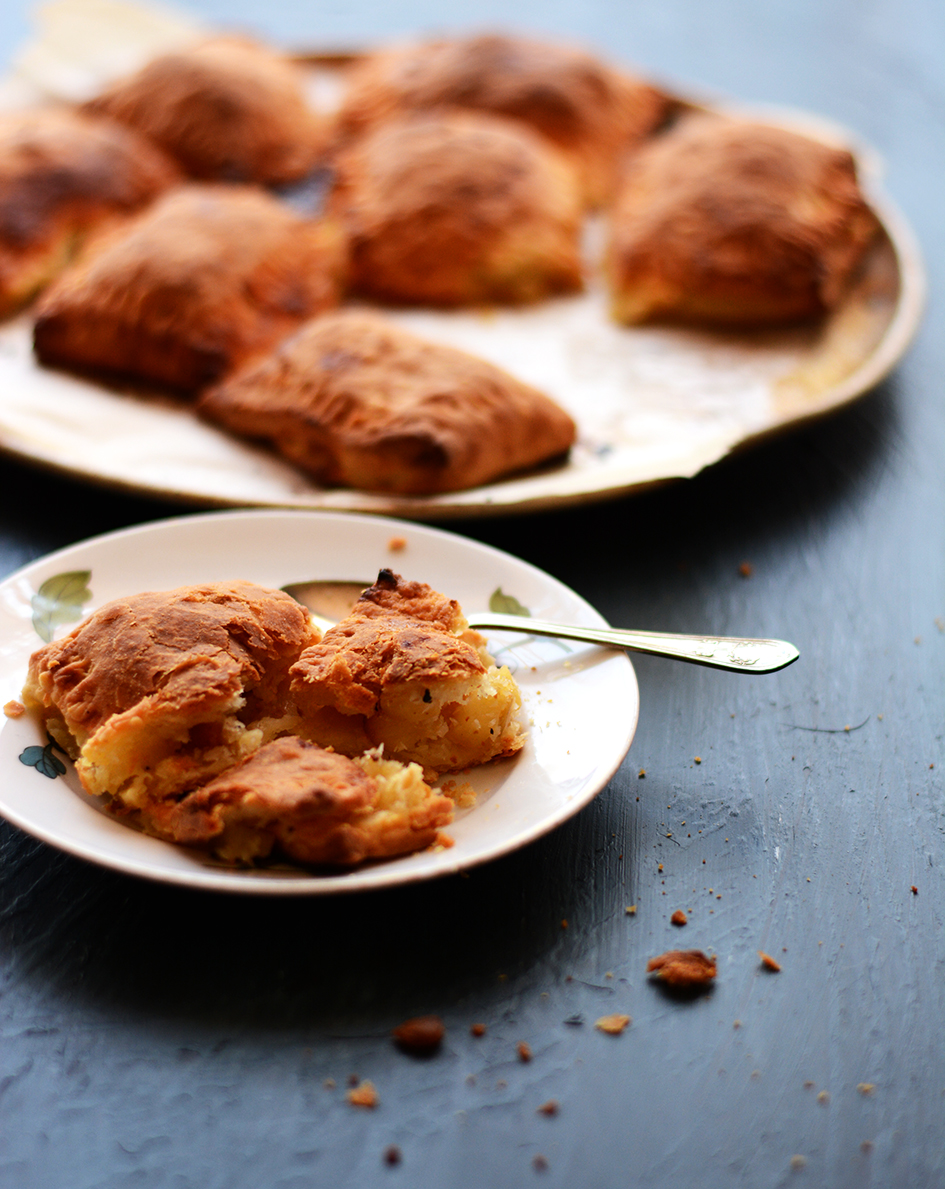
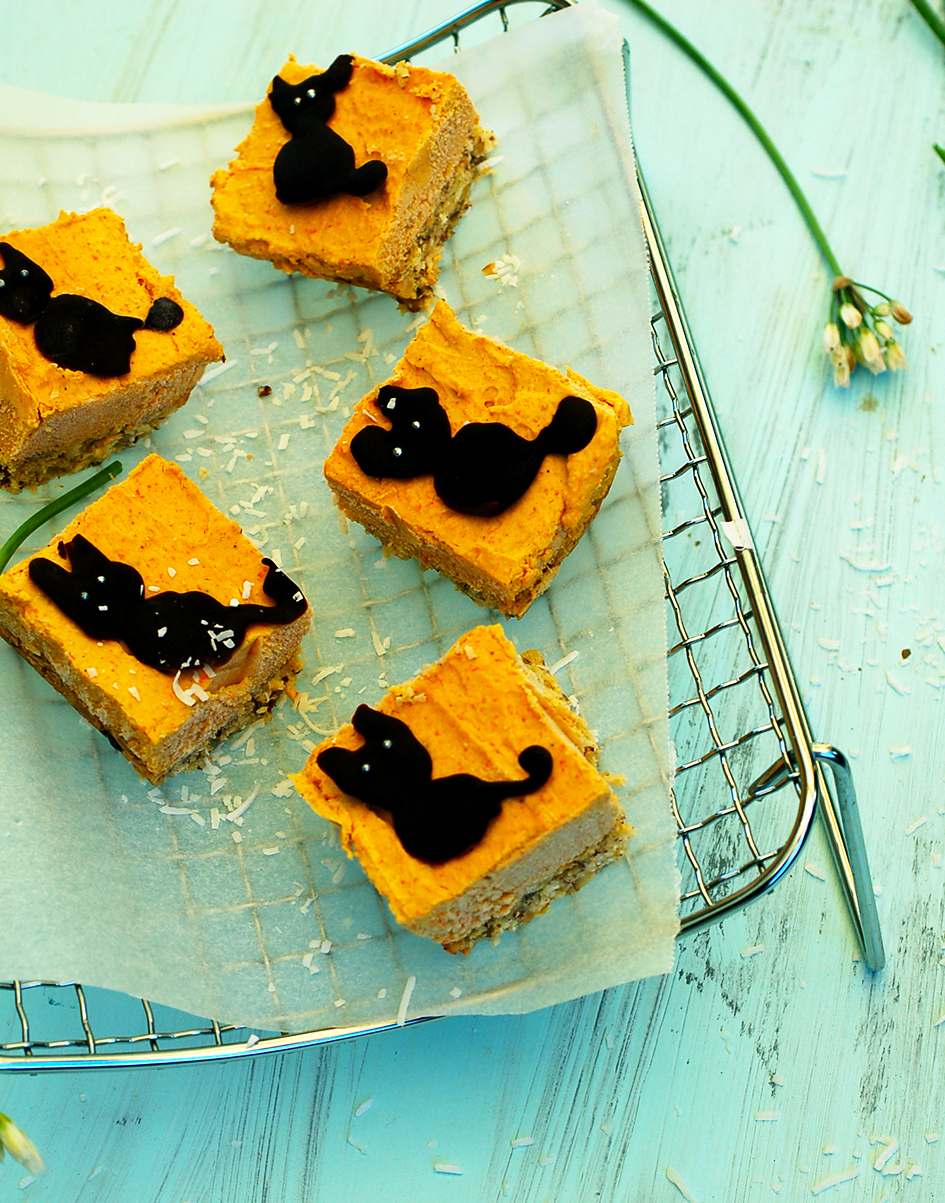
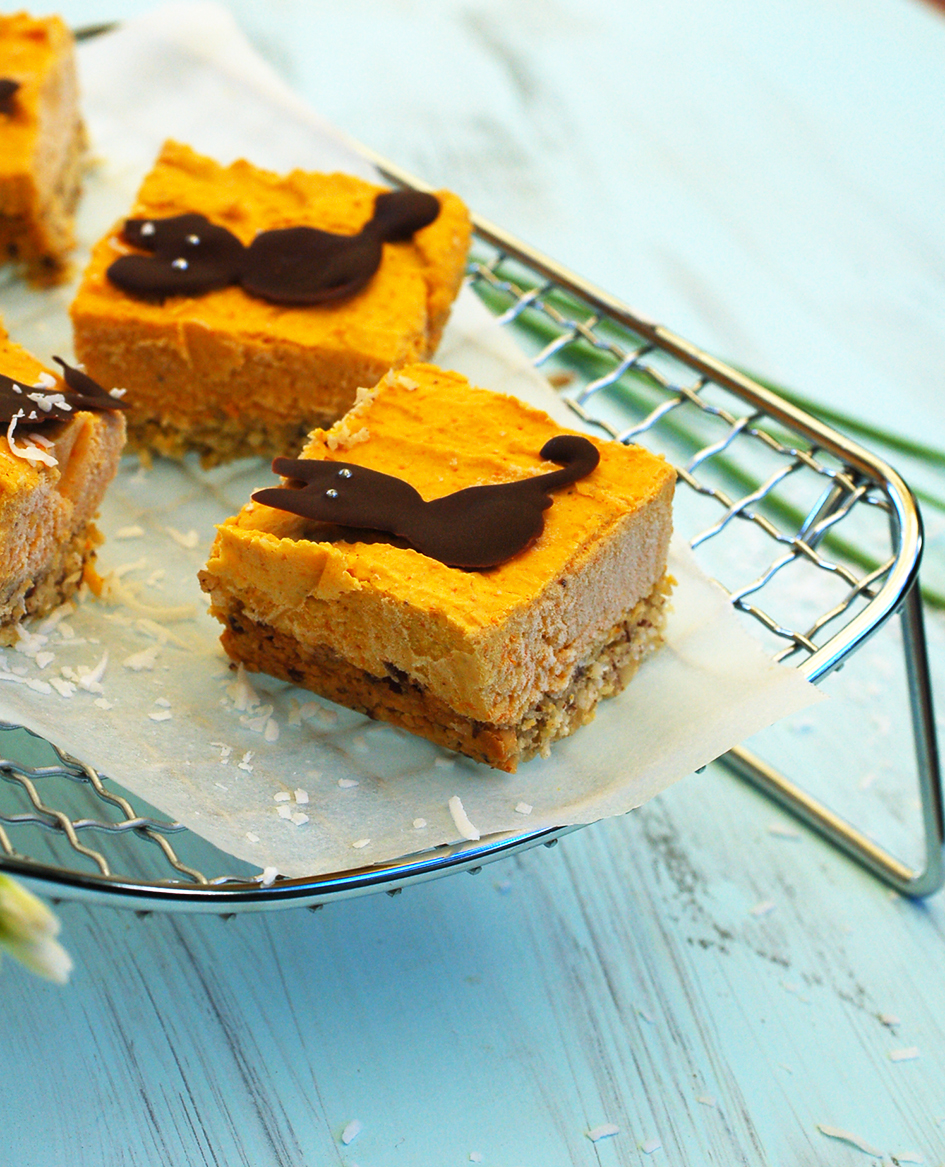
Halloween is coming!  And in anticipation, I present you with these Pumpkin Cheesecake bars which I assure you, you will love as much as I do.  The base is one that refuses to play second fiddle to the fresh, tangy topping.  It is packed with nuts and shredded coconut, providing a roughage that contrasts nicely with the smoothness of the cream cheese and pumpkin.

I used melted dark chocolate to pipe these funky little black cats, and adorned them with shiny edible pearls for eyes.  You can of course choose whatever design you please; witches hats, bats, evil eyes……the world is your cheesecake!

Pumpkin cheesecake bars ingredients

Speaking of cats and holidays, for those of you who have four-legged family members, I thought I’d put together a list of ways to care for them during this season.  Our beloved furry friends can get a little neglected during the festivities and that, as well as the insanely hot summers we experience here in Oz mean that vet hospitals are the busiest during this time.

Here are a few important ways to look after our creatures over the next few months…….

1.  Watch what they gobble: Our pets love a Christmas feast as much as we do.  In fact, we often see patients that have eaten something silly, causing them to become sick.  Nothing ruins a holiday like having to spend an hour in a busy waiting room of a vet hospital!  When pets eat fatty foods such as bacon, sausages and sweets, it can trigger a condition known as pancreatitis.  This is a very painful and debilitating condition whereby the pancreas becomes inflamed, causing vomiting and a lack of appetite leading to dehydration and illness.  Most cases are treated with hospitalisation, antibiotics and IV fluids, but severe cases can be fatal.

Fatty foods aside, certain foods such as onions, chocolate, raisins and many others are actually toxic to pets.  So while you enjoy your meal, treat your pet to something pet-friendly such as a raw bone or doggy treat, and ask visiting relatives nicely not to feed the pets human food or leave it lying around within reach.

Pumpkin cheesecake bars ingredients2

2. Remember that things that are not food can seem edible:  In addition to eating inappropriate foods, some dogs (think Labrador!) have a knack for eating things that really shouldn’t be eaten by anybody!  While you are celebrating the holidays, your pooch may do the same by gulping down something that may get stuck in his or her gut causing an obstruction.  Some holiday related things that I have had to fish out of doggy intestines include wine corks, skewers, fish hooks and corn cobs.  Believe me, spending Christmas eve elbow-deep in a dog’s abdomen is no fun for the vet, the dog or the anxious owner!

3. Protect against nasty critters: In Australia, the heat tends to bring out some of those nasty creepy crawlies that we are well known for.  Paralysis ticks are a horrible little bug, and if I could choose one species to be extinct, it would me this one.  They latch onto an unassuming animal and proceed to inject them with a poison that paralysis first the legs and then the respiratory muscles.

There are one or two good products available from vets to protect dogs against these ticks and they should be used in high risk areas such as national parks and near water bodies.  Unfortunately none of these products are highly reliable and you should search your pet after visiting these areas, focusing on the head and neck.  If you notice any signs of paralysis such as weak legs, a change in bark or breathing difficulty, veterinary care should be sought immediately.

Snake bites are also more common during summer and this should also be treated as an emergency.

Pumpkin cheesecake bars 3

4.  Stay on top of routine treatments: Ensure your dogs are fully vaccinated.  Diseases such as Parvovirus and Canine Cough (Kennel Cough) are more frequently transmitted in the warmer months.  Parvovirus occurs mostly in young, inadequately vaccinated dogs and causes severe vomiting, diarrhoea and dehydration.  It is also a condition that can be fatal due to the profound dehydration and weakness it causes.  Vaccinations and worming can often be overlooked during the excitement of the holiday season so stay organised!

Pumpkin cheesecake bars 1

5.  Beat the heat: Keep your pets cool during the scorching summer months.  Keep them indoors or provide plenty of shade outdoors.  Ensure there is plenty of clean drinking water within reach, and add ice cubes to it on hotter days.  Pets should not be left in cars on hot days and if this must be done, leave a couple of windows open a notch, don’t leave them for more than a few minutes and park the car in the shade.

So with a bit of care and vigilance, your furry friends can enjoy the holiday season while staying happy, healthy and out of hospital!

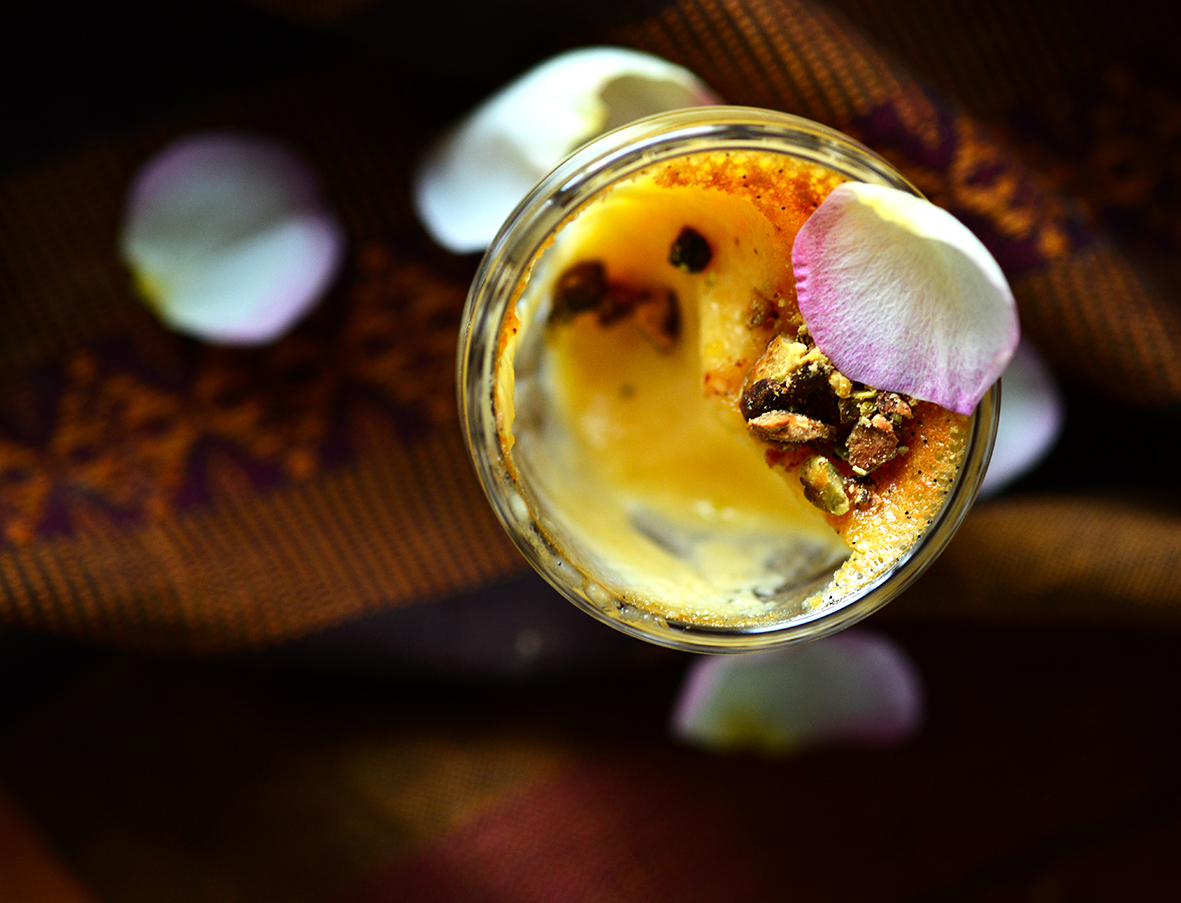
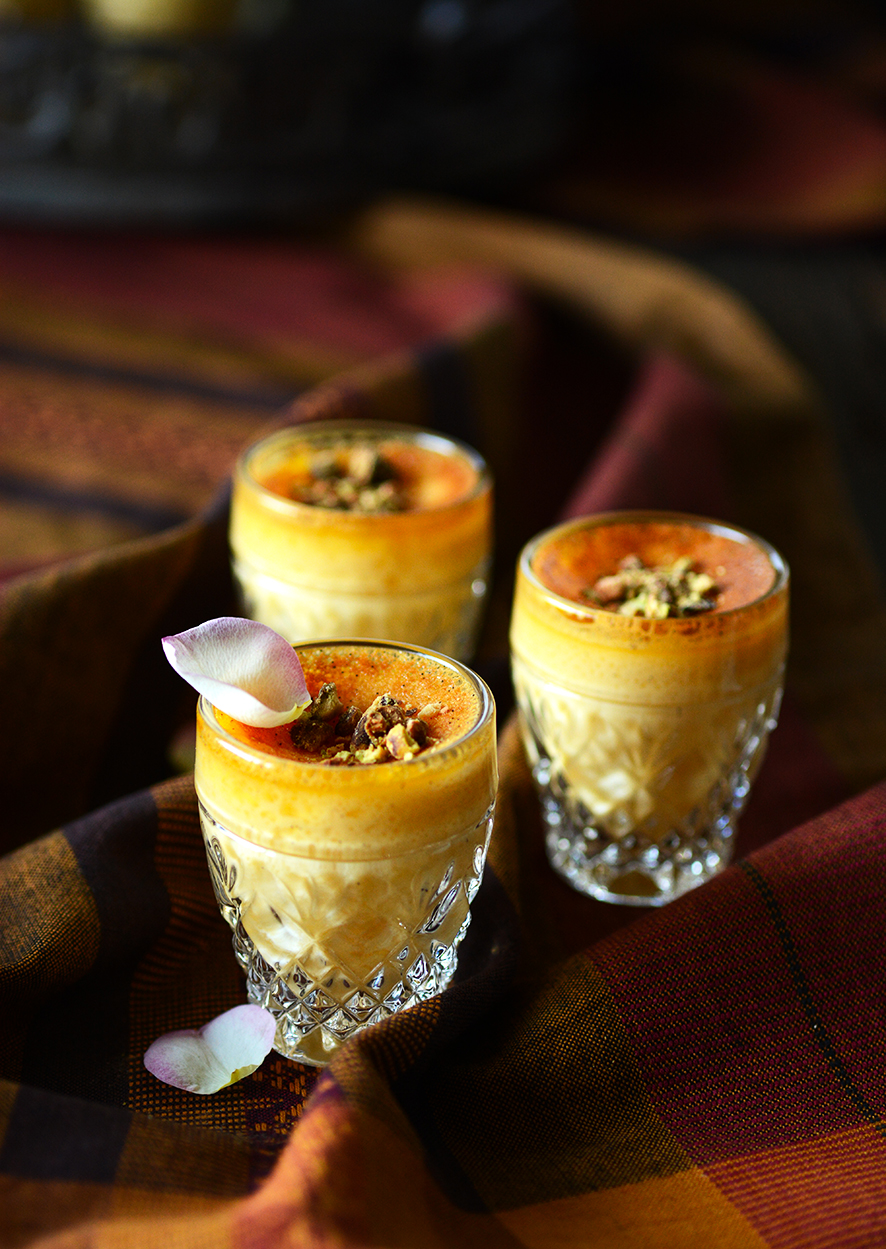
Hoping I haven’t put you off your food with all this vet talk and on a brighter note, here’s the recipe for my Black Cat Pumpkin Cheesecake Bars for October’s SABH.  The lovely JJ from 84th & 3rd is hosting this one.  These bars are gluten-free, vegetarian and fructose free (not including the decoration).

Happy Halloween to you and your pets!

Pumpkin cheesecake bars 2

Black Cat Pumpkin Cheesecake Bars

Makes 8

Recipe for the base is from Sarah Wilson’s Blog

Get:

For the base:
1/2 cup nuts- hazelnuts, almonds, pistachios or macadamias work well
1/2 cup shredded or dessicated coconut
1/3 cup nut meal- I used almond
2 tbsp unsalted butter

For the topping:
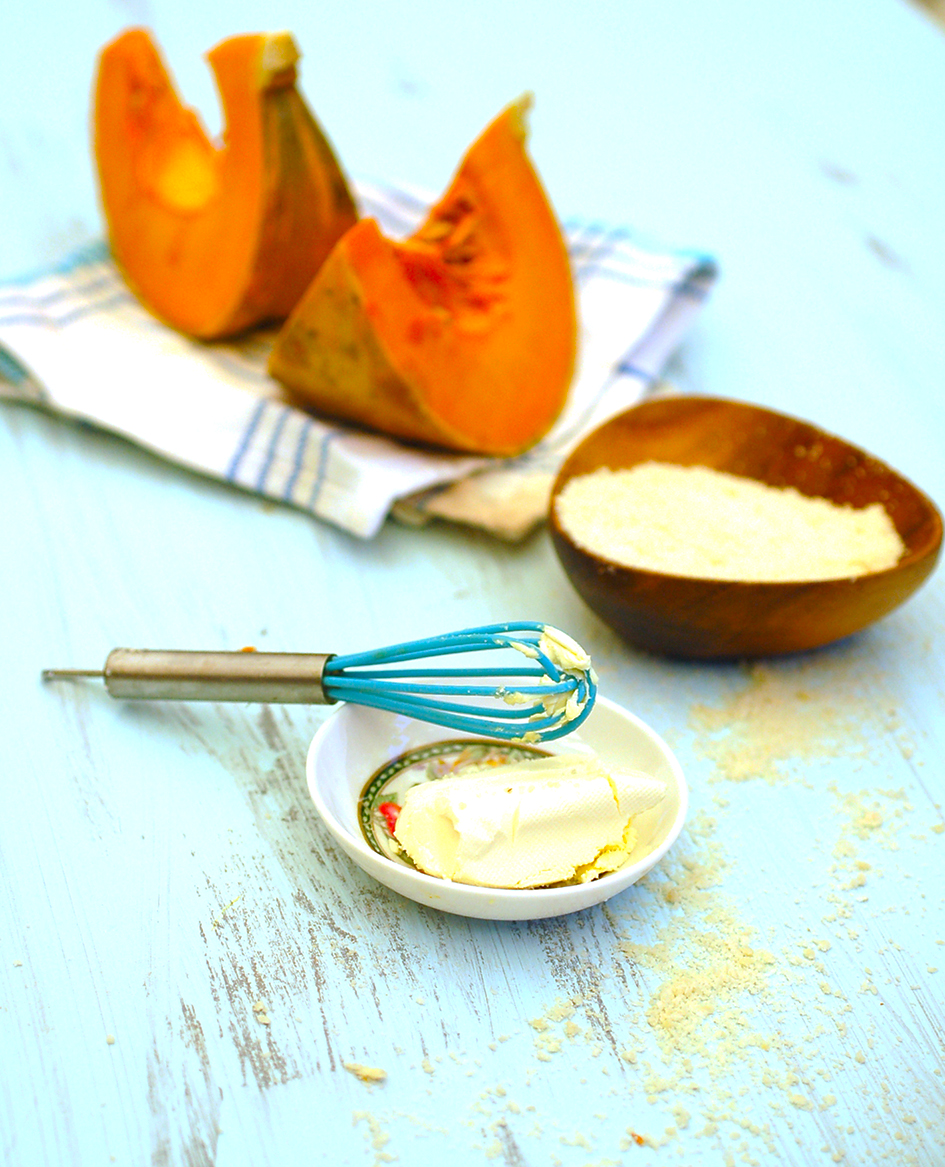
1 block (200g) cream cheese
1/2 cup pumpkin puree*
2 1/2- 3 tbsp rice syrup or honey
1 tsp allspice
1/3 cup almond meal

To  decorate:
About 10 squares dark chocolate
Sprinkles, pearls, et al
A piping bag or homemade version (try this tutorial)

Make:

Preheat the oven to 160 C.

Use a food processor to grind the whole nuts to a very coarse meal with some small chunks.  Place in a large bowl and add all the other ingredients.  Using your (clean) hands, rub the butter into the dry ingredients until the mixture forms a sort ok kneadable dough.  Press the mixture into a grease-proof paper lined loaf tin or a deep baking tray if you decide to double the recipe.  The base should be about a centimetre thick.  Bake on the middle shelf for about 15 mins or until firm and very slightly browned.  Allow to cool before adding the topping.

Place the topping ingredients in the bowl of the food processor and pulse until well combined and smooth.  Pour the mixture over the cooled base and spread evenly.  Refrigerate for at least 2 hours before slicing into 8 even squares.

Line a tray with grease-proof paper or a silicon mat.  Melt the chocolate in a double boiler or in 20-30 second bursts in the microwave.  Place in the piping bag and pipe shapes of your choice.  At this point, I placed the edible pearls to make the cats’ eyes.  Place the tray in the fridge till the chocolate sets.  Once the cheesecake bars are set and sliced, decorate with the chocolate shapes and any other decorations you wish to use.

*I make pumpkin puree by placing a chunk of pumpkin, skin and all, on a tray in an oven preheated to 180 C.  Bake until the pumpkin is quite soft, about 30 min.  Scoop out the flesh and mash by hand or using a food processor.

White flowers

Powered by Linky Tools

Click here to enter your link and view this Linky Tools list…